The Gravely Building From Bar Mills
An HO Scale Kit Offering
My next assignment in my structures project for my friend David Gardner is the Gravely Building which is a Bar Mills offering.
I really enjoyed building this kit along with adding a scratchbuilt rooftop sign and borrowing some of the upper awnings which were left over from another Bar Mills kit I had built many moons ago.

The striped lower awnings add a splash of colour as well.
Remember that you can enlarge the images by clicking on them and return to the default look of the page by clicking outside them.

I chose to add my own signs to the front and sides of the building that are near and dear to David's heart such as the RCA Victor dog...seeing as David is a classical musician who played for the Ottawa Symphony Orchestra and our Canada renowned National Arts Centre Orchestra.

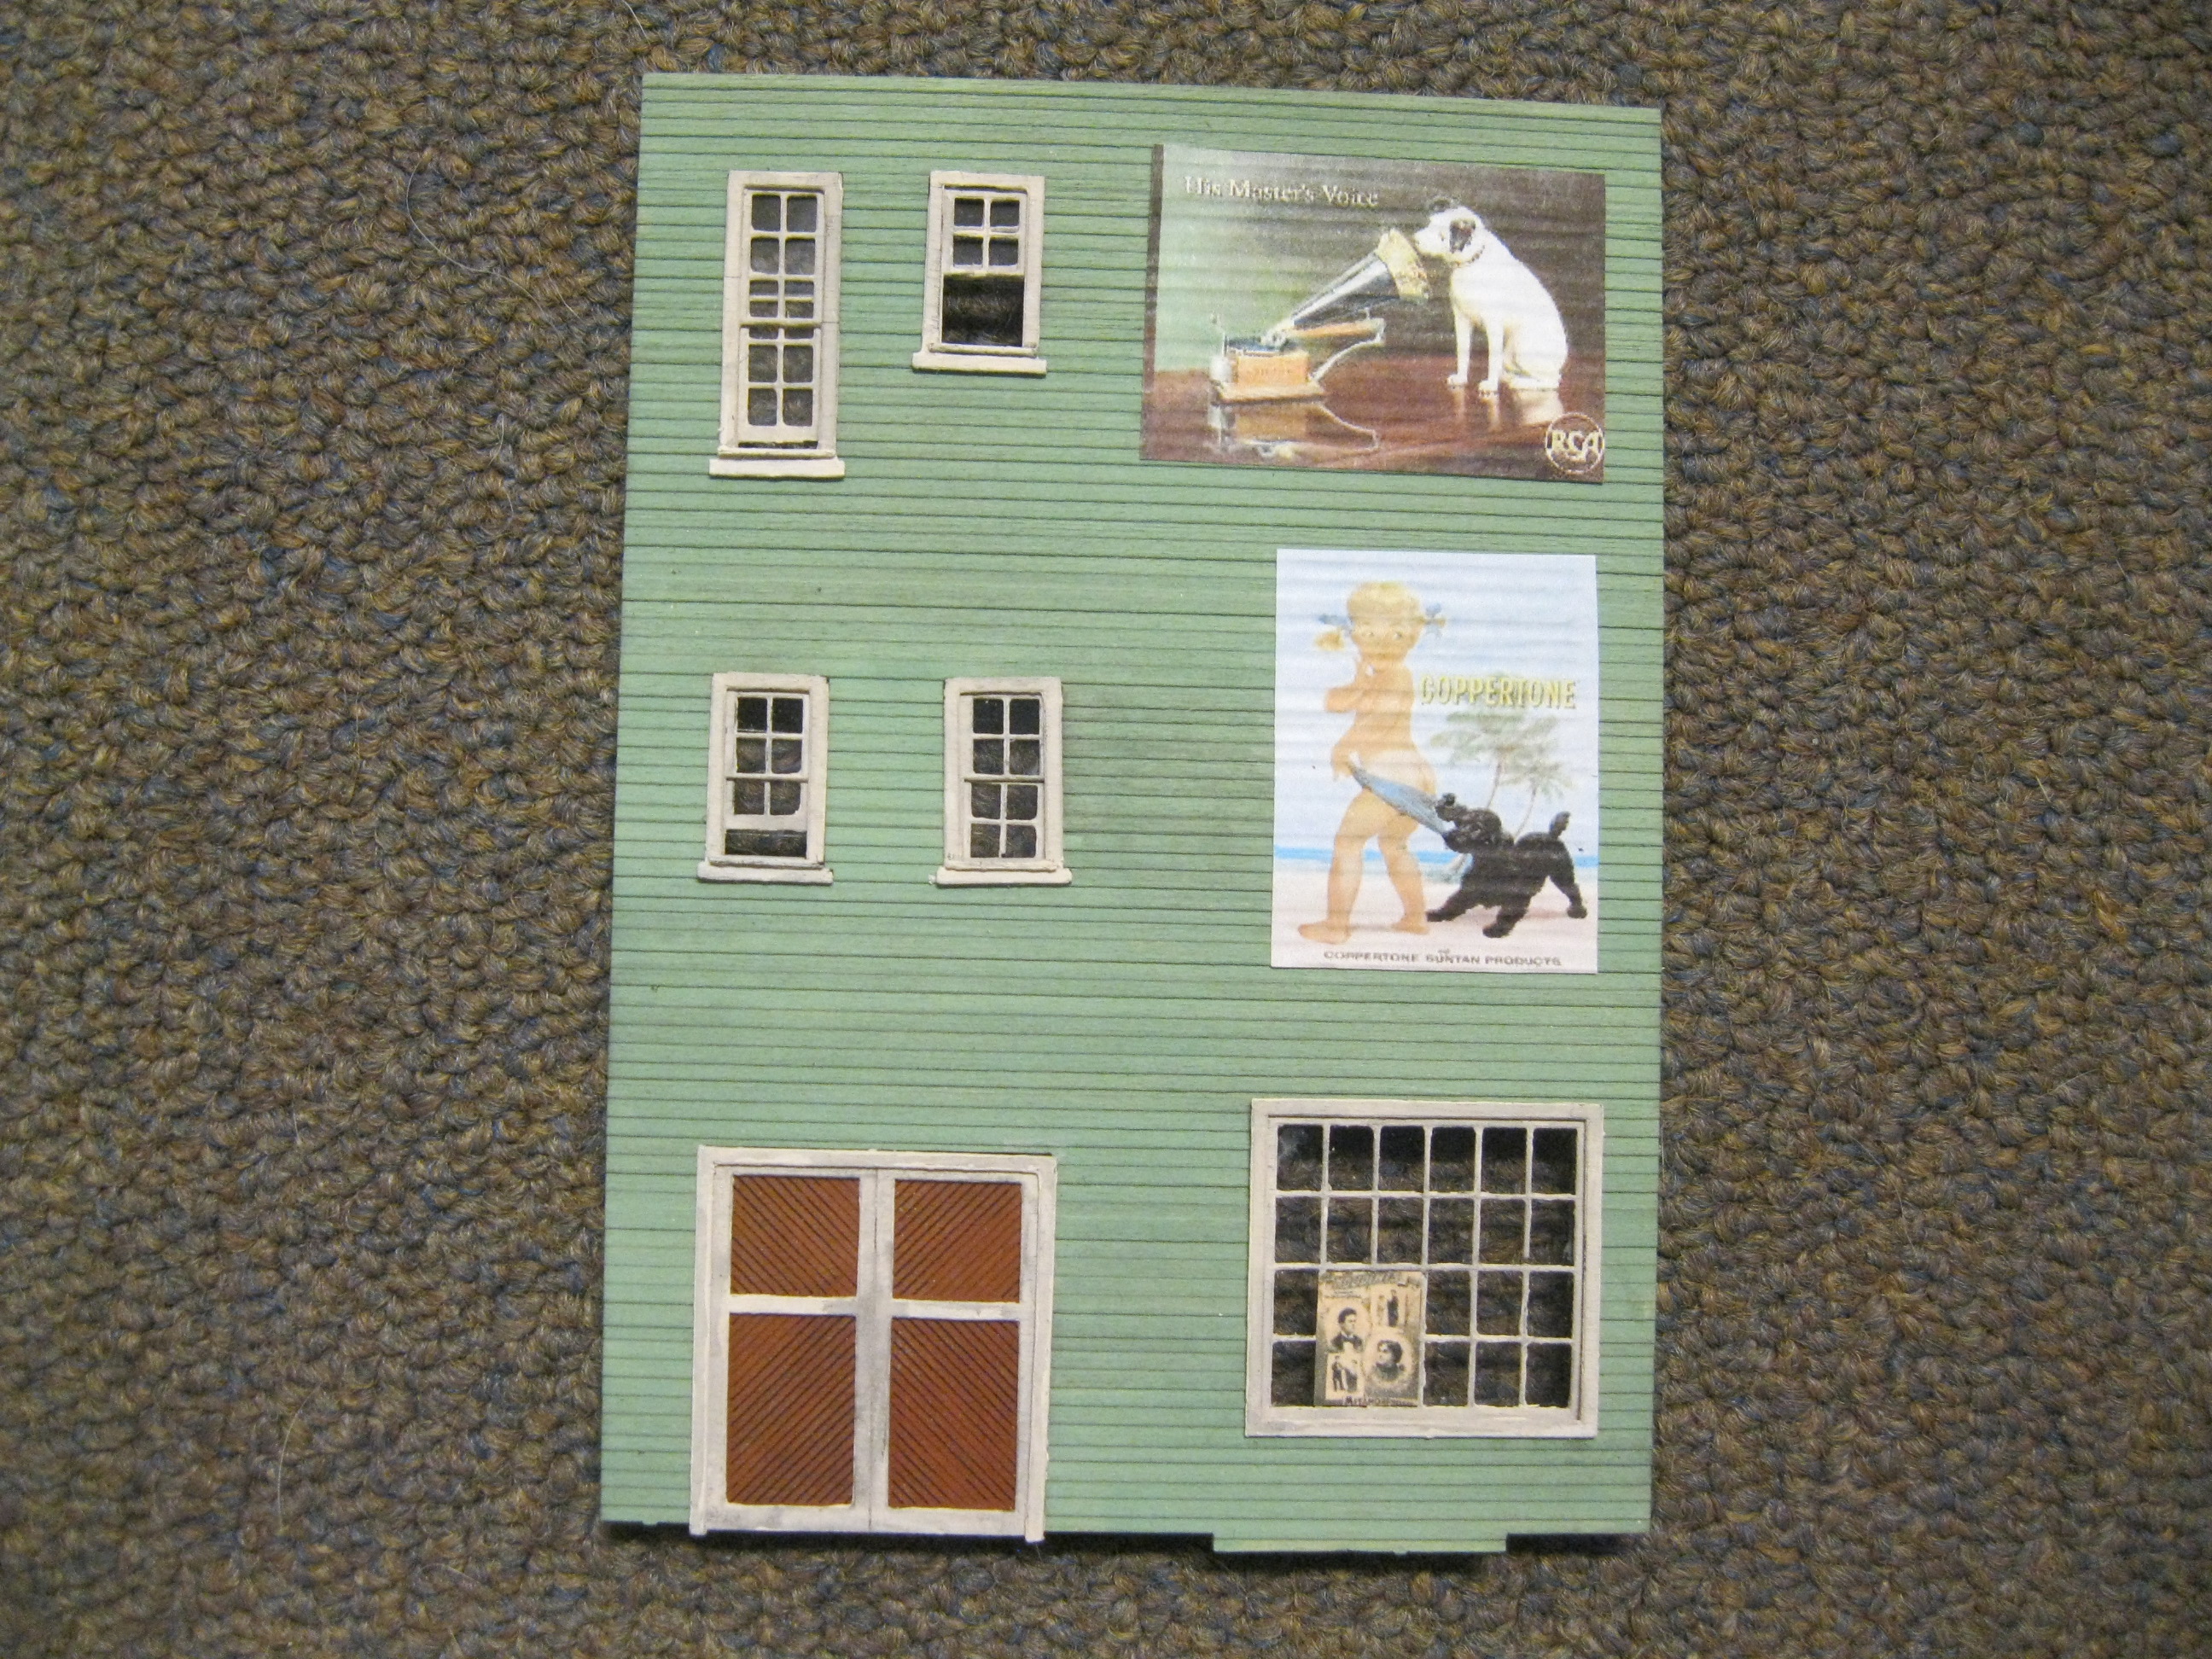
David settled on a nice sage green colour for the majority of the building's wall with a tan coloured front on the upper left section which houses a barrister. The off-white trim stands out as well.

Here is the box cover with its standard image of the finished model.

The kit instructions.

The contents.

The detail parts.
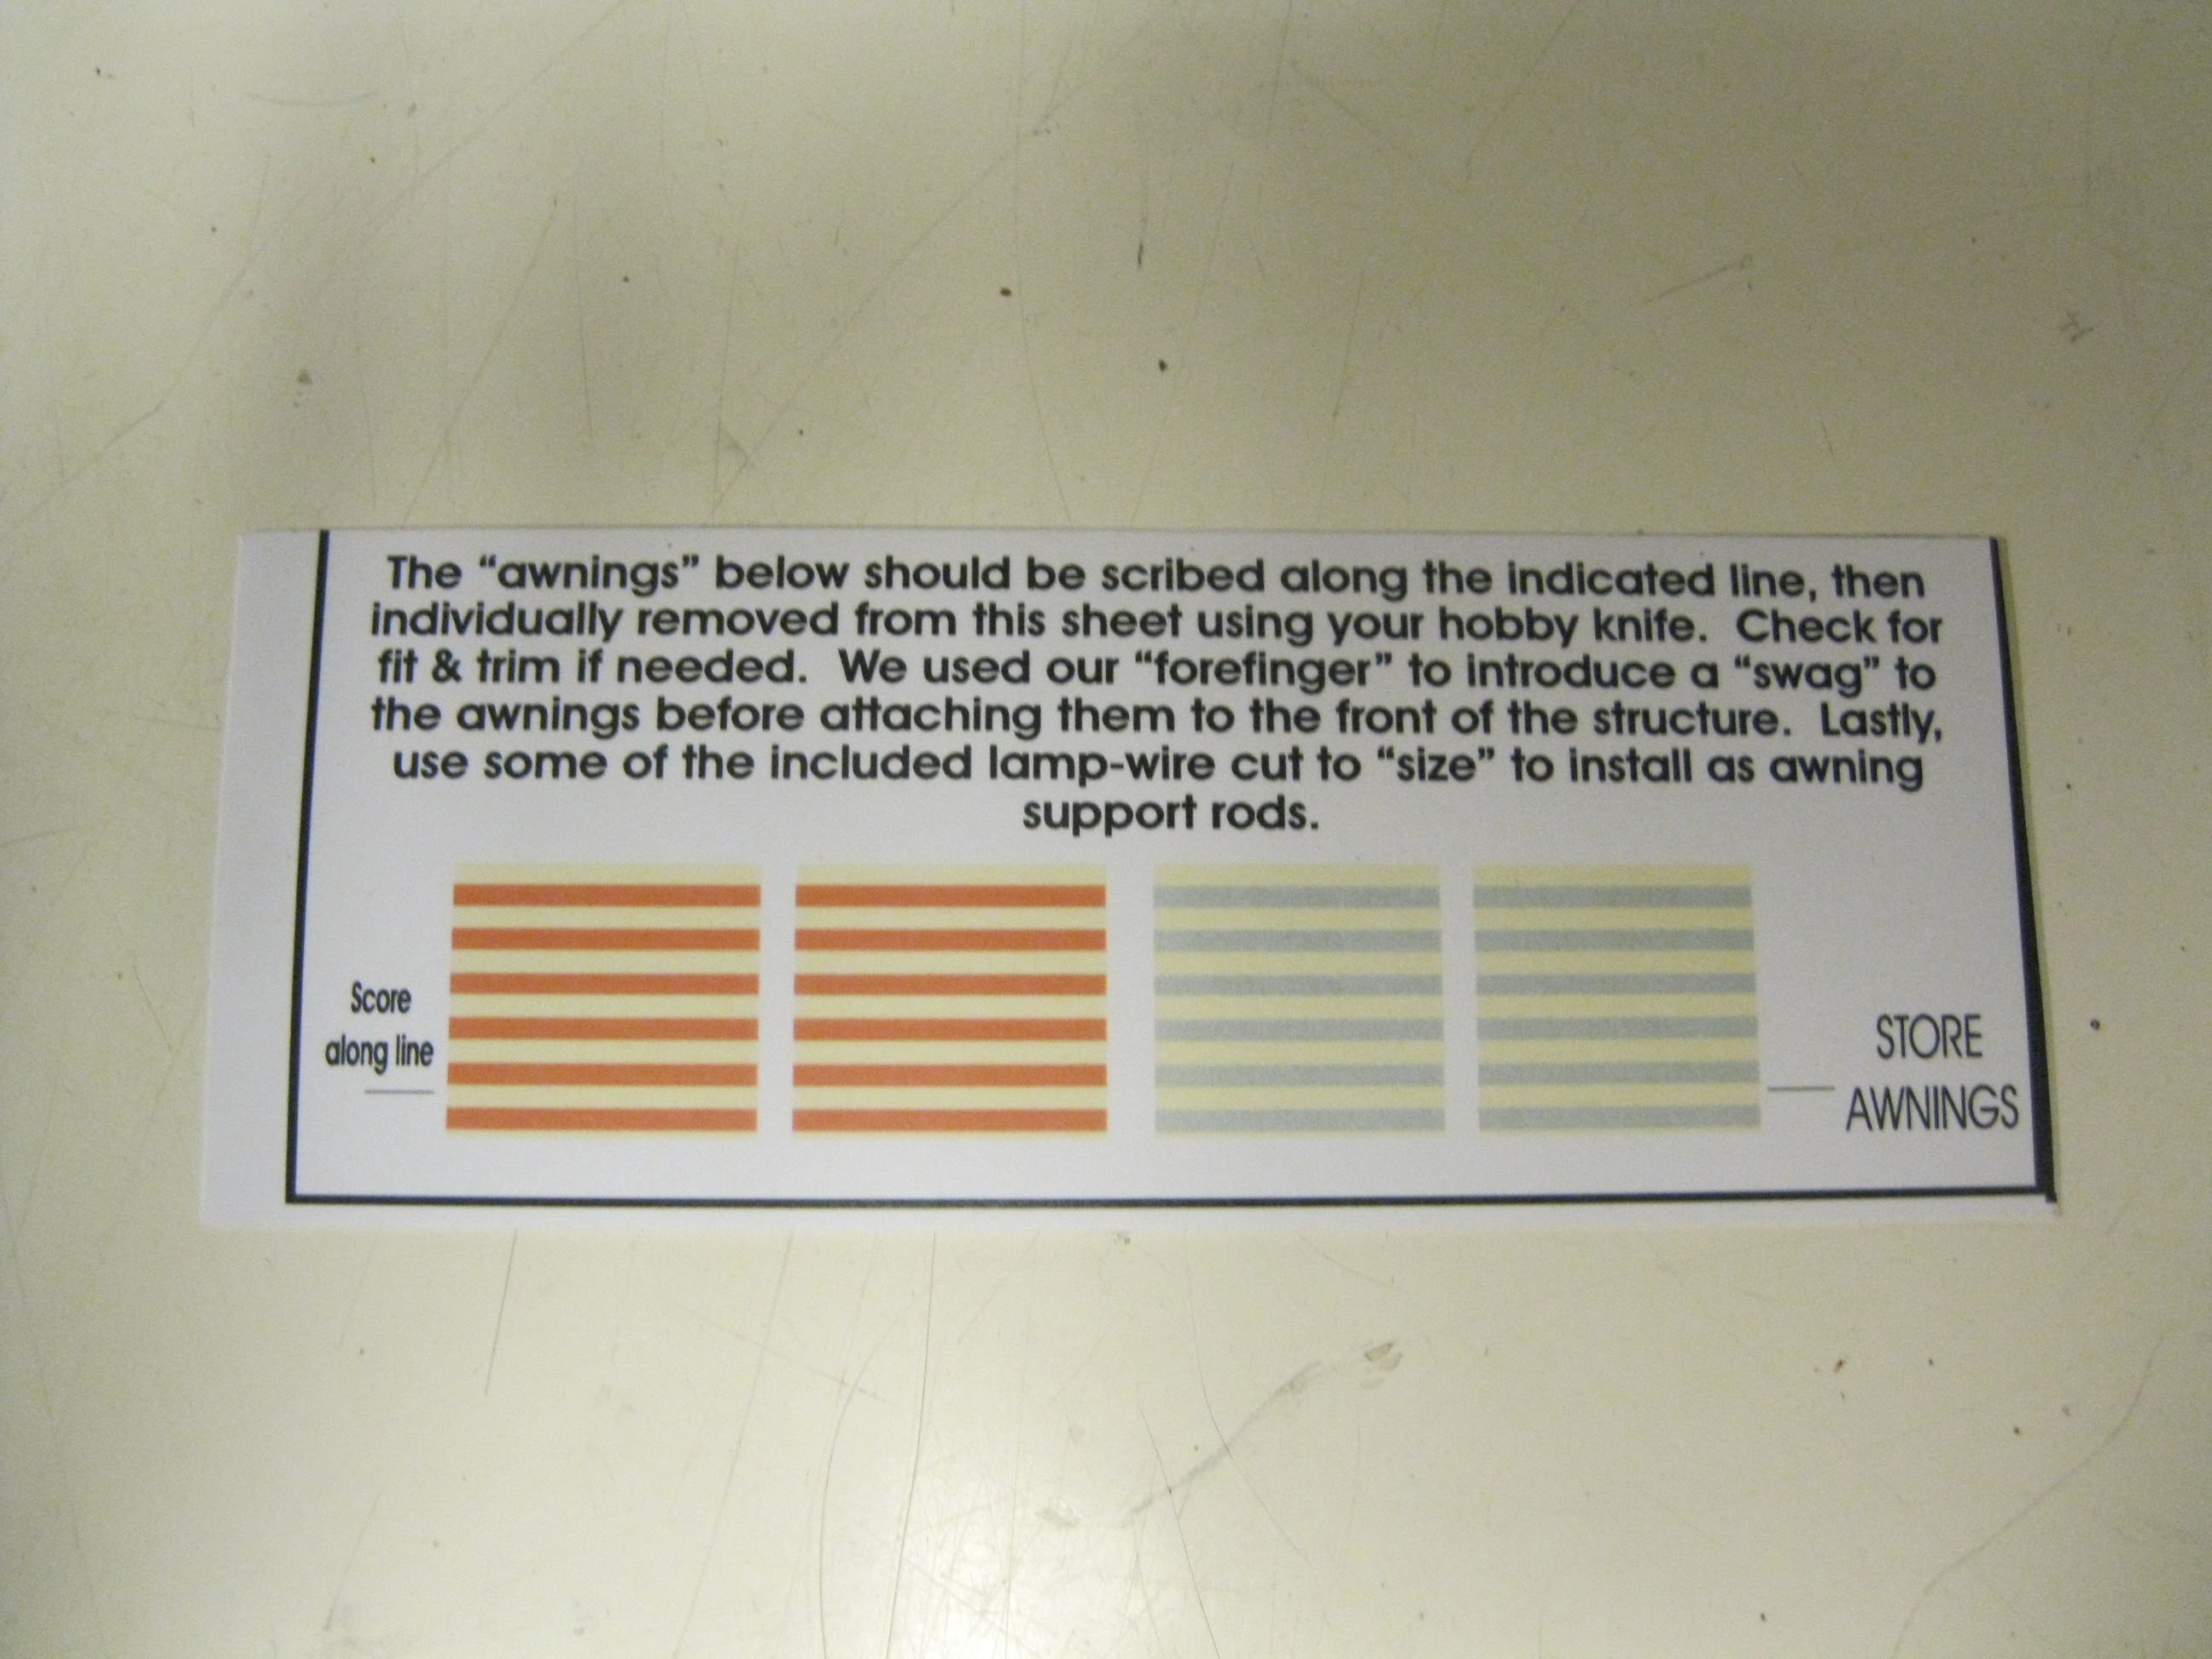
The awnings. The colours are quite blanched but I will brighten them up.

Roofing material.

Bracing and other strips of wood.

The windows.

The walls.

The sidewalk and base with other parts.

Framing and miscellaneous sections.

Still more.

The colours I will use pretty much match those in the picture.

Sage green, tan and parchment.

The finished model as seen in the instructions.

I've coloured the windows, doors and trim with the parchment colour which is basically an "off white" colour.

I have taped the building sides together to offer a "feel" for how things will look.

This will be a nice looking structure.

Laying out the bracing before glueing it to the insides of the walls.

My scribing tool to add more texture to the walls.

I've painted the inside black to counter any warping.

The exterior side of the walls.

Following a couple of washes of sage green, I now add a wash of black acrylic paint with loads of water.

This weathers the walls nicely as noted on the bottom sections.

I'm liking this!

I add the lower storefront entrance to get the flavour of things.

Looking nice once more.

Time to add my signs which I printed from the internet. The Coppertone sign is a classic.

As is the RCA Victor sign!
The side wall is developing.

Love it!

And David loves it as well!

The lower section of the side wall.

While David is not a motorcycle rider, I rather like this classic sign!

Two wall sections...the side and the upper front.

As Bar Mills does so well, I begin the "layering" process.

Adding colour to the storefront.

Still more layering.

Some fine painting with a fine brush. The recessed lines help out here.

After painting the next section, the thin areas began to warp so I "steadied" the thin areas as the paint dried.

Three sections will become one.

Here's what we have thus far.

Still more to come.

The "peel and stick" sections work very well.

Time to colour the brick areas. A combination of "pumpkin orange" and "bright red" will do the trick.

The brick sections are added.

The thick upper section requires small clamps while the glue sets.

The grey ornate detailing is added.

A check with the upper sections.

Two lengthy grey trims now adorn the upper row.

The walls thus far.

A cap is added to the upper row.

A check on the angle.

The windows adorned with their printed signs are in place.

A look with a white background to "pop" the signs.

The ornate upper section.

Looking good!

The kit comes with this base which I will use momentarily for the build, but we will be building a wooden planked boardwalk on David's layout instead.

The slots will act as momentary guides for the walls in order to help keep them aligned, but I will eventually cut of the tabs attached to the bottom of the wall sections.

Fitting the walls over top the base.

Adding some white trim.

My trusty mini-clamps! Every modeler needs a handful of these!

They come in handy while keeping awkward locations clamped together as the glue sets.

The upper establishment begins to take shape where the attorney's office will be housed.
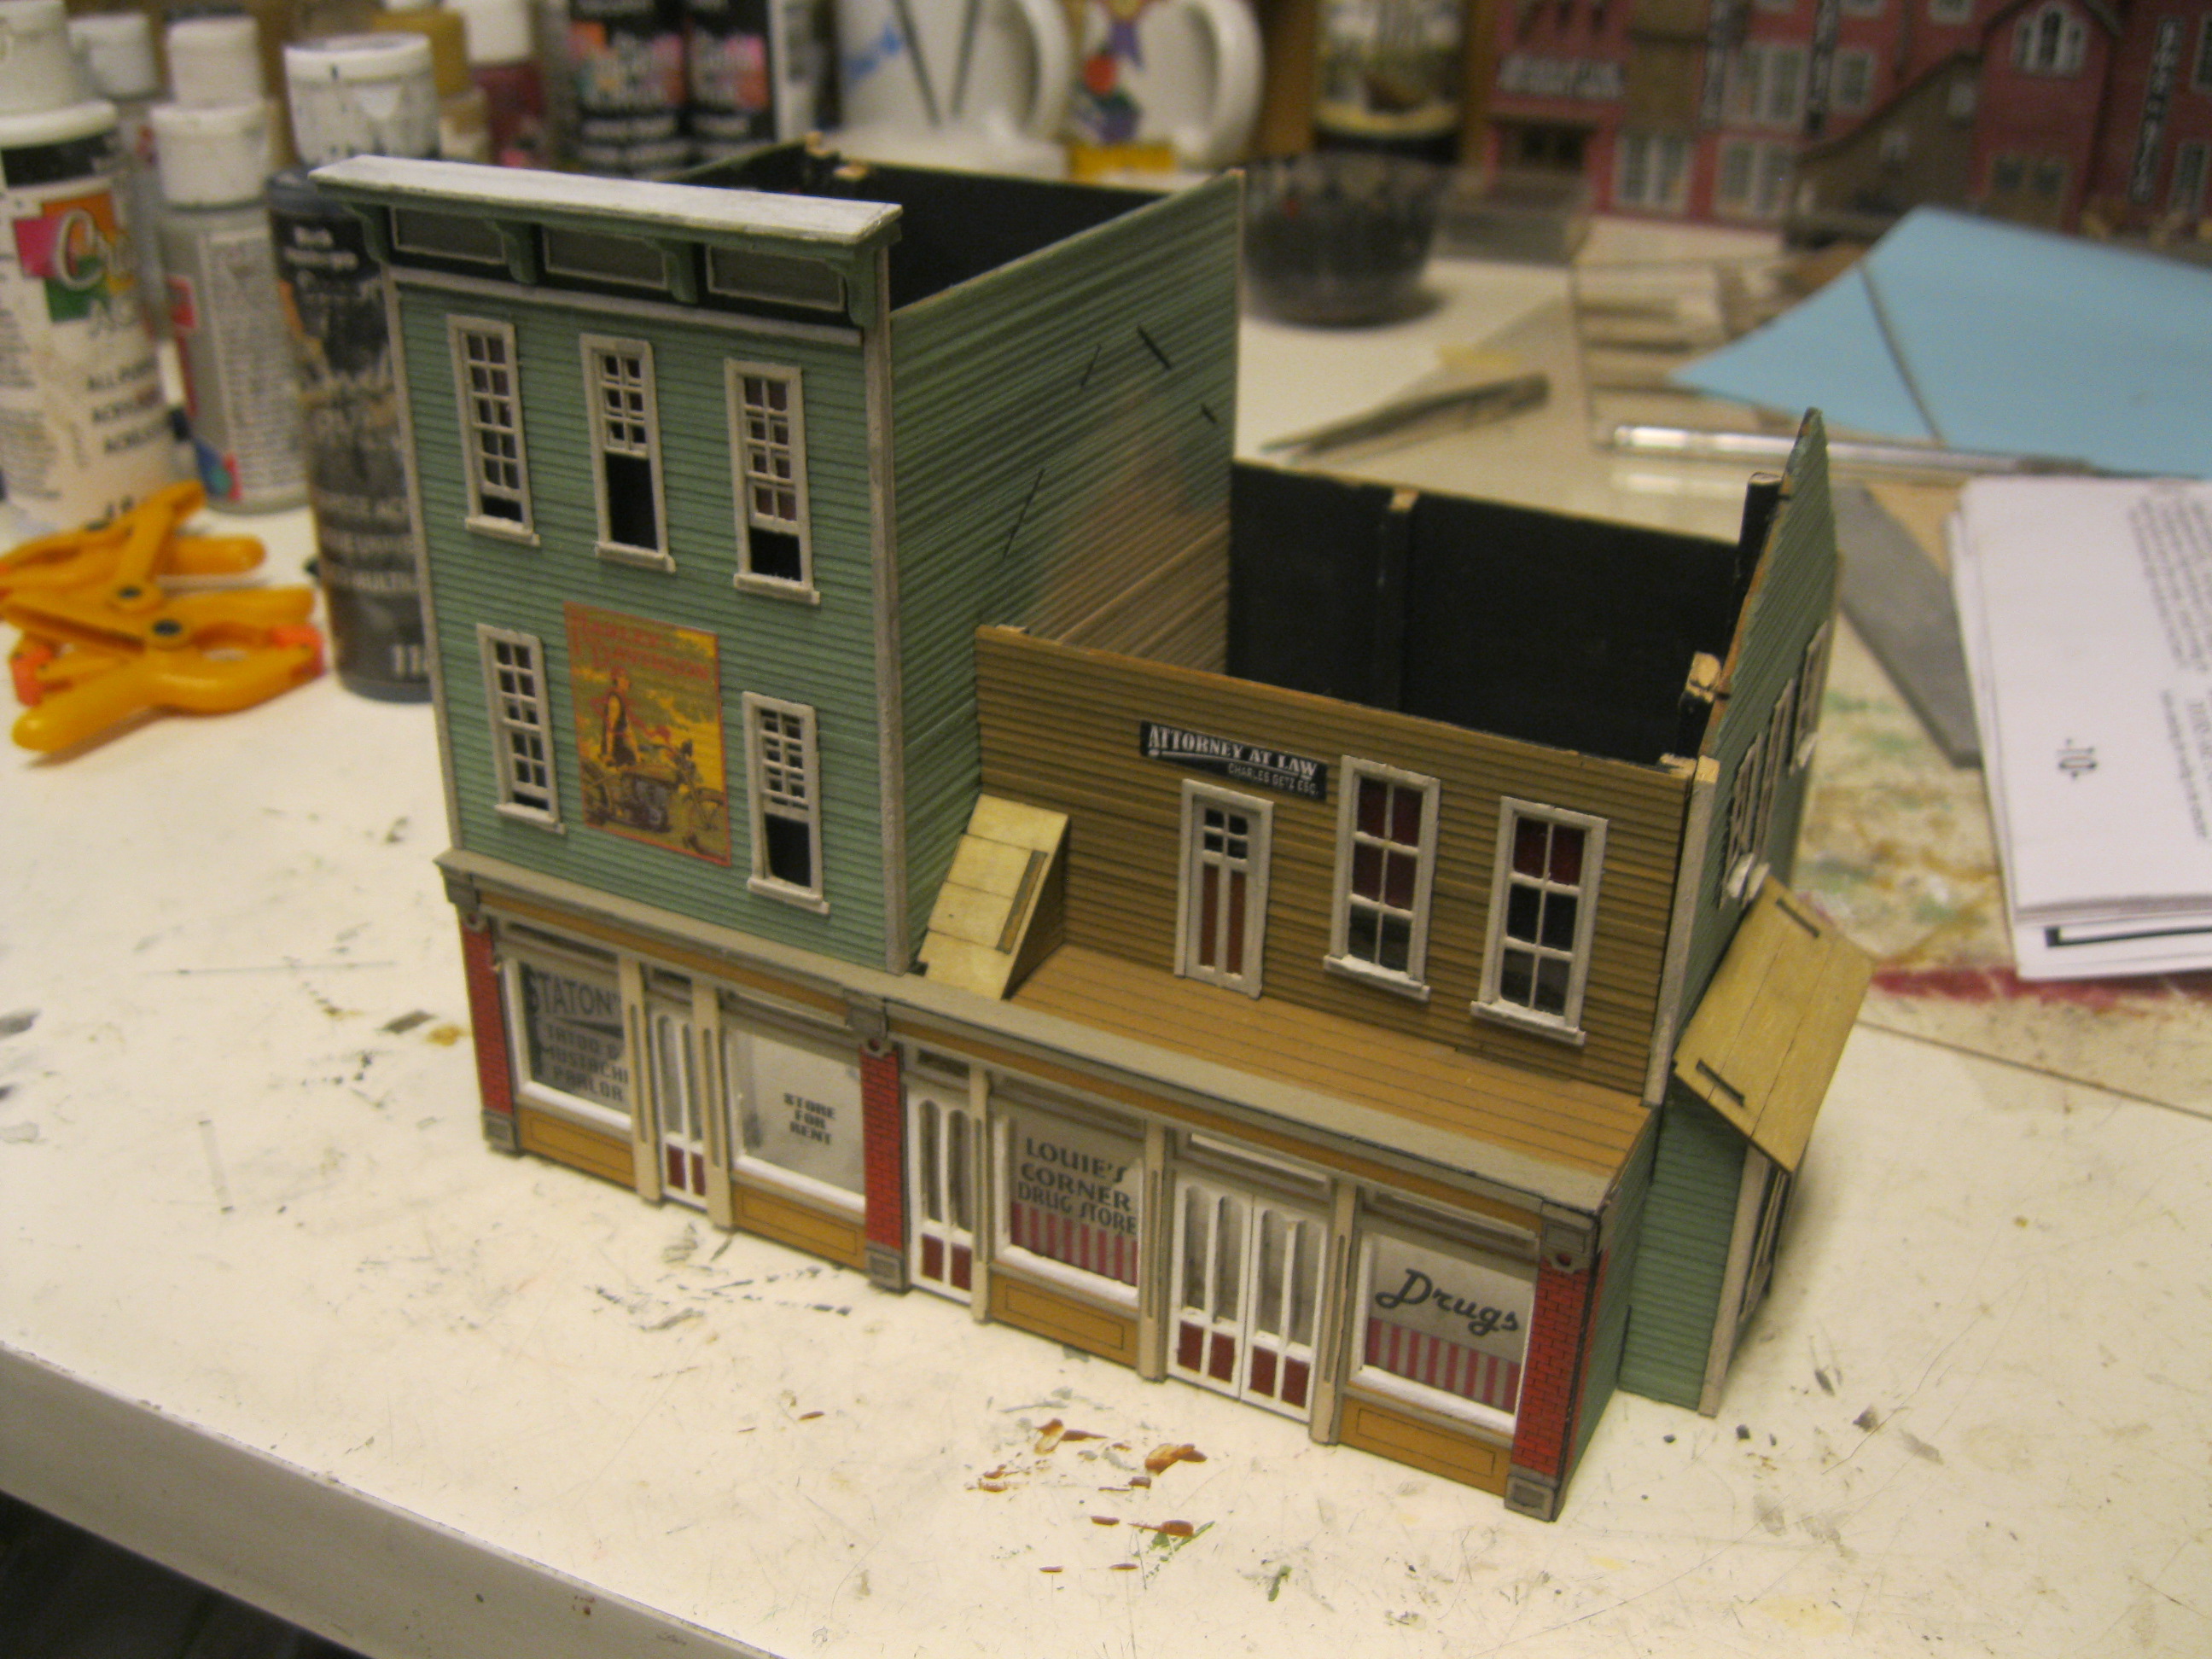
The lower storefront area certainly adds great detail to the overall appearance of the building.

Yessirree!

Time to add the roofing. In this area I painted the black on the roofing strips before adhering them, but another layer of black will be required.

I then decided to adhere the strips before painting them which made the roofing process go a heck of a lot easier. I'll just have to be careful when painting up to the wall section. The slots near the green wall will be hidden by the shingles

Looking mighty fine.

I decided to scratchbuild a rooftop assembly that would hold two signs.

A popular beverage in New England - not my type of drink though. I thought it tasted like cough syrup along with the same consistency! Yikes!

I never tried out the Kist beverages but it seems folks will "enjoy" the taste!

Remember those awnings that came in the kit.

I felt they were too "blanched" out.

My trusty pencil crayons came in handy here.

They certainly will stand out better now!

I am adding some people to the upper scene. The couple dancing are celebrating after having just be married at the attorney's office with a friend who acted as witness. The length of basswood is holding the gent near the balcony railing "upright" as the glue on his shoes sets. If not for this he would fall over!

Little pieces of wood help in keeping "unbalanced" figures from falling over while the glue that holds them upright sets.

I have added some leftover awnings to the upper windows. They were "extras" from an earlier Bar Mills kit I had made many years ago.

Note how I have added a lady friend alongside the gent at the railing on the upper balcony.

David, Carl and I really like the appearance of this structure.

A lower street scene shot.

In fluorescent lighting.

This will be the colour the structure will look like on David's layout. The boards to the left at the base of the wall are placed momentarily seeing as the structure will be removed from the base.

Some more views.

A lower angle.

These images were taken a week or so later as the Gravely Building sits nicely on David's layout in amongst other structures I have built for him recently including that gorgeous Bar Mills kit offering known as "The King of Clubs"!

Remember, a boardwalk will act as the pedestrian walkway here.

It's fun to move some of the structures around. Note how I have place the King of Clubs at the other end of the street alongside "Honest Joe's" which is yet another amazing Bar Mills offering.

A lower street view. Note how the general store by JR Models already has a wooden sidewalk.

I will eventually match all sidewalks up with it.

An aerial view.

The red building is the American Model Builder's McLeary's Pickle Factory.

The wooden structure on the end of the spur is Opansky Organ Works by Steam Era Structures.

Indeed, the scene here will be splended.

A look across the pickle factory.

A straight on view.

There's the pickle car I made for David.

The end of the spur.

Thanks to Carl for some of the images shown in this blog entry.
And...thank you for checking in on another of my builds!

It's fun to have a variety of hobbies isn't it!
Check in soon for another posting of my many structure builds.
All the best, Mike Hamer, Ottawa, Ontario, Canada
No comments:
Post a Comment