Opansky's Organ Works
A craftsman kit from Steam Era Structures in HO Scale
The next order of business for the harbour town on David's developing layout is a really old craftsman kit called Opansky's Organ Works...perhaps some 30 to 40 years old.
You can expand the images by clicking on them and you can return to the default look by clicking outside them.

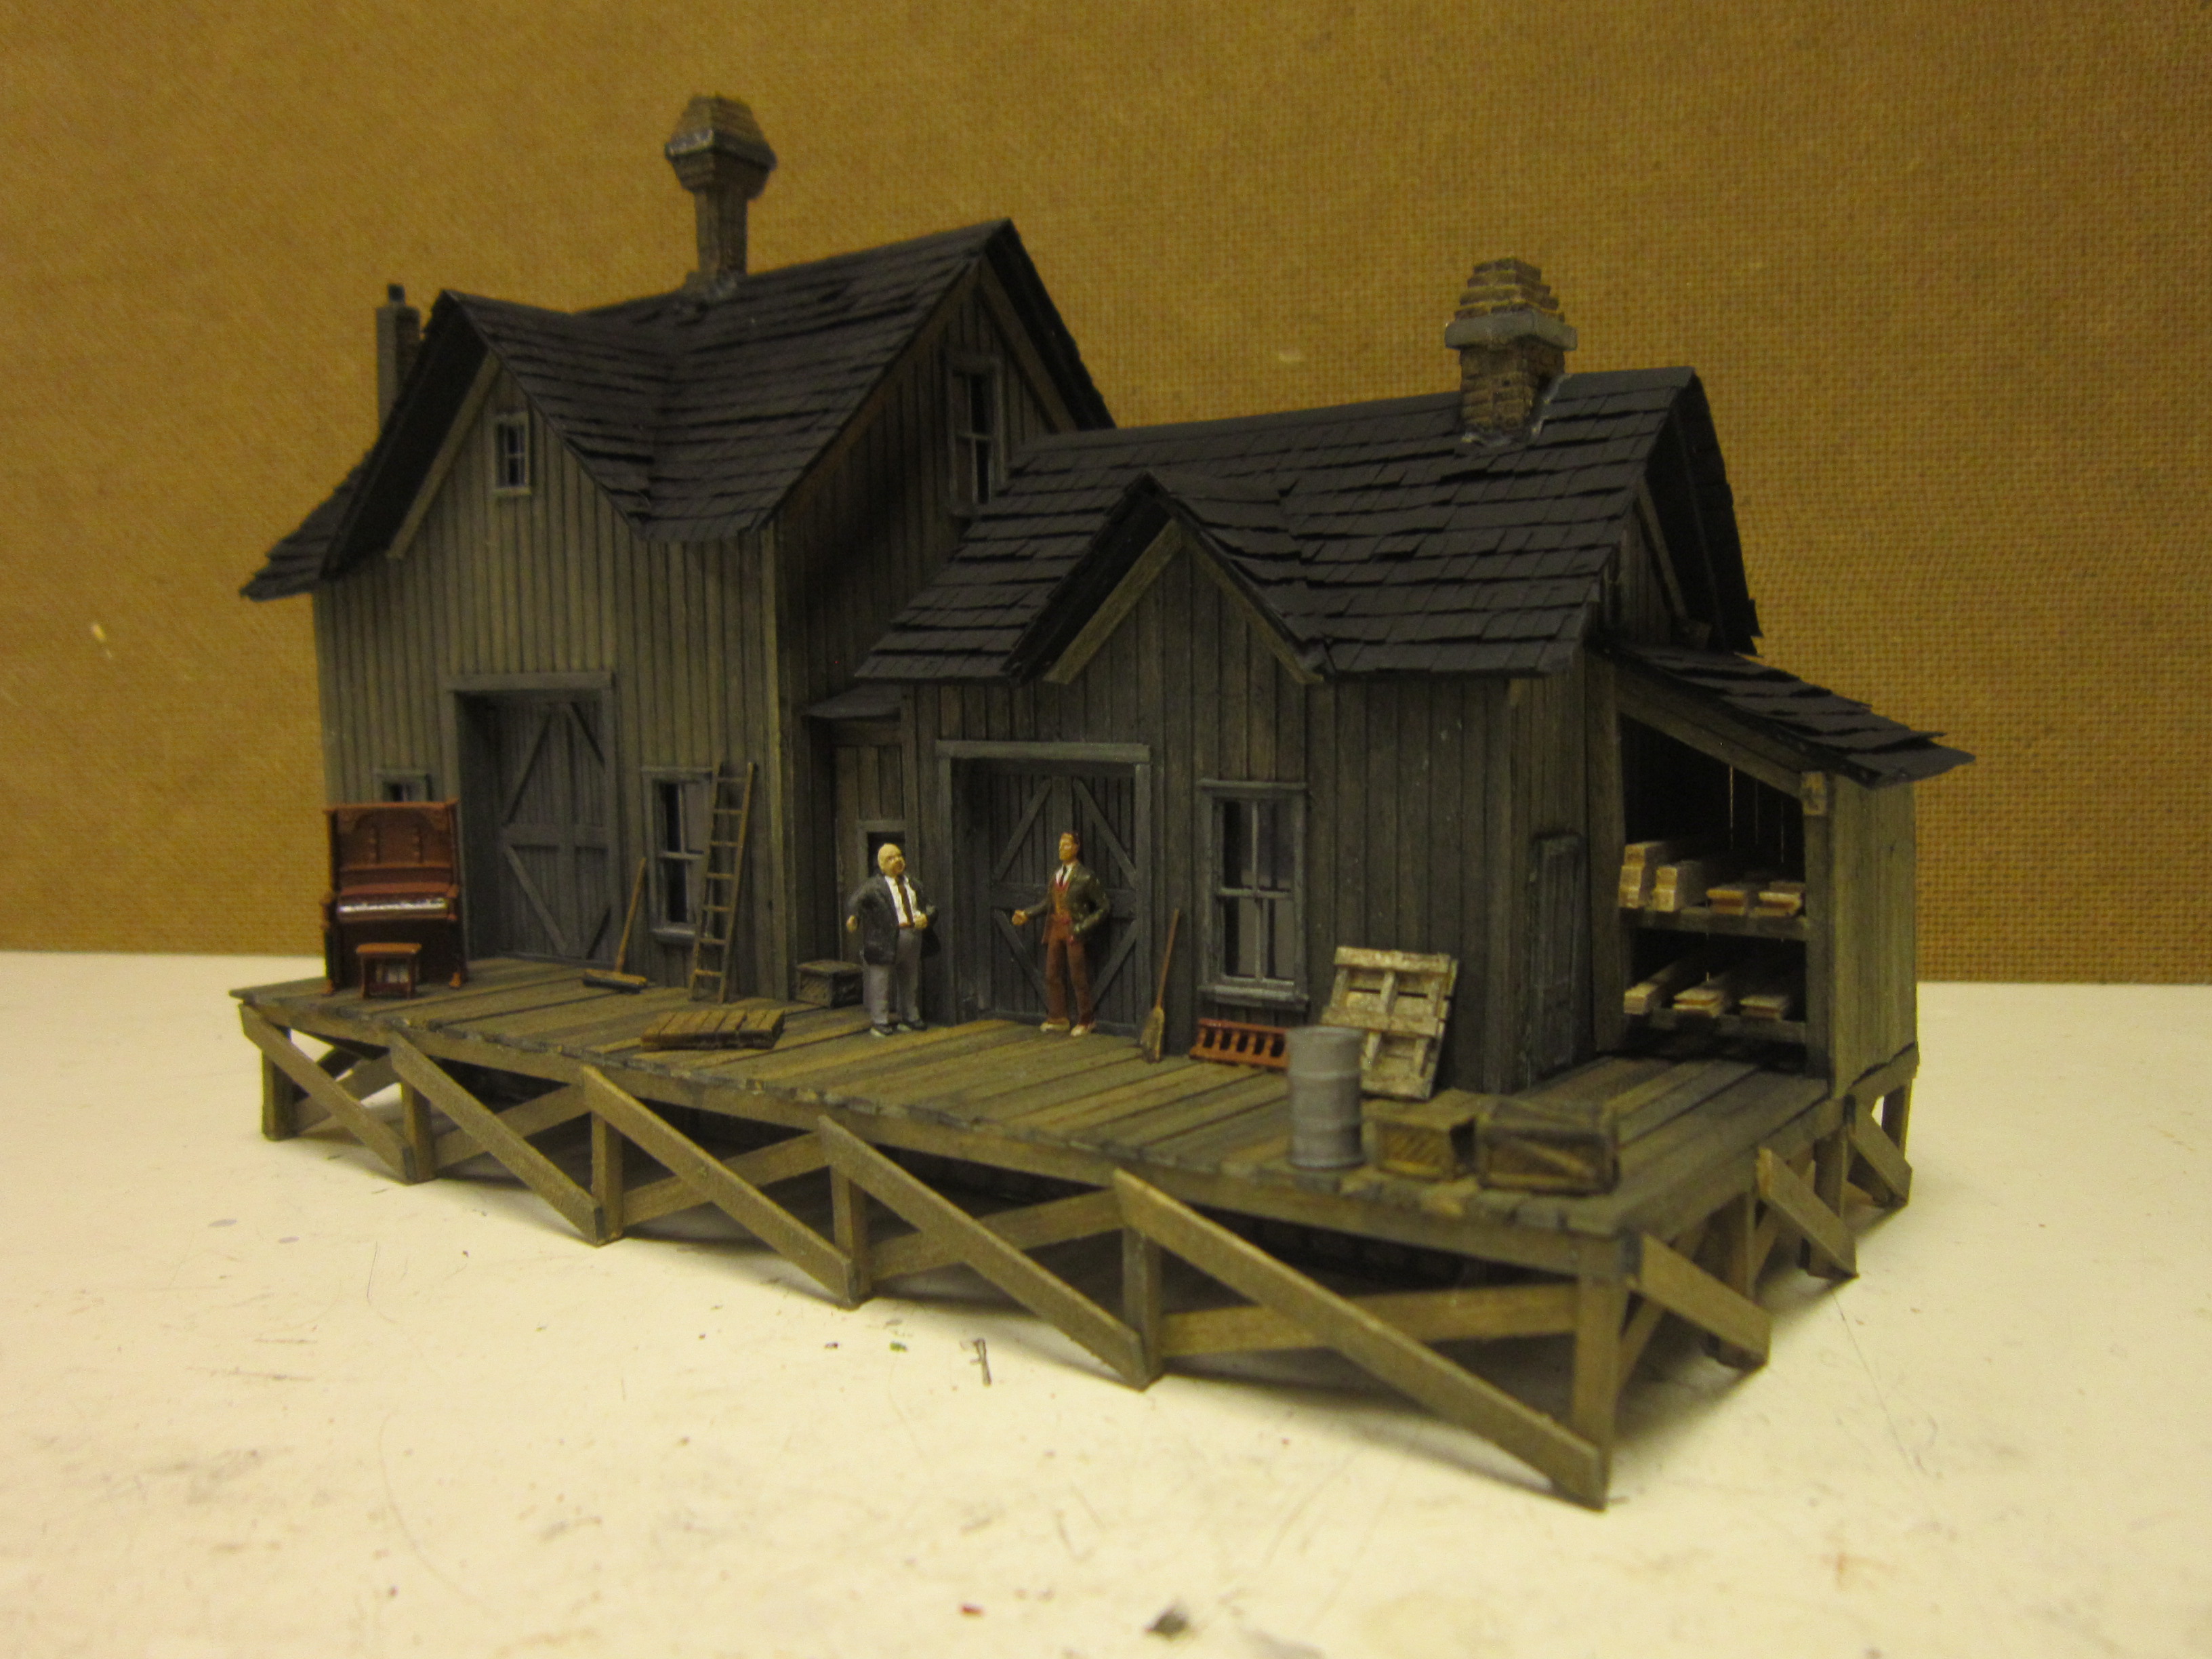
Here is my finished version of this great looking facility which contains four subsections which are built separately and then joined to together. From left to right; The larger "assembly" building, the small "connector" building, the "work shed" and the "lumber storage" shed. I created a smaller loading dock than the kit advised due to space constraints on David's layout.

The box as it was shipped to David's home many decades ago.

The side of the box. This is but one of the many kit offerings from Steam Era Structures.

A lovely illustration of the facility. If you compare this image with the first one in this blog entry you will notice that I reversed the main walls on the larger assembly building to offer all loading areas for the rail spur. I also lengthened the loading platform.

Here are two images found in the kit of the manufacturer's completed version.

This is the back wall which I placed on the front for greater visual appeal seeing as the back wall will not be seen by visitors to David's layout.

This is but one sampling of the many highly detailed templates found in the kit.

The instructions offer up 134 steps of which this image shows but two of them.

Time to start in on the foundation.

It's walls and the main floor are built up first.

The plastic stone sheet. I painted the stonework grey and ran a "wash" of black over top.

I added the lower basement windows to the foundation wall.

The floor gets a coat of black paint.

The windows were painted grey.

The walls were washed with a combination of the light grey Hunterline mixture followed by a wash of the SAMAN "olive" furniture stain.

The mini white metal casting details.

Plastic doors.

More white metal castings for the detail parts.

The wall sections and the stripwood.

The template drawings are all drawn to size where it is a simple matter of placing the wall boards atop the template and determining the window and the door openings.

The instructions recommend cutting out the paper version of each wall and taping it to the boards. Then you use a pin to mark the corners of the window and the door openings.

A small pin vise does the trick.

With the holes in place it is a simple matter of drawing in the lines.

Then it is a simple manner of cutting out the openings with an X-acto blade and test fitting the windows.
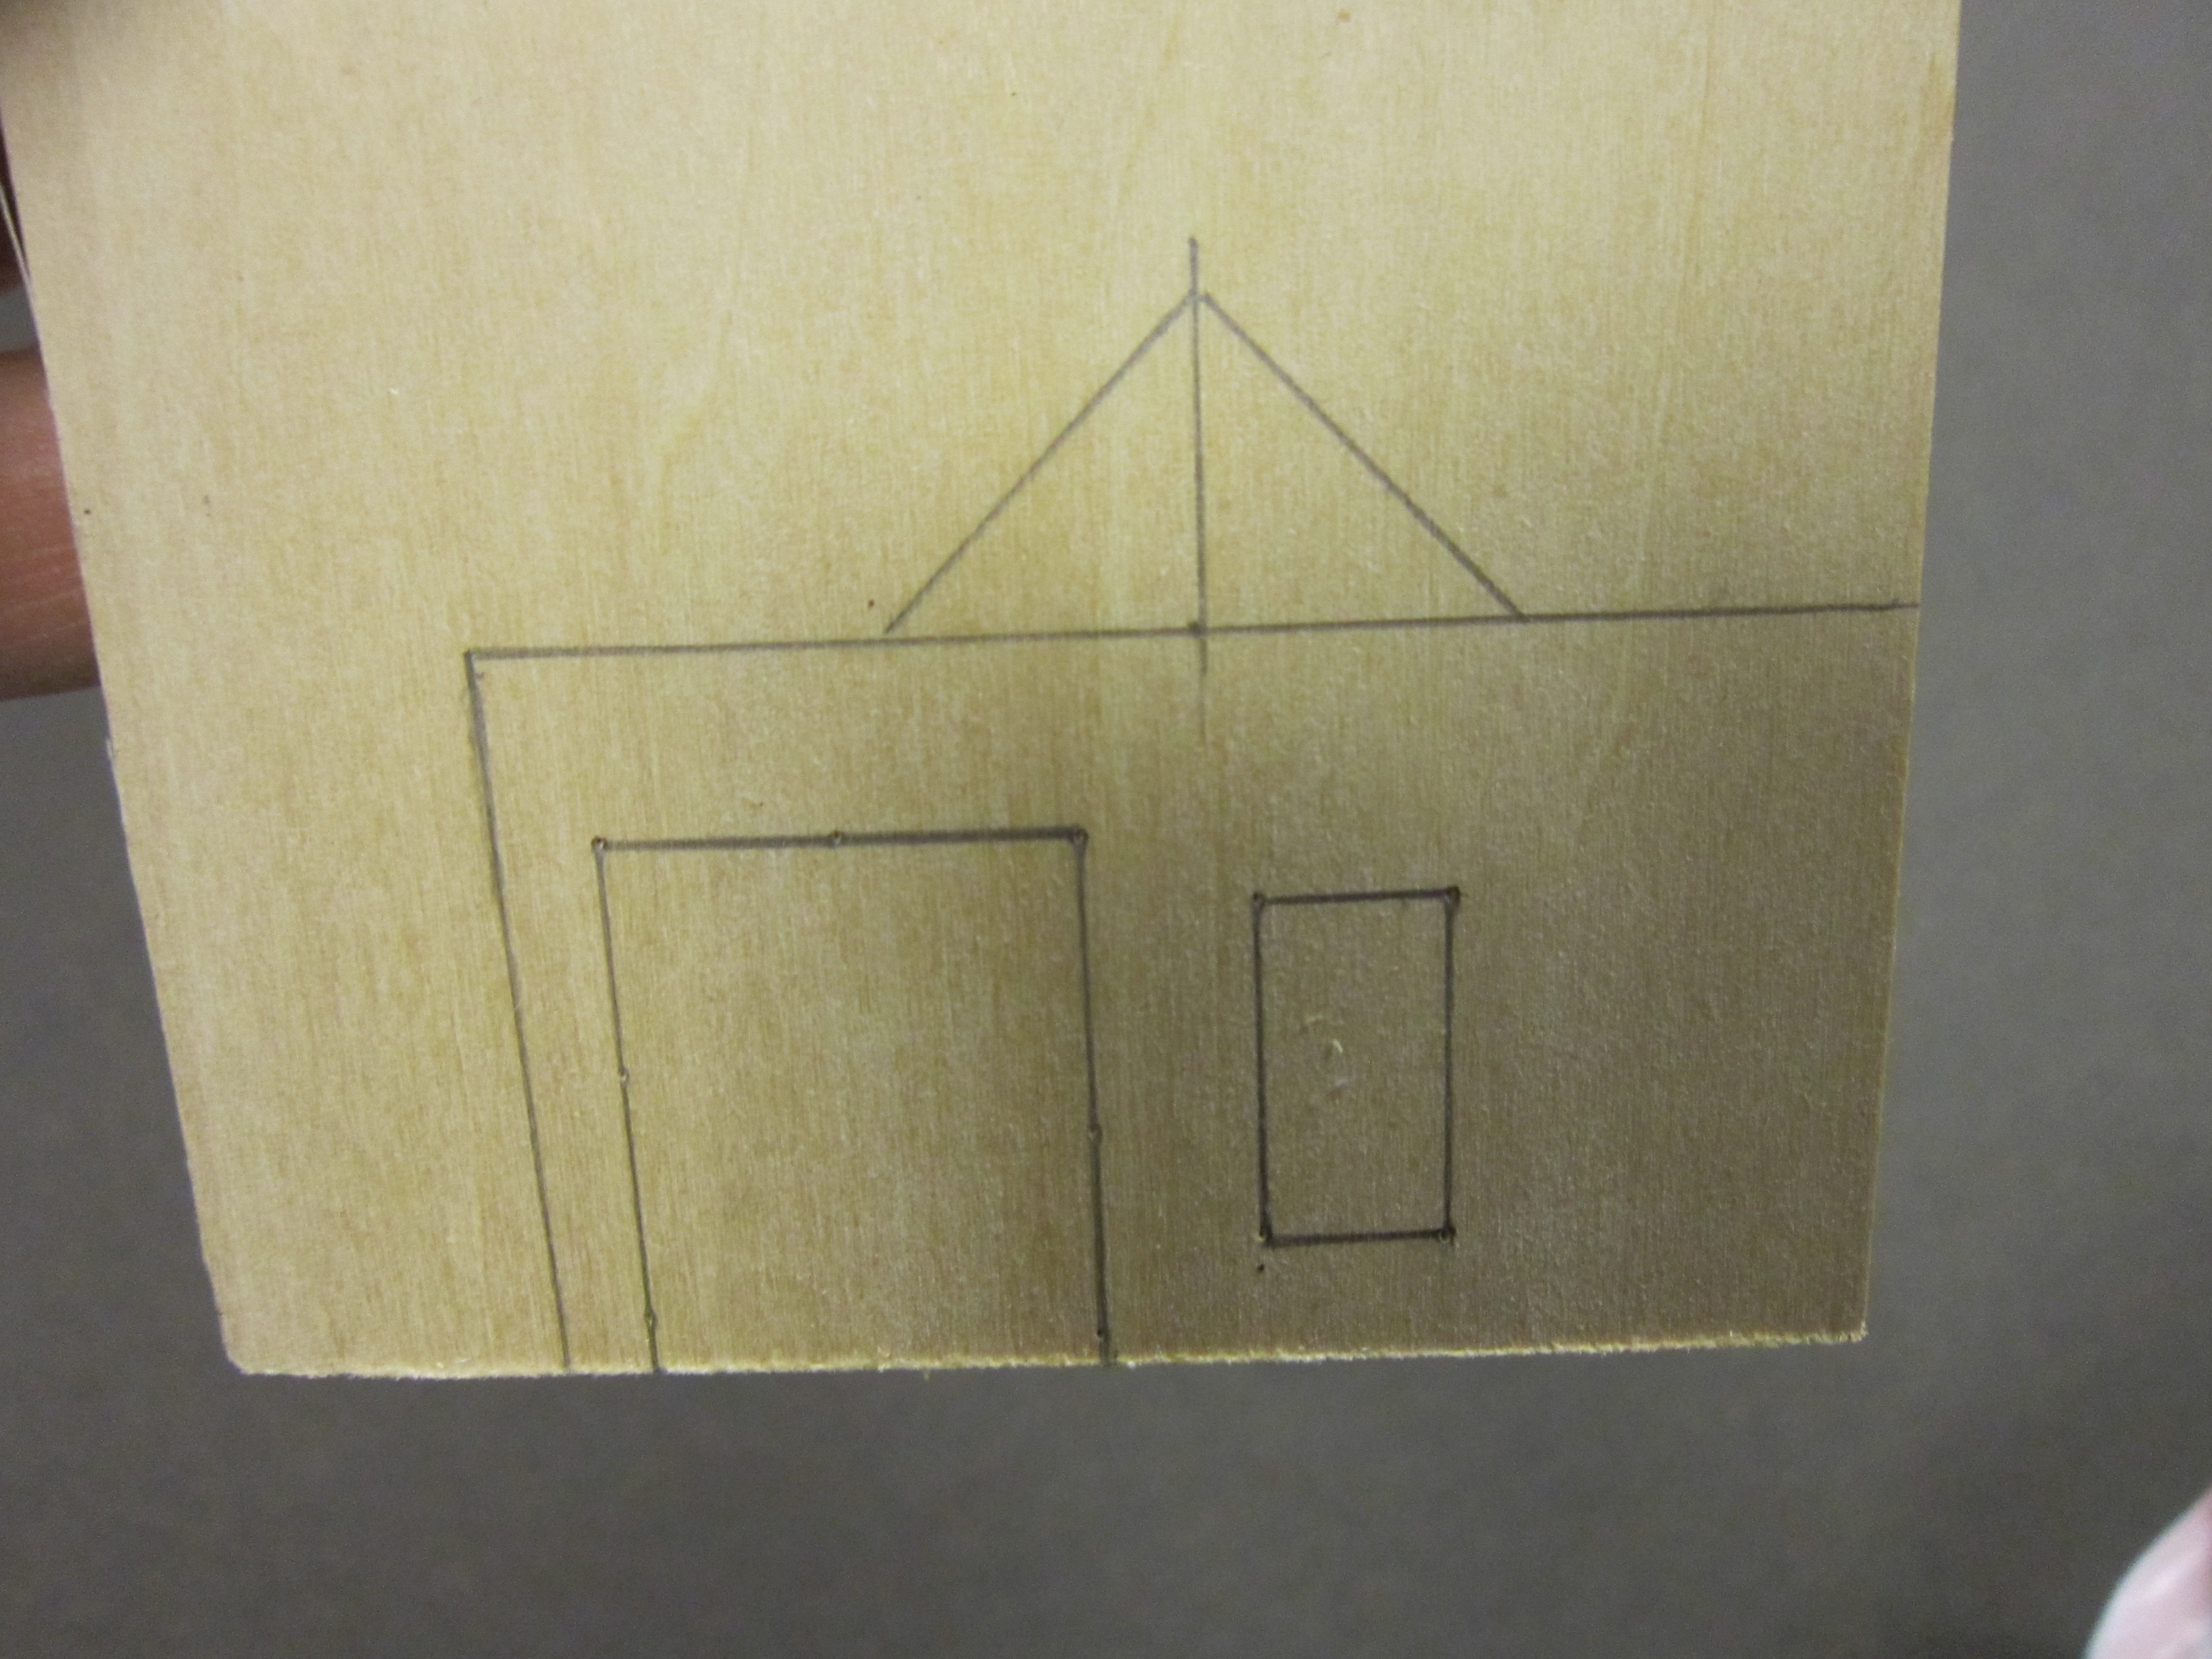
To determine the location of the central peak, a center line is drawn.

The recessed door is taking shape as it will be built entirely from scrap.

Another end wall is forming nicely.

It followed the shape from the template.

Adhering the connector building to the main structure.

Assembling the main building sections.

Checking the fit of the roofing cards.

Coming along.

Indeed!

The scribed line is where the roof fold takes place.

The roof is materializing!

Hmmm...that chimney stack is a tad too long...so get out the saw!

I am scratching the roof out of construction paper...a long and tedious project!

I've chosen to colour the chimneys a complementary brown tone. Note how the main stack comes in two parts that must be glued together.

Placing the thin stack atop the roof.

Adding the new shingles I have made. I purposely extend them beyond the roof line. A careful scissors cut will line everything up in time.

Careful attention is given to the gable area as this proves to be quite delicate work.

That main stack in the center is really tall...I will cut it down eventually.

The finish line is in the near distance.

Looking good so far!

I'm liking it!

I have scratch built the loading dock area to extend it well over to the left to accommodate the second main door on the larger building.

Opansky Senior holds a discussion with Opansky Junior who will someday follow in his father's footsteps and take over the business.
Stairs still need to join the loading dock to the ground at this time.

It's fun photographing the progress thus far.

A look out back.

As found at the local NMRA meet with a sign just out of the image indicating that the structure is still "In Progress".

For the sign, I simply coloured in the name in the instructions and cut it out with scissors after creating a quick black border.

The sign is in place!

Thanks to some left over stairs from a Rusty Stumps kit I will be able to create a small staircase.

The progress of the staircase with the further one now complete.

Another look at the NMRA meet before the sign went up.

I'm now over at David's place.

We'll find a decent spot for the organ works.

Aha! There it is!

We will have it share the spur with another industry...the pickle factory!

From a slightly different angle.

I'm loving it!

And...my good friend, David, loves it too!

Ah...model railroading is as much fun as playing my guitar!
Thanks for checking in on this fun build of a very old craftsman kit that offered up more of a scratchbuilding project than a kit building one!
All the best, Mike Hamer, Ottawa, Ontario, Canada