New Haven Interlocking Tower
An HO scale kit offering from Railway Heritage Models.
My friend, Doug, asked me to build a couple New Haven Interlocking Towers for his layout.
Follow along as I show you the process which arrived at the result below of two fraternal twins!
I have re-ignited this posting as I had only previously shared the finished images and not the step-by-step process which I will share with your here.

Here is one of the two towers I simply placed atop my Boston and Maine layout for photo purposes. You will see both towers in the images below.

Doug models a Canadian based road, but he liked the look of the towers along the NH.
Remember, you can enlarge the images by clicking on them and return to the default look of the page by clicking outside the image.

I varied the two identical towers slightly to give each one their own appearance.

One tower has the original concrete chimney while I placed a brick one on the other tower.

I also changed up the end wall where the outside ladder meets the ground. One of these walls has the door while the other has the two windows.

I used an interesting technique to achieve the concrete look I wanted. You will see the method later.

It certainly is a handsome looking structure with that pagoda style roof.
(Don't worry that the structure is simply floating atop the scenery. I place the structure there to give me a flavour for how it will look on Doug's model railroad.)

An aerial view.

One of the finished towers as placed momentarily on Doug's layout.

She sure looks great in place here!

The other tower guards the entrance to the station tracks on the layout.

The kit comes from Railway Heritage Models.

This colour image from a research book helped provide prototype information.

You can see the horizontal lines in the concrete showcasing the wood planking forms that were used during the construction of the tower.

The interest in the towers came to Doug when he saw this New Haven inspired tower on my B&M/MEC layout.

The contents of the kit.

I will be painting the wall sections a cement greyish-white colour. The window sections which fit into the slots in the wall will be a brick red colour.

The window section is tucked into place upstairs.

The glazing template sheet.

The kit makes use of "peel and stick" technology.

The lower level windows are in place.

I will use my chalks to help create the concrete look for the walls.

I run my brush horizontally.

The other wall section.

The supports for the roof must be "bent".

The wood is dipped in warm water.

My old spray cans will act as supports while I wrap the wooden roof supports around them as the moisture dries out.

As taped to the can.

All four are drying out at the moment.
The results are perfect!

The wall sections are starting to look "just right"!

The other wall section gets the same treatment.

With the windows and trim in place.

Let's test fit two walls to the base just for a sneak peek!

Looking good in both kinds of light.

Time to paint the flexible plastic roofing.

I painted the floor black in case folks looked inside the windows.

The interior of the walls.

The black cross shaped cardboard suffices for the interior meaning that the interior looks dark.

The roof section.

I've seated it atop the walls.

The slots are for the rafter tails which will go in shortly.

My heavy weights always come in handy.

The pagoda roof supports are glued in place.

More clamps held keep them in place as the glue hardens.

The structure is coming along nicely!

Installing the rafter tails.

They are looking really good.

Cleaning up the ends of the tails.

Coming along.
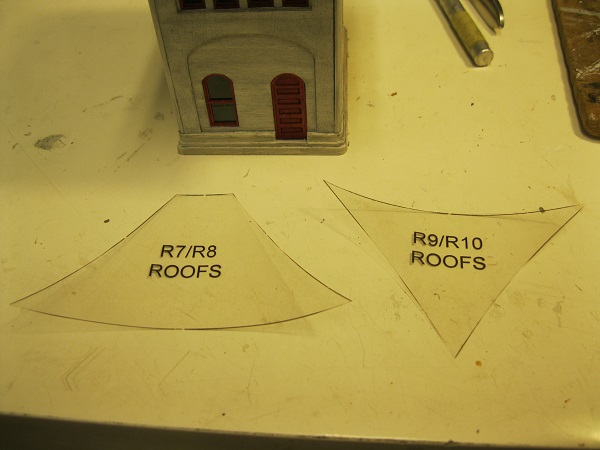
Now, for those acetates.

Here is the reason why they are clear...to help us line up the roof sections.

Once one roof is cut out, I simply use it as a template for the next ones.

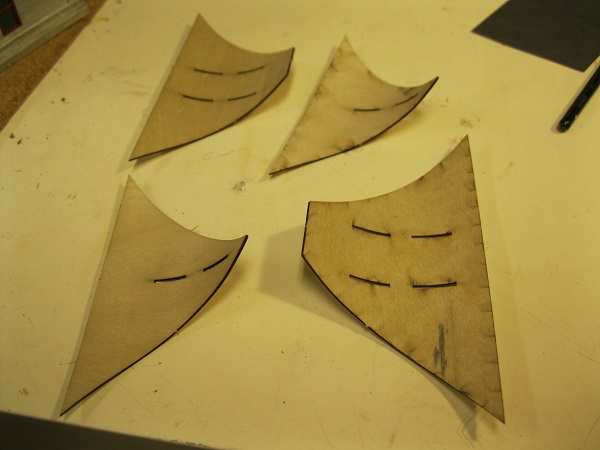
Two end sections and two side sections.

Time to address the ornate trim.

Looking good!

One entire wall section is done.

Some more ornate corner plates.

The corner plate is in place as I test fit the supports for the outdoor staircase.

The staircase with supports painted and ready for installation.

Ah...that's better!

The plastic roof segments are glued in place.

Then it's time to add the trim to the roof sections.

The masking tape helps to hold these trim pieces in place as the glue sets.

Much better. The gaps don't really stand out at a distance.

The finished tower momentarily placed on my layout.

A look up from below.

Side view.

My various PanPastels help to weather the tiled roof.

The chimney gets a dose of weathering as well.

I'm liking these two towers!

Where the decorative trim lines up you can see a slight gap. It will be covered up with some detailing.

Some of the electrical piping helps out in this regard.

A closer view.

As weathered and standing on my layout.

Oh...a train!

The other tower sits on my layout in another area with a B&M train passing by.

A look back at the tower that inspired Doug to purchase the two which he did.

My tower guards the interlocking of the B&M with the Maine Central.

Let's take a peak at Doug's layout which Chris and I worked on with regard to scenery.

Chris painted the backdrop while Doug and I adorned the trees with green ground foam.

Here's Doug.

The twin bridges on his layout.

One of the two towers which will be planted firmly on the layout in short order.

I've made a batch of Sculptamold to create the landscape before planting the trees.

I will stick the trees in the sculptamold after I first add a forested ground cover.

Indeed, art is just as important as reading, writing and arithmetic! Hehehe!

Here I am with my good buddy, Doug Matheson.
It was a true pleasure building the two towers for you Doug!
Thanks for checking in!
Mike Hamer, Ottawa, Ontario, Canada
No comments:
Post a Comment