Sean Brennan and Samuel O'Reilly
were two young apprentice blacksmiths back in the 1880's. In 1892 they became partners and struck out
on their own opening a blacksmith shop
in the village. They were progressive -
as the only metal working shop in the vicinity, they were called on for all
manner of jobs - and their shop slowly morphed to a full scale machine shop by
the early 1900's. They also mastered the
new technology of oxy acetylene welding giving them a steady stream of work
with the railroad, building and repairing bridges and other steel
structures. Since 1912 predated rural
electrification in Eastern Ontario by 20 years or more, the machine shop was
steam powered with belt driven tools.
Should you wish to visit the blog entry which showcases the scratchbuilding steps I used to create the machine shop copy and paste the link below into your computer's browser.
https://craftsmanstructures.blogspot.com/2021/04/machine-shop-diorama-in-o-scale.html
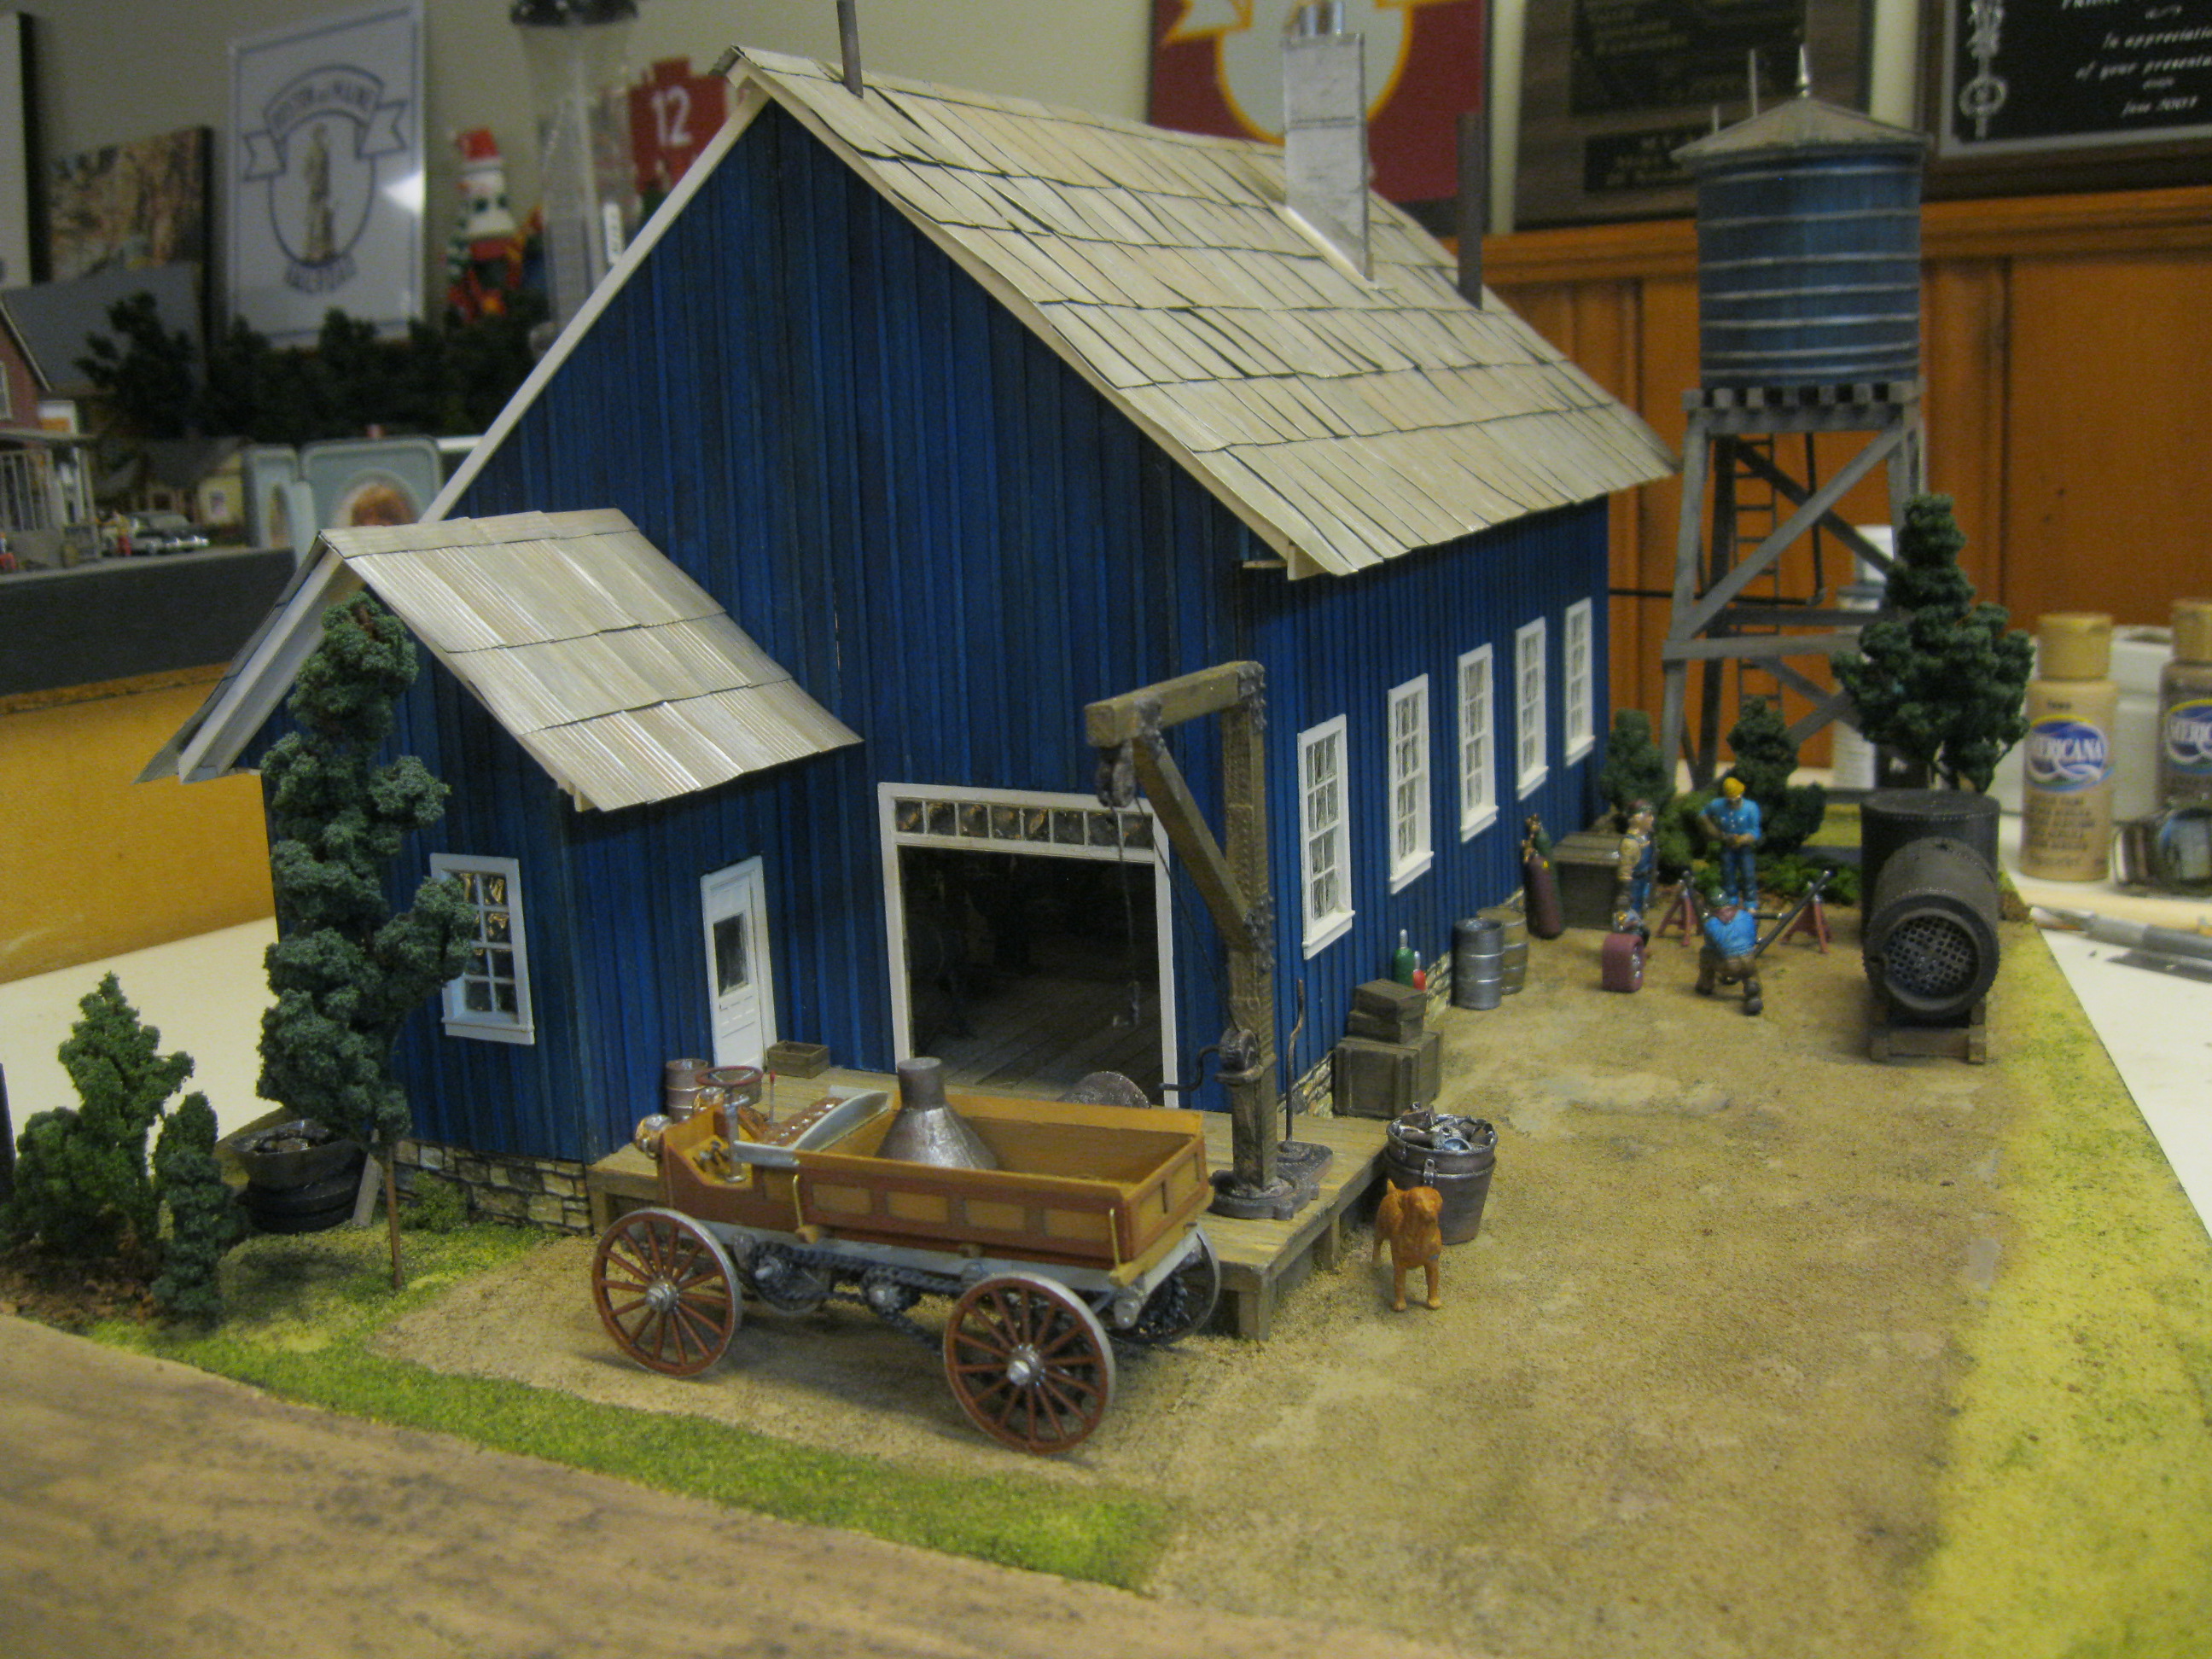
I had to scratchbuild a loading dock outside the scratchbuilt machine shop. The small jib crane came from Model Tech Studios. The truck came from Berkshire Valley Models and the additional details came from Sierra West Scale Models.
Woodland Scenics offers up this nice group of welders with their equipment. Later I will showcase how this scene developed.
The water tower came from B.T.S. "Better Than Scratch" models. I painted it the same blue colour that Doug loves so much. B.T.S. offers it in kit form as the "McCabe Shop Water Tank".
The combination of multiple vignettes helps to show how the machine shop was a busy place in its day.
Doug had worked in a machine shop during his university days to help pay his way.
In all I painted quite a few horses for the four scenes. They came as white metal castings in four parts and had to be assembled and painted then shellacked to offer a shiny, healthy coat.
The trees came from the false spirea shrub in my garden.
Miscellaneous junk hanging around by the fence helps to draw the eye into the scene.
An aerial shot. The machine shop sign was printed by Doug and I glued it atop a white piece of styrene to offer a nice looking beveled edge.
The figures came from a variety of sources. I will have to look up where Doug purchased them. Some were resin while others were pewter and all required painting and weathering.
Nice low-angle shot.
The camera elevates slightly.
Drawing back a bit we see the scene from a distance.
Doug and I chose to leave the roof off in order for the viewer to see inside the machine shop.
The overall diorama.
Well I had better get on my "high horse" and begin showing how the diorama actually came together!
I brought out the four modules to our OVAR monthly meeting up here in Ottawa for all of the lads and lasses to see firsthand.
OVAR stands for Ottawa Valley Associated Railroaders and we meet once a month for a dinner, display and presentation up here in Canada's national capital. We take a short hiatus in the summer months of July and August. OVAR brings together all folks interested in railroading, be it research, railfanning, modeling or those with solely prototype interests. We have the publishers of Branchline Magazine in our group as well as the fellows who put together the always popular annual Canadian Trackside Guide which is a "must have" document for railfans.
Let's head back in time to two summers ago when Greg Stubbings came over to solder the lighting requirements for Doug's lanterns which hang from the posts in the machine shop. Greg is on the left and Doug is on the right both working at my workbench.
Greg is a master modeler who has a wonderful HO scale layout depicting his home town of Lindsay, Ontario. His railroad showcases CNR operations on the Uxbridge and Haliburton Sub.
Looking good there Greg!
The lamps on the post are white but a little touchup of the lanterns should bring us to a more yellow hue.
We wanted one of the O-scale figures to hold a lantern seeing as we had an extra lamp. Greg is using his Dremel tool to drill a hole up through the leg of the gent.
Looking good, Greg. I will do the wiring later.
Before adding scenery I will paint the surrounding surfaces black as I always do on my dioramas.
The entire area that will take ground foam is now painted black.
While I am working on the scenicking of the diorama, I still have a bit of work left on the roof. Here. my trusty mini-clamps hold the trim in place while the glue sets.
Next step is to install the strips of wood in place that will enable me to glue the corrugated roof panels to the top of the building. My ruler allows me to get my spacing even.
That's done!
Wild West offers O-scale corrugated roofing.
A closer view of the packaging.
I have to create the top section of the roof vent for the hearth on the shop floor.
Coming along from scratch.
Now time to weather the corrugated panels with my PanPastels in browns and rusts.
I offered up a light weathering as Doug wanted the roof to look in relative good shape.
Even the smaller adjacent office will take the corrugated panels.
My Rube Goldberg measuring device.
Coming along.
Yes, the slight weathering does show up under these lighting conditions.
Some of the detailing that will reside at foundation level is going in.
My light shines directly into the shop...just for a quick glance!
Some ground foam is sprinkled around. Yes, it is too green at the moment but will be toned down with light browns eventually.
I simply run a glue and water mixture (with a drop of dish detergent to help break the surface tension) before sprinkling on the ground foam.
Along the front.
Some twigs and miscellaneous junk help to bring the scene to life.
I enjoy the scenicking aspect of model railroading.
This is how the front looks for the time being.
Oops! When I completed the roof I realized that I had forgot to create an opening for the exhausted pipe from the top of the boiler.
So-o-o-o...I had to remove some of the corrugated roofing panels in order to measure and create the pipe that would fit down through the roof all of the way to the top of the boiler.
Some styrene tubing painted black and rusted out a bit did the trick. The pipe won't actually pierce the roof. It will butt up against the underneath and I will create another pipe atop the roof and locate it precisely to meet where the lower section comes up.
You can see from this image why I had to remove the roof. There was no way I was going to risk damaging all of the interior detailing just to place the remain pipe stack atop the boiler.
I am pleased with how it turned out!
I used this small piece of stripwood as my guide to the height I required to match the elbow curves in the pipework from the water tower.
Here is an elbow curve I have placed on the pipe which drains the water tower into the main building.
From another angle.
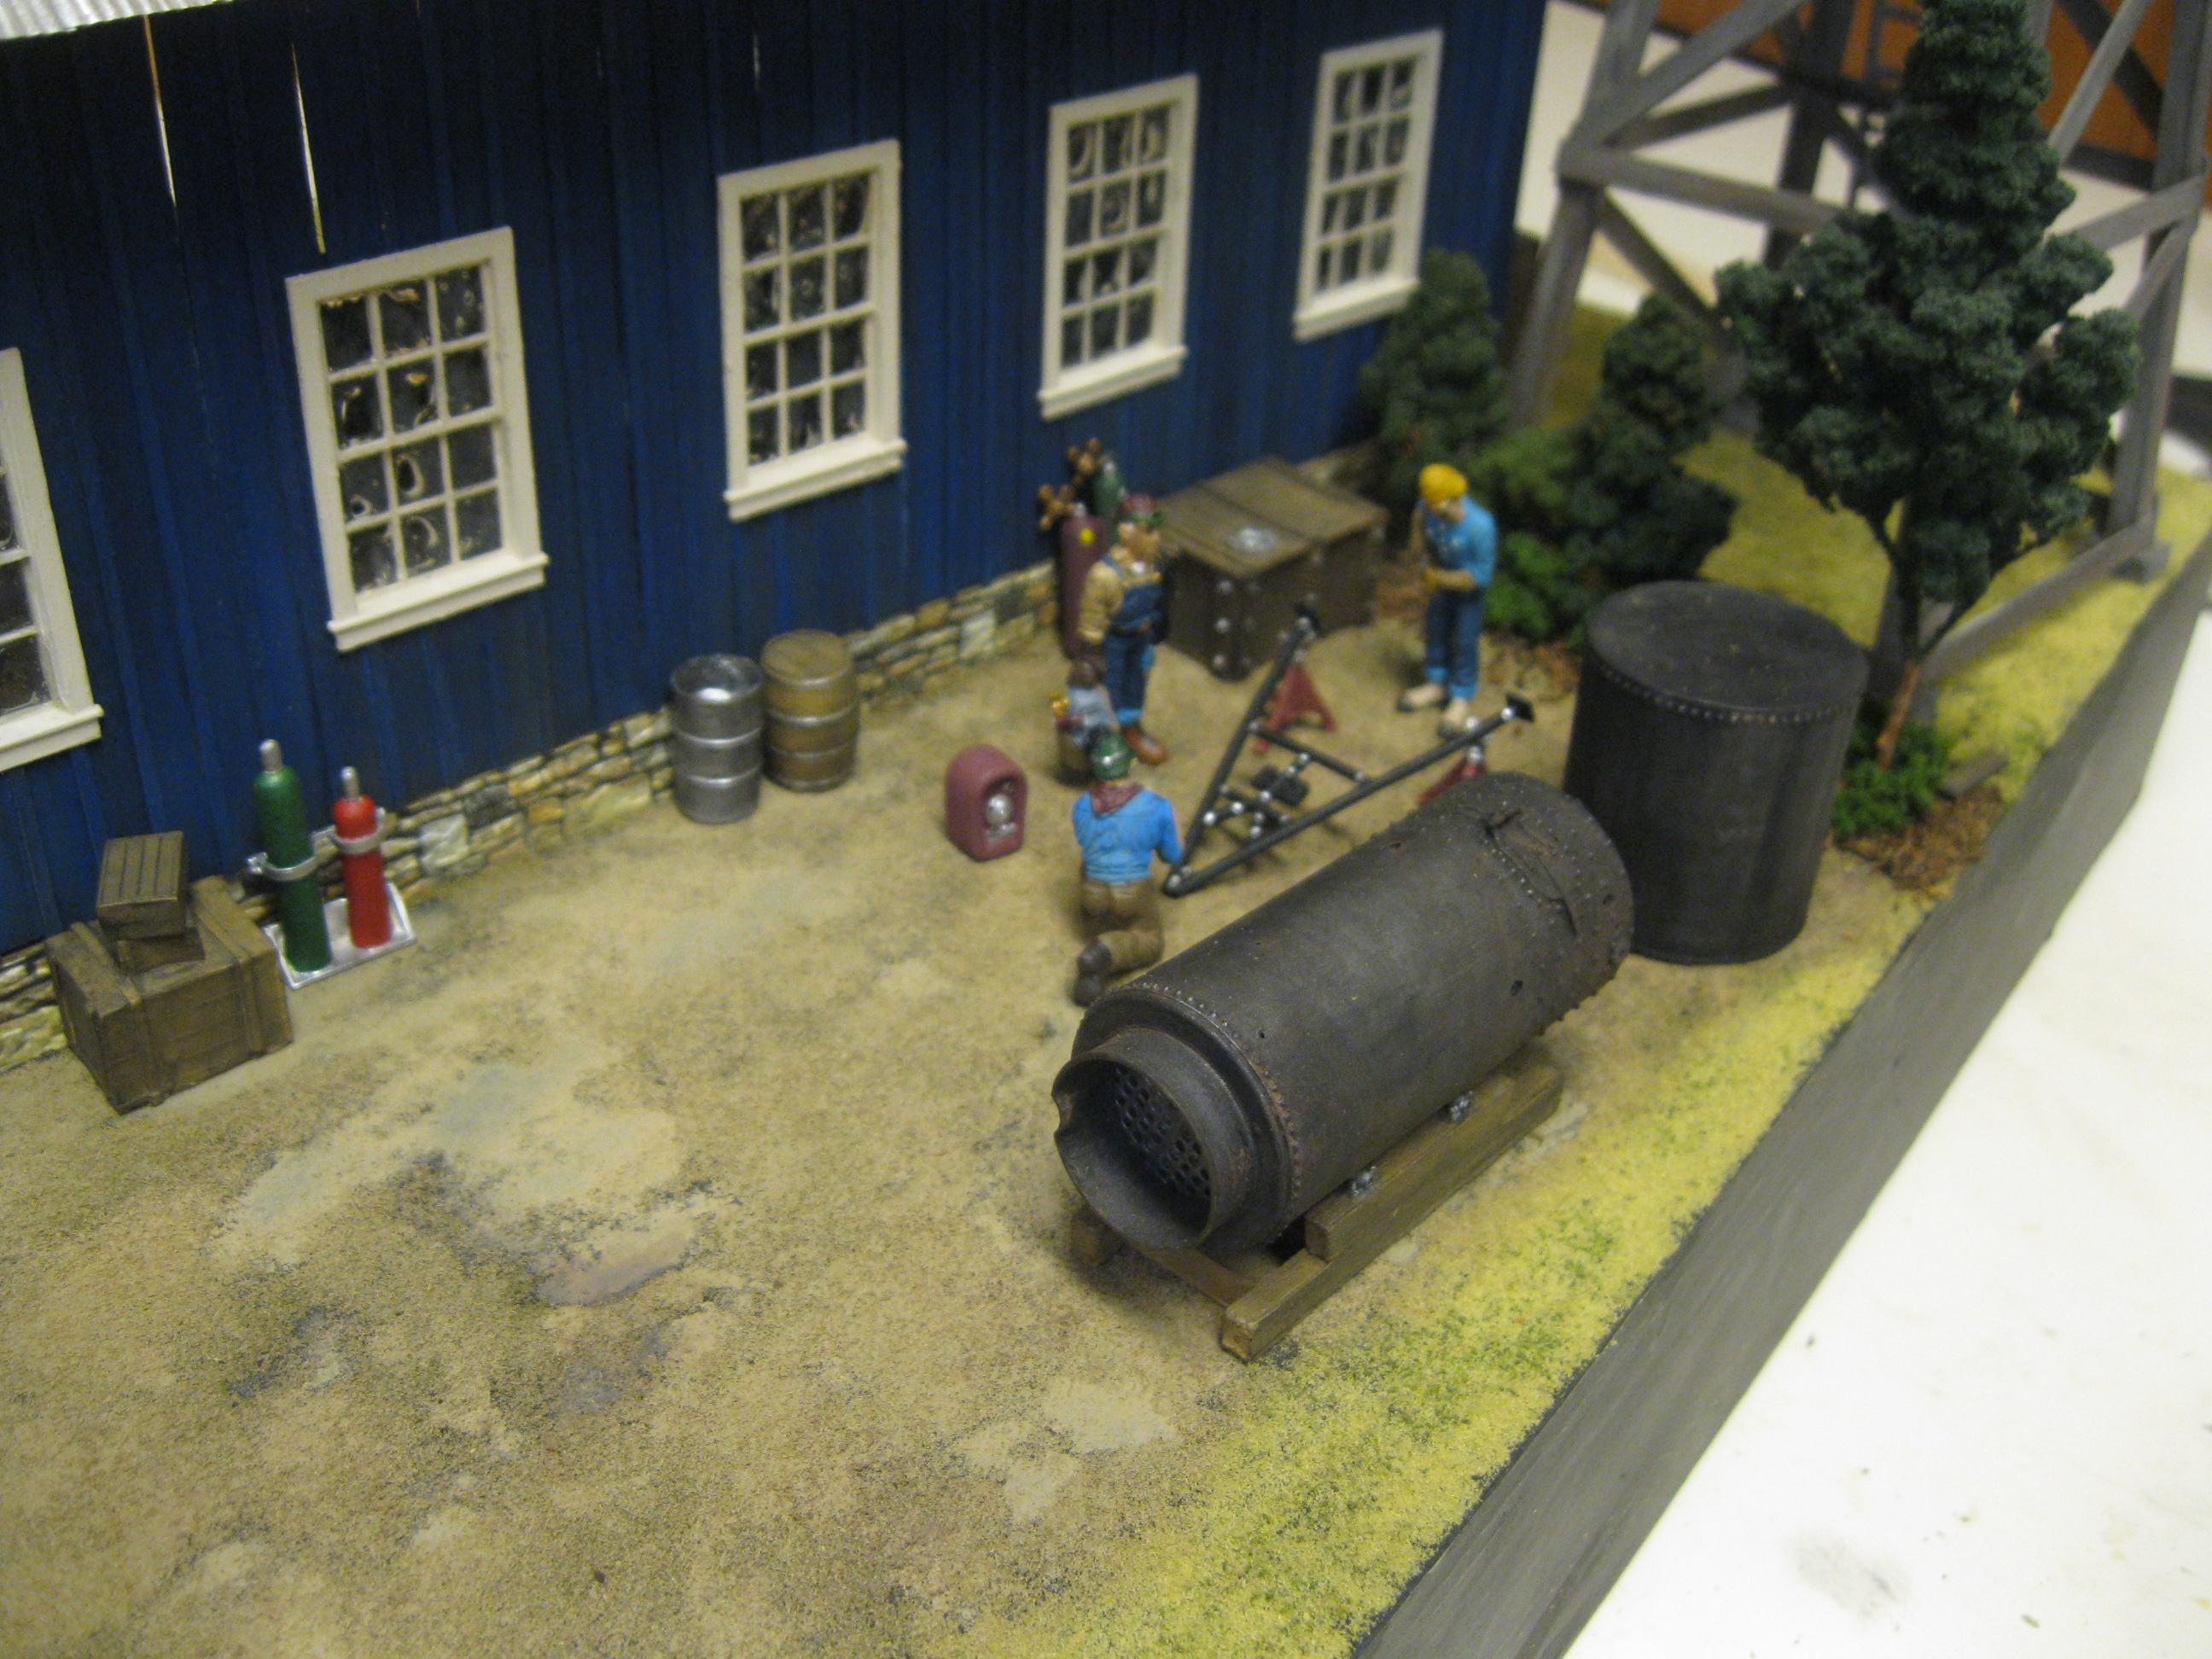
I got the height "just right" with a slight downward slope for gravity to work its magic. Now the boiler can be fed its water supply. The vent to the right acts as an exhaust vent for the belt driven shop engine.
Doug had purchased the welder's set from Woodland Scenics as mentioned earlier so I am "playing around" with the configuration of the scene at the moment.
Some additional larger details that came from Sierra West Scale Models adorn the landscape.
Coming along!
As I work on finishing the machine shop module, it is fun to "look ahead" to see how the other modules will fit in with the scene. Doug purchased the depot from the Peter Nesbitt estate sale. Peter was a magnificent modeler up here in the Ottawa region and will be deeply missed. In the foreground you can see the farmer's wagon drawing into town. I built the farmer, wagon and horses from a Berkshire Valley Models kit offering.
The general store module is in the foreground here. It was built from a Blair Line Models kit.
Sculptamold was used to create the dirt road surface.
Weights helped keep the sidewalks glued in place.
The road crossing is now in.
Sidewalks in the time period we are modeling are simply four lengths of planking running parallel to the flow of the road. Some of that Sculptamold will be cleaned off the sidewalk in due course.
The developing scene.
A look from this end of the module.
And...a gander down the tracks. The roadway on the left in front of the general store will be repainted a lighter tan colour.
A couple of figures arrive on the scene at the end of the sidewalk.
We spot a green buggy with rooftop in the entrance to the machine shop.
She's one fine looking buggy.
A fine looking horse as well.
A closer examination of these Berkshire Valley models.
A look down the line.
How about a Black Beauty with the buggy?
She looks mighty fine as well.
The REO box truck by the shop looks impressive too.
Or...how about a buckboard wagon?
I'm having too much fun!
Posed image.
Ditto.
The little puppy is a curious little fellow!
I'm liking the look of these models!
Hehehe! As I was in the process of creating a gondola for another scene on the four module assembly I decided to pretend it was a flatcar delivering the buckboard wagon and buggy to town!
Yes, those trucks on the flatcar do require some weathering. I'll get to that when I begin construction of the fourth module.
The wagons arrive at the station while a farmer drives his team of horses out of town. The farmer's wagon is still standing on the smaller plate I made for it.
Hey, there's the gondola hanging out by the station!
The water tower "towers" over the scene here!
Doug and I are both liking how all this is turning out. Doug hand laid the railroad track.
Hey, what have we here? A dappled mare!
She looks mighty beautiful as well!
I eventually got to removing the farmer, his wagon and his team of horses off the plate on to which they were glued. It was a tricky maneuver un-glueing off the plate and re-glueing back on the diorama but I managed to get it down with very little damage requiring some "touch-up" work!
Some homemade evergreen trees from our friend, Gaston, help to adorn the module..
On another note, here is a lovely Surrey wagon and horse that will make it onto another module.
There's the Surrey wagon with the machine shop module up top and to the right.
Stepping back in time, we view the four modules together. The roads and parking lots will be given a lighter paint colour in due time.
A view from the other end of the module.
The machine shop requires some fencing, so here is the start.
I've stained the fences and given the a light wash of black acrylic paint.
My square ensures the posts line up properly. I remember to leave a small gap between them.
Coming along.
That looks good!
Indeed it does.
From another angle.
Doug printed off some signs from the Internet for me to use.
To ensure the joint in the fence corner is a perfect 90 degrees, my trusty weights come in handy!
They also serve to weight down the fence as the glue sets.
I'm liking this!
So is the REO box truck. The block of wood you see just in front of the truck allows the fence to stand perfectly while the glue sets.
A nice looking scene for sure.
As viewed from the road.
And...viewed from the air!
Looks great!
Along with the station module.
No, the welders are not sleeping on the job. They are awaiting me at the modelling bench to give them so work to do!
Some exterior detailing out back the machine shop.
I found the cabling for the welders' torches too finicky to work with. Then I had an "aha" moment. Why not use solder which is very malleable and can bend and shape in any configuration with ease.
Here's the result with the cabling from the silver solder now painted black.
The welders are content now.
For they have work to keep them busy throughout the afternoon!
And...I am content as well.
Here is the sign Doug printed for the Machine Shop which I "doubled over" with white styrene in the back to offer up that beveled look.
Looking down the back of the machine shop.
The diorama has come alive.
It is fun to view it from all angles.
And...from all elevations.
While there is still much work to do to complete the overall scene I am very happy with the developments.
A look at the shop off in the distance from the coal dealership module.
A look down the back of the shop from the water tower end.
A few trees add a vertical dimension to the scene.
A look down the tracks.
From the east.
From behind the depot with its evergreen tree which is adorned with trees around Christmas time to welcome visitors to the town of Tyrone.
That corrugated roof on the shop certainly stands out proudly!
A look from the stairs leading down to my crew lounge.
An O-scale world in front of an HO scale one!
With a brown blanket to add as a backdrop.
The finished scene. That's my Hamer guitar peeking in from the top left corner of the picture!
Lovely.
It has been pure joy working in O-scale.
The full diorama has made it safely to Doug's home.
Here are all four modules tucked in safely in the back of my Rav4.
As displayed at OVAR last season.
I add all of the pertinent information as well to accompany the modules.
It sure has been a great learning curve as so many of the smaller projects that make up this finished seen presented me with "many a challenge" but I stuck through with it remembering that "Problems are opportunities for solutions"!!!
Once again, thanks for checking in on this posting. It has given me tremendous pleasure in sharing the steps I took to create the machine shop diorama.
In the not-too-distant future I will share with you the methods I
used to create the other three modules.
Until then, stay safe and stay healthy!
All the best, Mike Hamer, Ottawa, Ontario, Canada


No comments:
Post a Comment