Tyrone's General Store
Doug and I discussed the various structures we may find along the street that runs through the tiny Eastern Ontario village of Tyrone.
I had suggested a general store as I had seen many of them modelled and a store of this nature would fit nicely into the overall theme of the four module diorama.
So-o-o...a general store it would be...and the one purchased from Blair Line would fit the bill nicely.
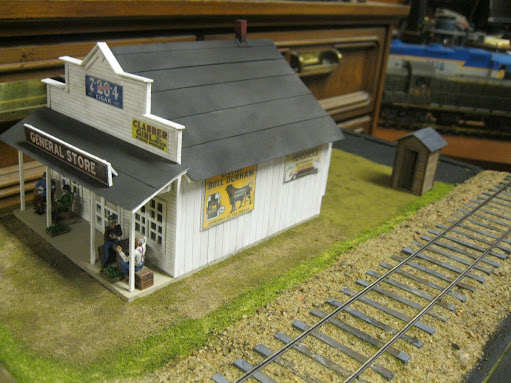
While I have weathered it slightly, we wanted a relatively "clean look" to the store.
You can enlarge any picture by clicking on it and return to the default look of the page by clicking outside it.
I had fun adding some of my own signs I found, resized and printed off the Internet.
The only rise in elevation on the entire four module set is the elevated land where you see the stand of trees at the rear of the module.
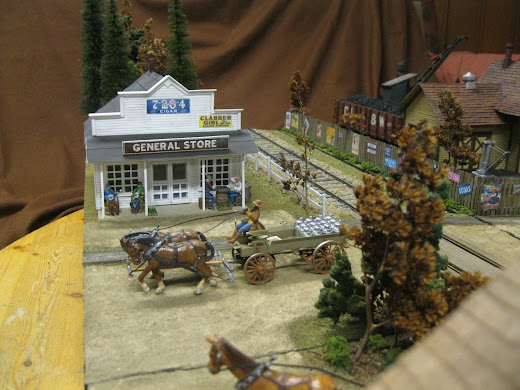
The general store certainly fits in with the remaining structures on the whole diorama.
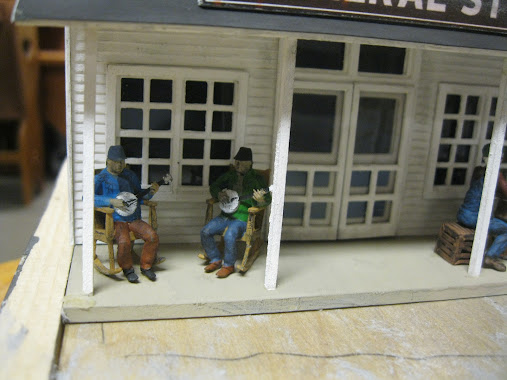
The figures sitting in the rocking chairs and playing banjos are from Miniprints while the checker players at the far end of the veranda area are from Woodland Scenics.
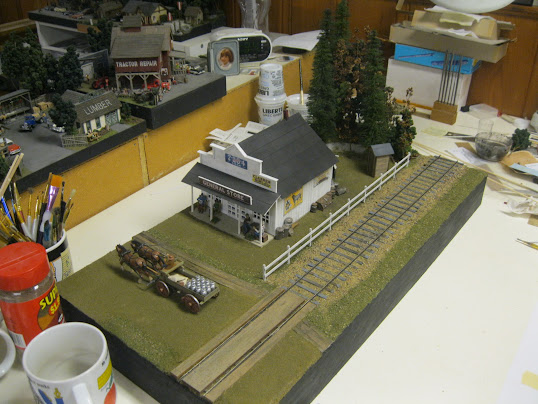
We catch the farmer heading out of town after having delivered milk. He is returning to his farm with empties...just like the real railroad does!
An overall shot looking down the line even though there is still further scenicking to do on the modules. Below is what Doug wanted to inform us on with regard to the general store.
Tyrone c. Sept 1912
(a fictitious slice of Edwardian life in rural Eastern
Ontario)
The General Store
Gerald Sheehan was the son of
an Irish immigrant farmer. He took up
the role of a merchant when the station was built and opened Tyrone's General
Store. He was the man primarily
responsible for most of the lcl freight at the station as he weekly ordered
supplies from wholesalers in Montreal. The store as well as the station were at
the centre of day to day social life in the vilage and folks regularly gathered
to simply chat or as shown here, to play checkers or to listen to some banjo
playing.
Let's go back to the beginning with this wonderful kit. We see the box and the instructions.
Yes, this is a Laser-cut kit...known as the Blairstown General Store.
The entire kit contents.
A sampling of some of the signs that come with the store.
Certain signs could be used if the product were to be available in both Canada and the United States.
We would have to be careful to select products that were also available circa 1912.
I actually selected some signs I found and printed from the Internet.
Here I have already painted the main walls white. They will be toned down slightly to take some of the sheen away, but we want the store to look fairly clean.
Here is the supporting interior front wall which acts as a shelf for the roofing as well.
Peel and stick technology once again allows for multiple layers painted separately in different colours to adhere together nicely...making the modeler look like a master painter.
A couple of signs have found their way onto the storefront as has the main entranceway with trim.
Adding additional levels to the storefront doors...we see the screen door coming together.
The upper level framing goes in.
Time to make the windows. That's the upper level to the left. It will be placed atop the clear area above and to the right.
Coming along!
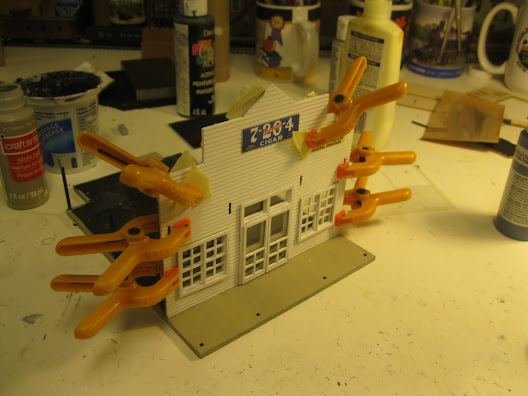
I am using my mini-clamps to ensure a solid bond for the two wall sections, the interior and the exterior.
Here is the bracing used to support the veranda roof.
I've painted the bracing white as well as the support posts.
My heavy weights hold things together as the glue sets. I am careful to set the weights down very gently so as not to damage the support structure for the veranda roof.
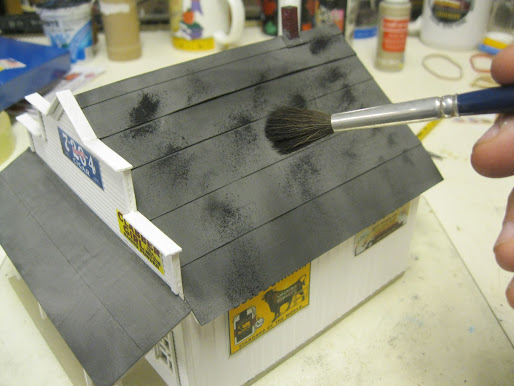
Glueing the roof sections in place with the paper offered in the kit. I've painted it black and then weathered it with powders.
I've then sprinkled on black powder to get just the look I desired. I have painted the veranda floor with an aged concrete colour.
A make-up brush with soft bristles does the trick when adding the powders to the roof.
Doug and I opted for the basic "General Store" sign for the veranda roof.
A small chimney sits atop the roof peak near the rear of the store. I painted it red and weathered it.
The back entranceway is recessed slightly from the side wall which offers visual interest. Note too the back walls are clapboard while the side wall is board and batten.
Looking good so far!
I photographed the general store outdoors when Doug came by for a visit. Due to the pandemic, our meetings were held in the great outdoors once the snow left.
We spot the checker players and dog from Woodland Scenics and the REO Box Truck from Bershire Valley models as well as some old boilers which will be strewn about the machine shop property which came from Sierra West Scale Models.
Here is the farmer and farm wagon with his horse team...a wonderful kit building experience from Berkshire Valley Models as well. I have the team assembled and glued on the piece of styrene. They will eventually be "scraped off carefully" and "slid gently" onto the general store module in due course.
For fun I have placed the checker players in underneath the veranda canopy while the dog and his master look away in the other direction.
I quickly borrowed the station bench from the station platform with Curly and Moe seated. They will not remain here...I did this just to get a feel for things.
Yup...the general store will sit parallel to the railroad tracks as does the depot in the distance.
The sidewalks have been glued in place and my metal weights ensure they will remain where I want them to be when the glue sets. The railroad crossing is also in place with a weight atop. The sculptamold roads are still wet and require more time to dry.
Here is an image of the sidewalks I built from scratch. They are just four lengths of planking with cut marks notched in every sixteen scale feet.
Curly and Moe have been replaced by Mutt and Jeff on the banjos. Oh...there's Curly and Moe playing checkers at the far end of the porch!
While they may not be too good looking, the music they make sure sounds good!
The checkers game in action.
Carbonated drink bottles will adorn the front porch area as well.
The road is still drying. It will then be sprinkled with fine brown ground foam and painted and weathered.
I always paint my surfaces black before adding the ground foam and relevant scenery.
Yup, the three modules thus far are coming along nicely.
The road crossing.
A perfect fit!
Under different lighting conditions.
Still much to do!
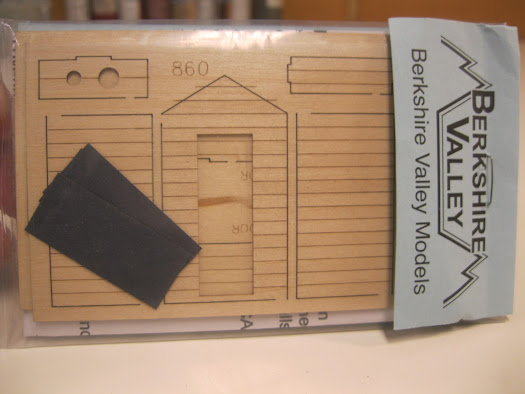
An outhouse from Berkshire Valley Models will look good out back the general store.
This will be a quick build out of the Laser cut wood.
Colouring with furniture stains.
Building up the walls with tab and slot design.
Where ya sit to pass the time! Hehehe!!!
Man oh man...my mini-clamps look like monsters here!
Adding the trim.
And...the door that opens to the interior.
Looks terrific!
I'll place it somewhere at the back of the model.
I may angle it later.
There are always lots of castings hanging around that require attention.
Such as this case.
I simply painted it a brown tone then gave it a wash of black acrylic paint and then touched up the metal parts.
There's always trash cans around buildings.
Barrels too!
Our little puppy dog sure likes to ramble around the town!
The farmer is heading back home.
My paint jars help keep a few figures propped up while the glue under their boots and shoes dries.
An overhead view. Note the large metal weight to the left. I have glued a couple of layers of styrofoam to create some elevation for a forested area out back.
It will come together with the Sculptamold and some groundfoam.
I've now angled the outhouse and have begun creating the forest floor with the addition of a few trees.
An aerial look out back. The detail parts you saw earlier have yet to be glued in place.
I'm liking the composition of this scene.
Yes I do!
Some of Gaston's homemade coniferous trees will be planted. Some haven't been officially placed and are leaning in this image.
That's better! Trees lean somewhat anyway. Hey, I like that rail fence!
Doug and I felt it best to paint it white to differentiate it from other fences on the other modules along with the fact that it is a rail fence while the others are not.
To create the fence from scratch, I first drew myself a template.
Then it was a simple matter of glueing the painted strips together. Masking tape offers us a big assist here.
My weights see action once more while the glue hardens.
Indeed, with that fence and the other miscellaneous details in evidence, the scene is coming alinve.
The store owner is off to visit the "Loo"!
Some of the trees are from the false spirea shrub in my garden. Some I coated with green ground foam and some I left in their natural brown state. This makes it feel like the "fifth season" in between fall and winter or in between winter and spring.
An overall view of the module as it appears thus far.
A low angle view.
Looking good in my books!
While there is still loads of work to do, the general store module fits in with ease in the overall scene!
A glance down the tracks.
A glance from the machine shop end of things.
The roads have now been coloured and the modules require just a little more trackside foliage and the scene will be complete!
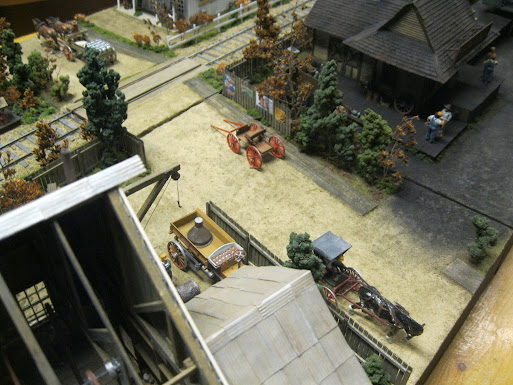
Here is a view from perched atop the general store's roof.
The store is located in the upper righthand corner here.
As seen from atop the machine shop roof.
Aha. Foliage now appears trackside between the general store and the coal dealership off in the distance on the two furthest modules.
The completed scene!
From other angles.
Drone footage!
Doug is very happy with the overall appearance of the town of Tyrone.
And...the general store is a huge player in the game!
Every town requires one!
Another look from above.
A final glance down the main road in town with our general store adding a splash of brightness to the scene!
The modules all fit nicely on a special piece of mattress foam in the back of my Toyota RAV4.
On display at the OVAR meeting (Ottawa Valley Associated Railroaders).
Thanks for checking in on this blog posting showcasing the build of the lovely General Store kit from Blair Line Models.
Here I am on the right holding a lovely gift my dear friend, Rob Kazakoff (Kaz) presented me with many moons ago...showcasing images from the train operations of the Friday Night Group!
Be sure to check in later when I share with you the build of the fourth module that makes up the Town of Tyrone...the local coal dealership.
All the best, Mike Hamer, Ottawa, Ontario, Canada


















No comments:
Post a Comment