King of Clubs by Foscale
Being a musician who plays all style of music including Jazz I simply had to have this kit!
Foscale has done a wonderful job of creating a night club that looks inviting to all visitors in town as well as local residents.
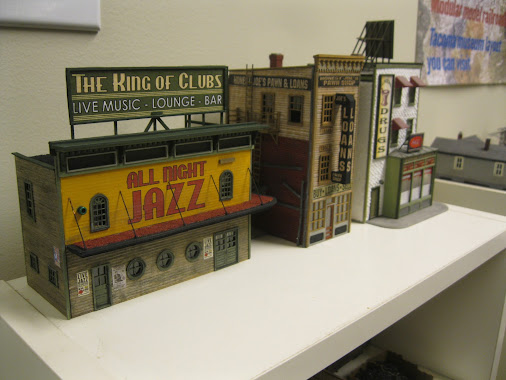
This kit took a week of evening to complete. It's large and colourful ALL NIGHT JAZZ sign adorning the main wall along with the King of Clubs rooftop billboard sign make this structure stand out from those in the surrounding neighbourhood!
I quickly painted and weathered the sidewalk and added a few "little people" for this image.
You can enlarge the images by clicking on them and return to the default look of the page by clicking outside them.
David, Carl and I won't be having the sidewalk in the finished town.
We'll be creating a wooden planked boardwalk around the various establishments.
Doug and Foscale tells us this kit is representative of Jazz clubs and lounges found in the early twentieth century.
The art deco wrap-around awning is a clear example of the means of keeping the rain off the patrons who are waiting in line to enter the club from that time period.
The circular marine-style windows on the first flow managed to grab my attention.
My blues band would create a set of old Jazz standards and would love to perform in this colourful establishment.
A picture of part of the instruction manual.
A close-up view of the finished model "from the factory".
FosScale Models make awesome kits in a variety of sizes and scales.
The sign sheet.
The colour codes for the wood that comes with the kit.
A look at all of the contents from the box.
Bracing instructions with bracing included.
Templates for the rooftop sign.
More templates for the rooftop sign.
The instructions are "to scale" which is nice.
My trusty scribing tool to add texture (carefully) to the wood.
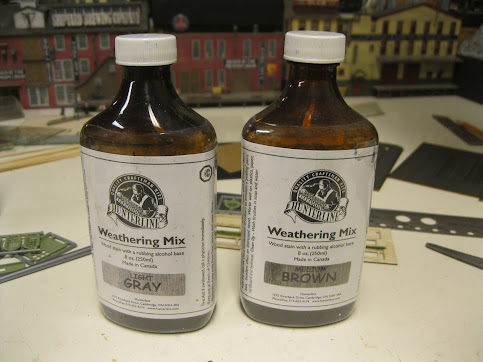
Hunterline weathering mixes helped me attain the colour tones I desired.
Light grey and medium brown.
I've had these two bottles for years and years.
I've cut out the sign and sanded the back of it in order for it to lay nicely atop the clapboard siding using fine grit 220 sandpaper.
I've now run a wash over top the sign and added a couple of detail to hide errors while sanding! Yikes!
I've heard that the difference between a good modeler and a great modeler is...the great modeler knows how to hide his mistakes! Hehehe!
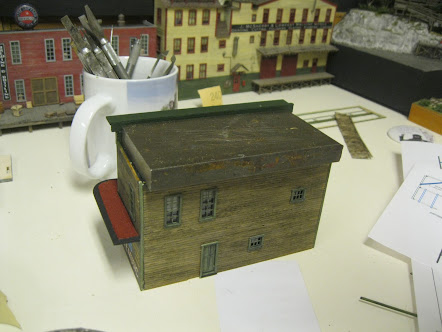
I have added corbels and trim to the cornice.
The "peel and stick" nature of the kit allows for the modeler to look like a "master" painter!
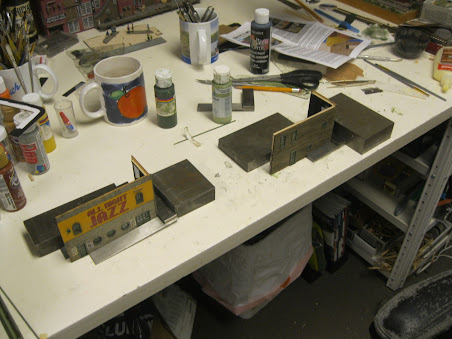
Using my squares and weights, I begin to assemble two wall sections
A weight and a square is on both sides of the two walls to offer pressure...thus ensuring everything remains in place while the glue sets.
As I always do with rectangular buildings, I create two "L"shaped sections of adjacent walls first. Then I let them set overnight. The next day I bring the two groupings of two together to arrive at the four-walled structure.
Then, I use my weights as added pressure to ensure the two pairings remain perfectly square.
That wrap-around awning comes in three pieces.
I tape off the area where I do not want roofing material.
Rather than using sifted sand, I sprinkle on some tan ground foam and glue it down with a watery mixture of glue with some dish detergent to help break the surface tension.
I then paint it the desired colour when dry.
Looking good!
I'm liking the look of this kit already!
The underneath of the awning shows the three levels.
For the flat roof I've decided to go ahead with the ground foam once again rather than light sand. Either works our okay!
The wire supports are cut and painted black. A little dab into my carpenter's glue helps to create the little ball at the end which will act as the base.
With the glue still wet, they are attached in place.
My heavy weight will ensure the roof stays in place while its glue sets.
I work atop the template to create the large rooftop billboard.
Et voila! The building is complete.
I brought it out to see how it will fit in the scene on David's layout.
It won't end up here...rather at the far end of the block.
But I like the look of it anywhere!
Here is where the building will find its final resting place. Because it is on this "opposite" corner, I will recreate the billboard so that it will face the viewer when David's version of the kit arrives town. It is currently on order.
Here I am holding my Fender Telecaster guitar in one of the three bands of which I am a member. That's my daughter, Alison, holding the camera off to the right of the picture.
Thanks so much for checking in on my build of the King of Clubs HO scale kit from Foscale.
To see other builds of mine over the years , check out the blog archive in the righthand column near the top of the page.
All the best, Mike Hamer, Ottawa, Ontario, Canada











No comments:
Post a Comment