Foscale Department of Docks Kit
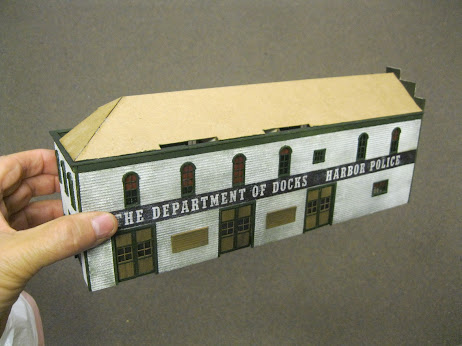
Foscale Models offers this wonderful looking kit which was inspired by the original Dept. of Docks in New York City.
The original structure was built in the 1800's and is still standing today. A pier comes with the kit and it extends out over the water.
Pre-cut standing seam roofing sections make for a fine scale east to build tower roof.
My completed version of the kit.
An image seen from a Google search of the Foscale website.
An image of the structure as it appears today.
Four pages of detailed instructions are included in the kit.
Weathering ideas are discussed and modelers have the option of using the clock faces that came with a pre-determined time...or they can create their own time with laser-cut hands found in the kit box.
The pre-determined time...
...or blank clock faces to make your own time.
I needed to create a specific time as I had recently built another kit with a clock tower...the FSM "Seafood Emporium" where the time is 3:24.
The two structures will reside in the same harbour town...so the time on both clock towers had to line up!
One of the instruction cards.
Colour-coded stripwood sections.
The open kit box.
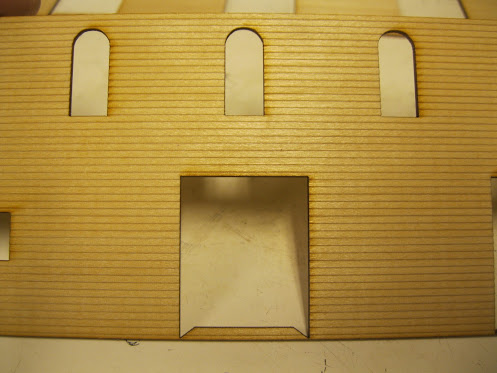
Some of the wall sections.
Clapboard siding.
I offered up a wash of Hunterline "Light Grey" weathering mix.
The weathering mix.
I then applied a "wash" of FolkArt "Parchment" acrylic paint.
I then dabbed on a "touch" of sage green using a sponge. I followed this with a similar sponging of white acrylic as I found the green too dark for the colour mix I wanted.
That's better! Now it's time to glue the sign to the wall. I have pre-weathered the sign.
My blunt-ended tool comes in handy when tucking the sign down into the grooves of the clapboard.
It's coming along!
Time to address the doors. These were easy to paint as the overlapping sections were "peel and stick".
I've decided to create blinds in behind the windows so a maroon painting on a sheet of paper will do the trick. Once the paint dries I will then cut out the blinds and glue them in behind the window openings from the interior of the building.
The blinds are in place on all four wall sections.
Adding the corner trim.
The corner trim has been painted green before being glued in place. Whenever I assemble a rectangular structure I first create two "L-shaped" sections and let them dry overnight.
Then the next day I glue the two sections together to form the full body of the structure.
The trim atop the walls is now going in.
It is angled at the corners as apparent in this image with one section still to be painted.
The interior roof supports are now in place.
A side view.
The other side.
An aerial view with the final piece of trim at the back still to go in place.
That piece of trim is now atop the end wall and the cardboard base for the roof is glued in place.
Coming together.
A look from the rear end of the structure.
Time to create the base for the clock tower.
Again, peel and stick sections are used which makes painting so much easier!
The upper section of the clock tower looks like this in the early phase.
Tab and slot design.
The peak of the roof.
The peak contains layered sections as well.
I like the two-tone green here.
Just for fun I snap yet another image of the yet to be finished clock tower.
Aha! Those very tiny hands for the clock...both the minute hand and the hour hand.
Time to assemble the clock area.
Peel and stick sections help bring the clock face to life.
3:24 is the time on the clock to match the other structure that will sit nearby on the harbour front.
I'm liking this!
The tower begins to take shape!
A little bit of brass colour delineates the peaked roof section from the larger tower base.
Nice!
Aerial view from the back with roof sections awaiting their turn to join the structure resting on the shelf.
Close-up view.
Side view.
Zenith view.
The two structures find each other...one complete and one under construction.
At least the times will match!
And they do!
The inner section of the gabled roof parts.
Nice!
A different gable juts out from the roof to the right.
A closer view.
I tape the sections in place after glueing to ensure all pieces of cardboard remain in place as the glue sets.
Coming along.
Indeed!
The rolled tar roofing comes in the kit as a sheet of lined paper which I will paint black and weather.
It is a pre-cut standing seem roof. My pencil mark on the next layer of roofing shows where I must snip the end with scissors,
The peaked section.
Time to deal with those gables.
Finished!
Varying views.
I painted the roof black.
When the black paint dried, I ran some grey powders over top.
This creates the weathered look to the roof.
Additional venting and piping now go into place.
The entire structure is weathered the way I like.
When I brought the structure over to David Gardner's home...
...he loved it!
"Just perfect!" was his response.
I really enjoyed this build and the structure will eventually find a home on the "yet to be made" dock on David's layout.
The two landmark structures...just two of many that will make up the scene on his harbour front area of his layout.
And when I am not modelling structures, I share the dispatching chores at a massive outdoor large scale model railroad which is heavily into operations. My co-dispatchers are Doug Matheson and Bill Sn3 Scobie. We alternate on a three week rotational schedule.
This link will take you to a blog posting covering one of our many sessions we hold each summer.
Simply copy and paste the address below into your computer's browser and it will take you there.
https://gardenrailroadottawa.blogspot.com/2022/09/session-14-september-17th.html
Thank you for checking in on my build of the Foscale Models "Dept. of Docks"
All the best, Mike Hamer, Ottawa, Ontario, Canada

.jpg)


