Pickle Car in HO Scale
LASERkit by American Model Builders
Seeing as David now had a pickle factory on his layout, the ownership of a pickle car became a necessity.
Remember, you can enlarge the images by clicking on them and return to the default setting by clicking outside them.
We found a "conversion kit" for our pickle car which came from the same company that offered the factory...LASERkit from American Model Builders.
You must supply the flatcar though. Not a problem as David had a spare one hanging around.
This is the image which came with the pickle factory showing an all boxcar red pickle car.
Another angle of the factory with the car residing on the spur.
A photo of the kit offering.
Two choices of flatcar. one an Athearn model and the other a Tichy model. Note the stake pockets left on the upper version, the Athearn one.
These are both 40' flatcars.
Note how we decided to leave the lower section black.
The starting point.
Because this is an Athearn offering, we must first remove the existing brake stand as the kit offers one.
The stand is removed and I have "test fitted" the wooden deck.
Before glueing the deck to the car I gave it a wash with my "Colonial" furniture stain.
The deck is now in place.
Time to construct the four pickle vats which will carry the precious cargo.
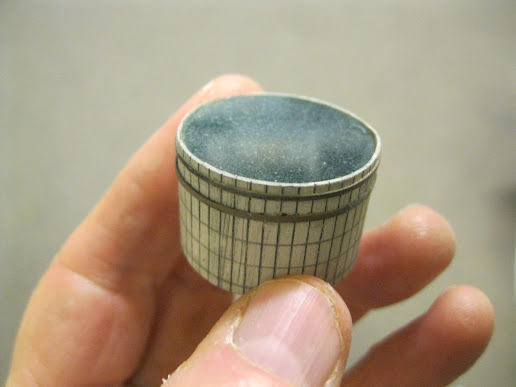
I painted them a "parchment" colour then re-scribed the lines. This is the same colour I used on the vats for the factory. They could be painted any colour really.
Looking good!
The process from bottom to top with the original vat, then with some paint and finally with the lines having been re-scribed.
To build up the walls of the vat it is simply a matter of glueing the "puzzle pieces" together to create a frame for the "wrap-around" walls.
Top and bottom in place.
Getting there.
A well designed kit for sure.
All four walls sub-structures are ready for their walls.
While still on the "flat" I drew in the location for the five bracing bands.
Then I first glued the walls around the inner frame and let them sit overnight with elastic bands holding them together before adding the official bracing bands around each vat.
Aha! Some pickle brine comes in a flat disc with a removeable adhesive backing! Cool!
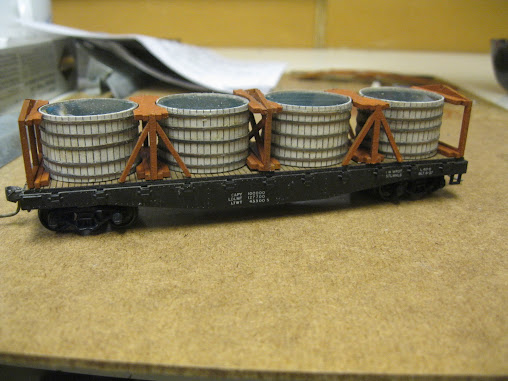
The four vats are in place and I am following the instructions closely to create their bracing assemblies which make up the super structure above the flatcar.
A view from the side.
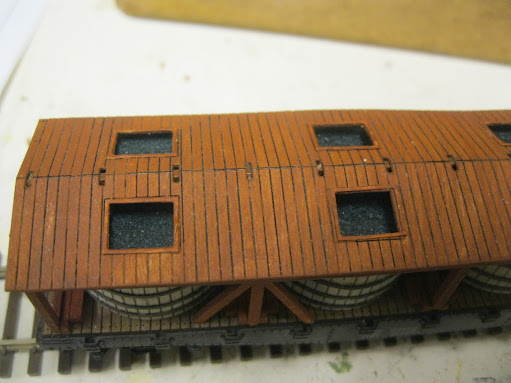
The framework for the roof goes in place.
Then the roof finds its home.
While not quite complete, I bring the car over to David's home to see how it will look next to the factory. I'm liking the appearance!
Adding the rims for the hatches.
Ensuring the roof remains in place while the glue sets.
Some of the latches for the hatches - hey that rhymes!
A nice additional detail.
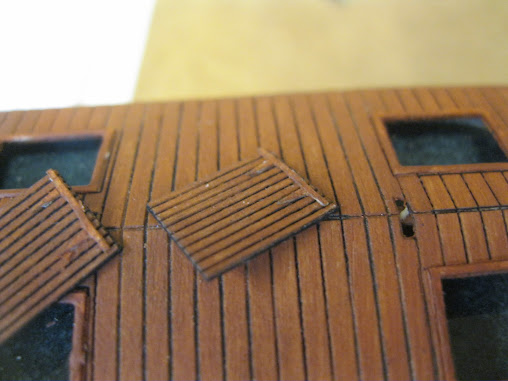
A wee touch of glue is all that is required for the hatches.
All eight are now in place.
Note the small brake wheel that is offered in the kit. It is located to the left of the sheet with two being offered up, just in case!
The finished car plies the rails on my Boston and Maine layout for a brief moment in time.
As located on the North Siding in North Dover, NH.
She's a beauty!
This was a nice weekend project.
David will have a little bit of homework to do...determining the lettering for the the pickle car!
Thanks for checking in on this wonderful little project.
All the best, Mike Hamer, Ottawa, Ontario, Canada


No comments:
Post a Comment