Tidewater Wharf Lighthouse - Builders In Scale
The fourth structure I took on for my build of the Tidewater Wharf diorama was the lighthouse.

Here is the finished diorama which I brought out to display at a recent OVAR dinner. OVAR is the Ottawa Valley Associated Railroaders, a dinner club that meets once a month.
You can enlarge the images by clicking on them and return to the default look of the page by clicking outside them.

I really enjoyed my time building all four structures for the diorama from Builders In Scale!

Here I am beside the model at the May meeting where I was the guest presenter.

The diorama is temporary.

The four structures will be removed and placed on my friend's layout.

My friend, David Gardner is a retired university professor here in Ottawa.

He hails from England and has begun construction on a British Railroad in his home here in Ottawa, Canada. David is a free-lancer who wishes to have a New England coastal village on his layout located at the end of a short branchline of the double track main. Yes, two continents will be represented on his model railroad!

With the light nearing completion I've simply rested it atop the rocky outcrop on the diorama.
Let's head back to the initial phases of the build.

The components of the build. Rather simplistic really!
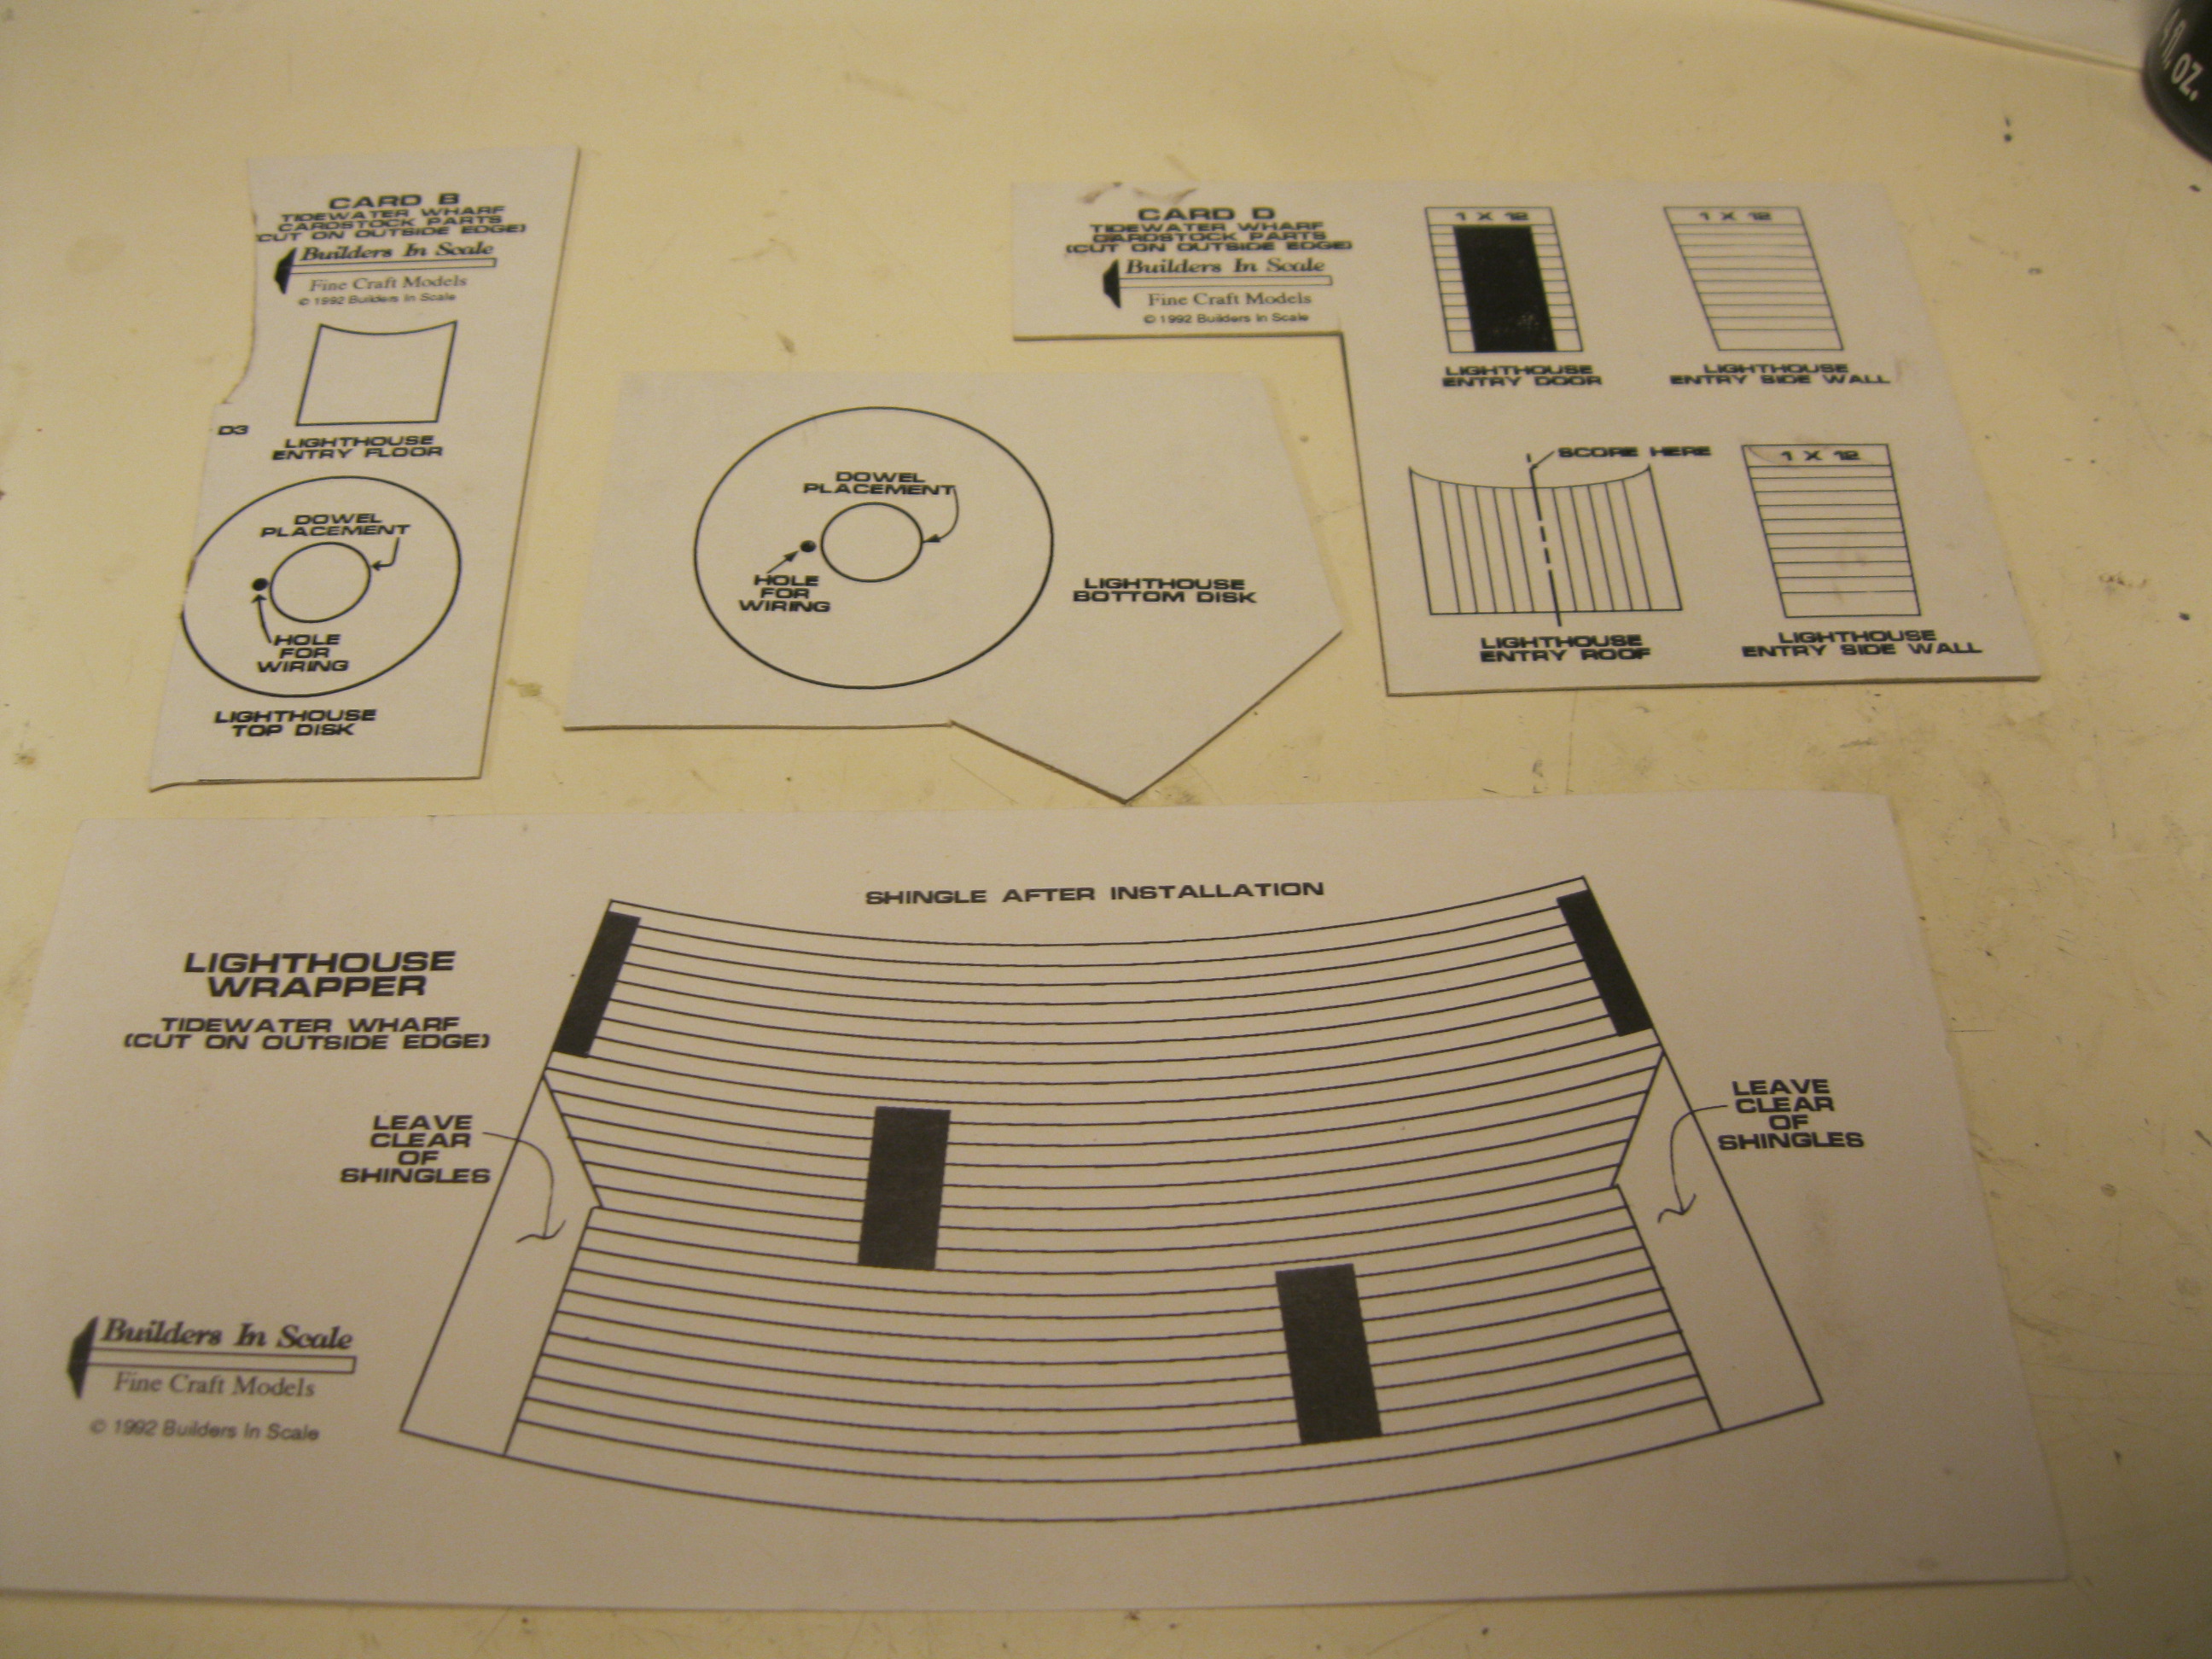
Some of the cardboard templates which will be cut out and applied to the lighthouse.

The main core of the lighthouse body will be constructed between these two circular cardboard sections.

I've purposely added holes for wiring should David wish to retro fit the light to make it a working lighthouse.

Should he require wiring, I have chosen to drill a cavity directly through the interior support.

The interior support is glued to the smaller top circle and the larger bottom one.

I've painted the sections. The lighthouse will appear black and white with sage green windows and doors.

I've painted the inner side of the wall black so that if you peer through the windows you will only see the darkness of the interior.

The outer side of the curved wall is marked to assist you in lining up the cedar shingles when the time comes.

The plastic glass for the light is a single segment that you score to create the folds.

The end of a guitar string from my collection of old strings comes in handy for the top of the light.

Makes a nice lightning rod appendage to the lighthouse.

Because the walls are rounded, the shingle strips travel around the curve in a natural fashion.

Getting there!

I'm liking this look!

All shingles are in place and the windows and doors have been taken into account.

Looking good!

The top section is coming along.

Time to add the brass handrails.

They came in a single section that had to be bent to accommodate the curves of the top walkway.

The shingles have been painted white.

Time to make the doorway entrance.

Nicely done.

I opted for full on black windows and doors rather than the initial choice of sage green.

I felt the black and white appeared "stronger".

Time to find a good location for the light.

Just as in the picture on the kit box, the light will appear at an angle to the other structures.

We've already seen this photo. It showcases how the light stands sentinel on the point!

Painting the base black starts to bring the scene into focus.

Plaster of Paris was used for the rocks. I then used a square chisel blade to carve the rock face. A wash of black acrylic brought out the rock tones and some ground foam added nicely to the mix.

Coming together.

The light is now on its supports...some weather-beaten and leaning slightly!

Some wall casting were included in the kit, but they weren't tall enough for the boat ramp so I simply fabricated a concrete wall along the front of the diorama.

Masking tape will hold the water pour in place.

Some trackwork is in evidence and the pilings are weathered!

The water pour begins using Liquitex Gloss Medium and Varnish.

A close-up shot.

I created waves at close intervals as they approach the land.

A closer view of the waves dusted with white paint for the crests.
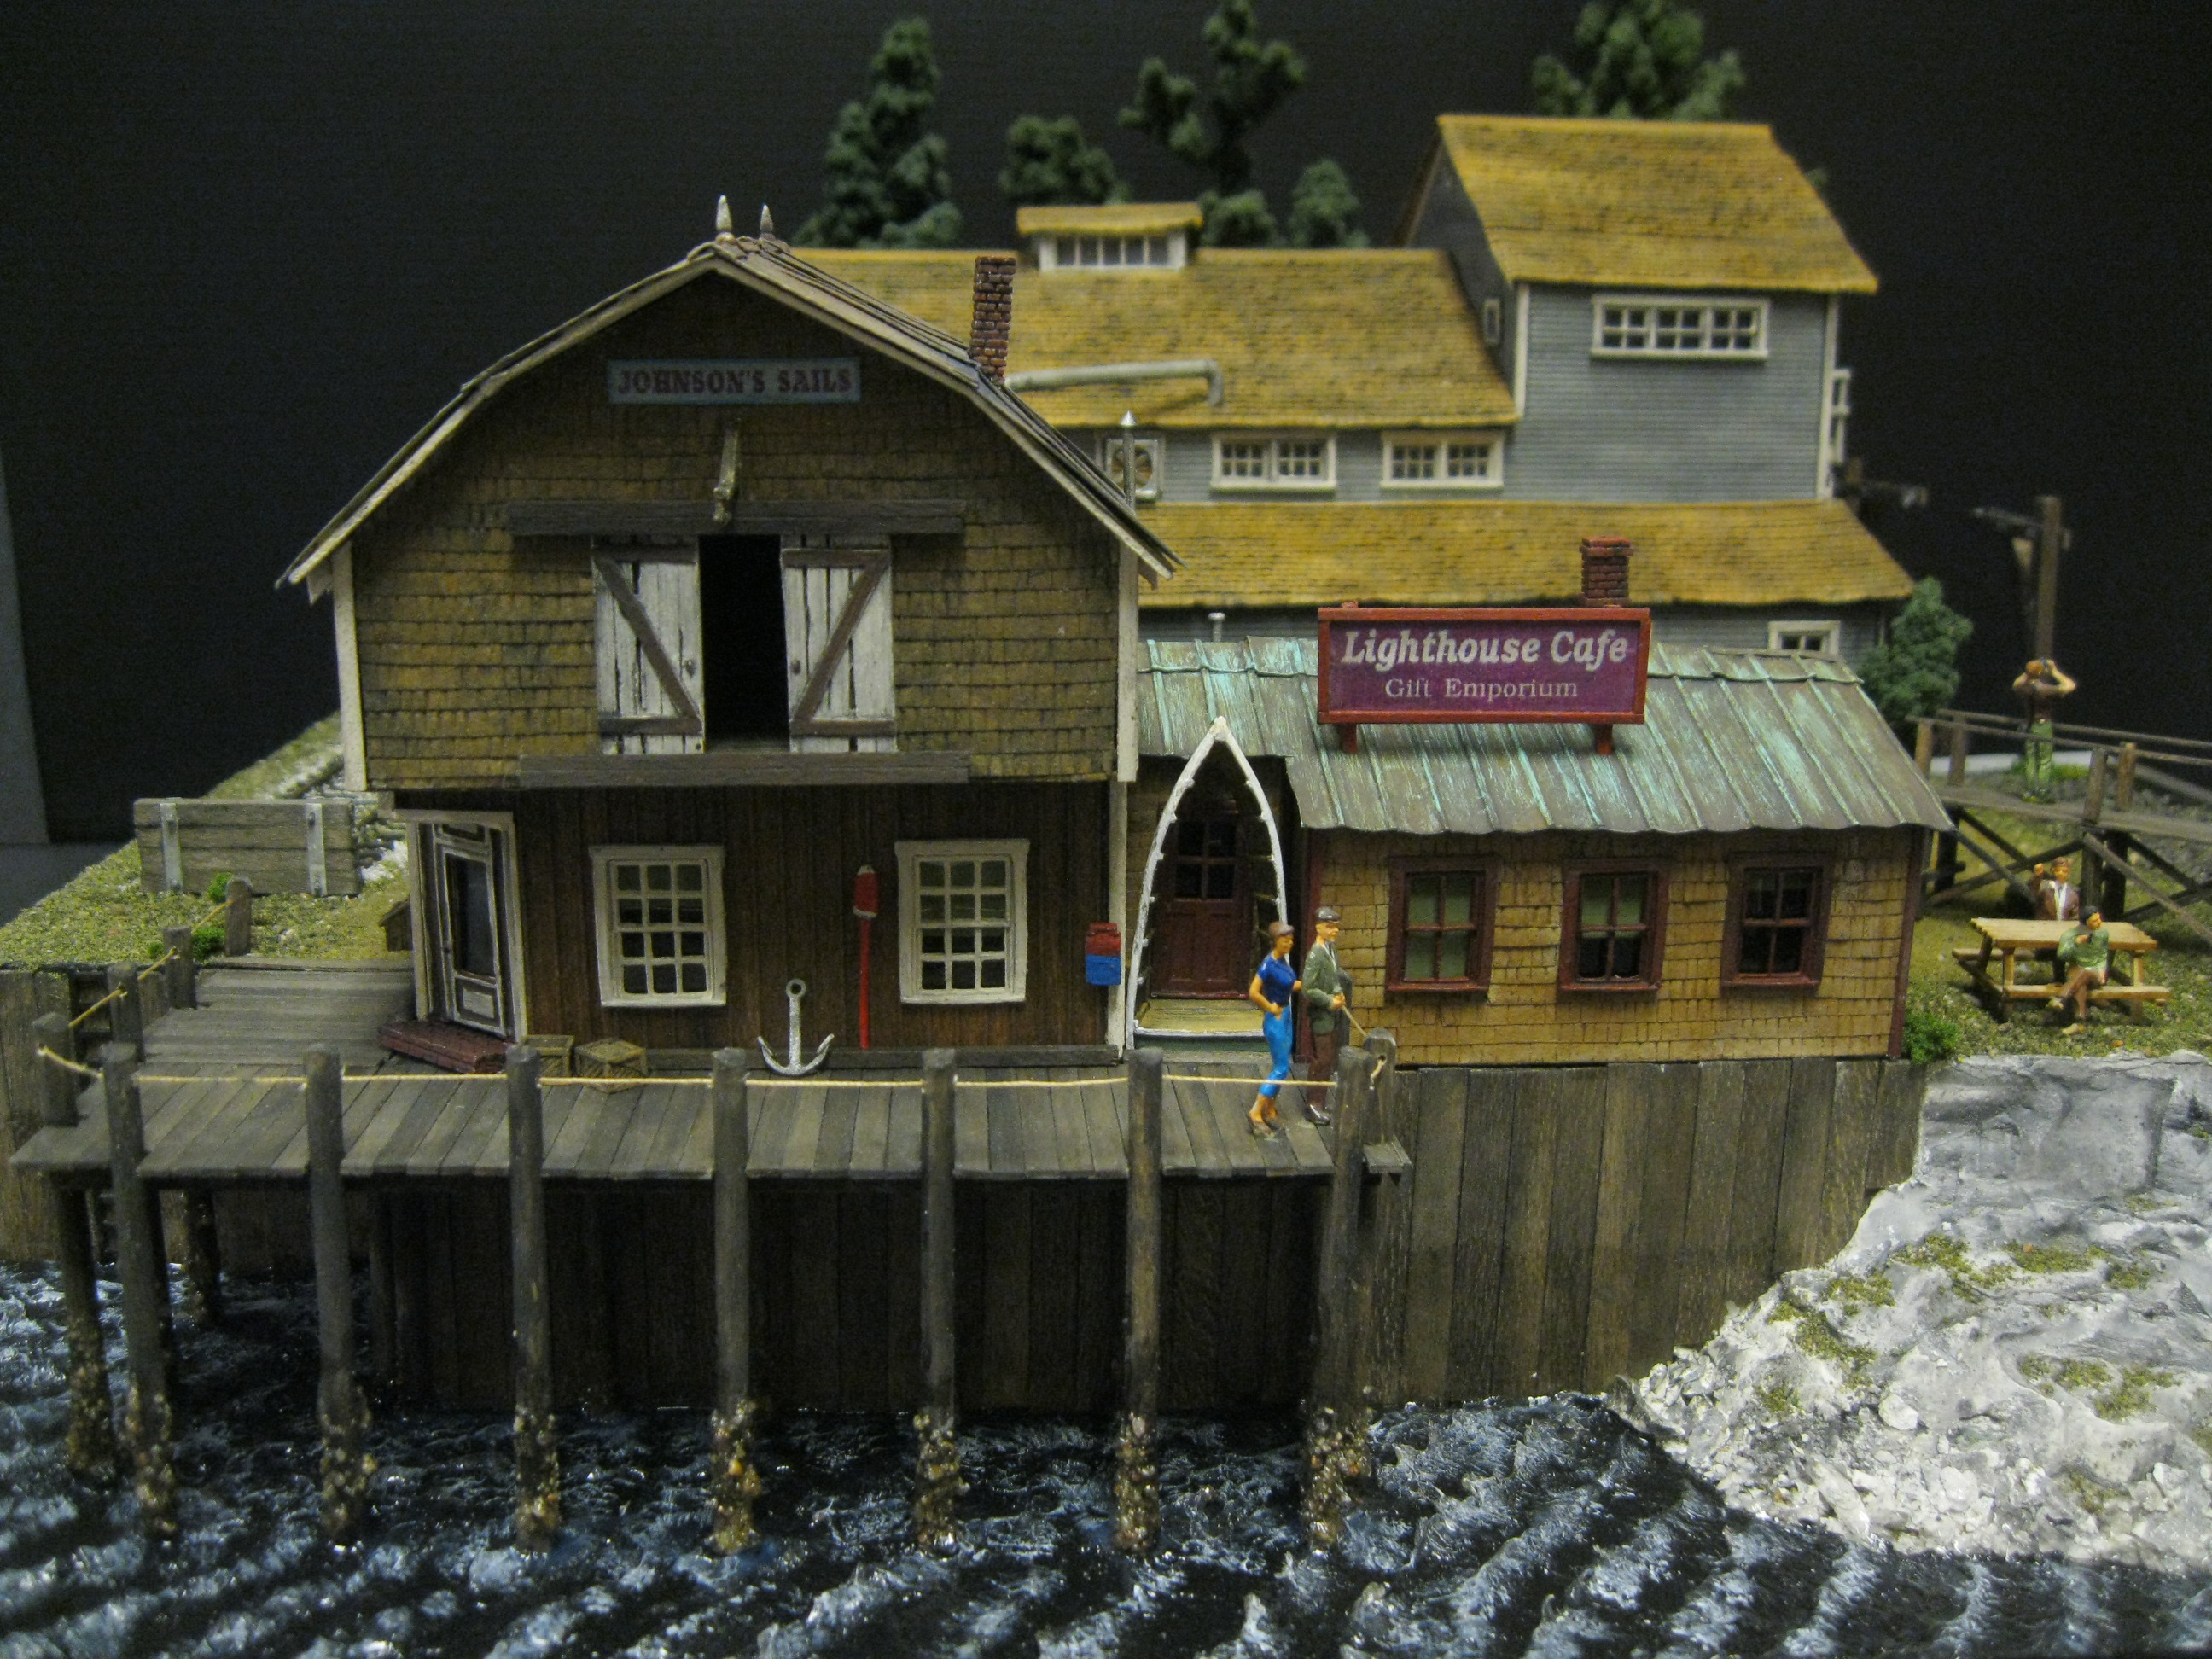
The left side of the diorama with the sailmaker structure attached to the diner.

This sure was a fun build!

Thanks for checking in!
Now to get that old Fender Stratocaster back out for a song or two!
All the best, Mike Hamer, Ottawa, Ontario, Canada
No comments:
Post a Comment