McReady's LTD
Pickle Packers and Condiments
This is a wonderful kit offering from LASERkit by American Model Builders.
I have built it at the request of my friend, Professor David Gardner.
The structure will ultimately find a home in his harbour town.

The structure is based on an industry located in the province of New Brunswick in eastern Canada. McReady's Limited of Saint John, NB was established in 1883.
Remember, you can enlarge the images by clicking on them. Return to the default look of the page by clicking outside the image.

The company originally packaged pickle products along with the production of vinegar.

The outdoor brine vats are included in the kit and add greatly to the realism of the facility. The pickle car does not come with the kit although a "conversion kit" can be ordered where you create a pickle car on a flatcar that you already own.

The kit instructions are very clear and concise offering many exploded images as you progress through the build.

The kit contents.

The contents splayed out on the workbench.

Note the "tab and slot" design for ease of wall construction.

Bracing is critical to prevent warping of the painted walls.

Corner bracing is predetermined based on where the tab and slots are situated.

A nice fit!

Voila, one corner done!

Time to paint the walls, windows and doors. Trim will be grey.

To achieve the desired colour which matches the kit as built by the manufacturer I combined "bright red" with "pumpkin orange".

That's the colour I desire for the building!

A quick wash of black acrylic paint tones things down nicely.

The windows go in.

Time to glue the signs to the walls. A little pressure from my embossing tool allows the sign to be tucked in nicely to the clapboard siding.

The doors are created with "peel and stick" material.

Coming along nicely.

My heavy weights allow for the bracing to set which holds the foundation to the walls.

I have lifted the weights to show where the foundation is braced to its wall section.

The upper wall goes in.

The tab and slot design makes it easy to assemble...like completing a jigsaw puzzle!

The sign is tucked in place.

The bracket which acts as the guide for the sliding door finds its location.

My weights, clamps and squares come in handy to ensure perfect alignment.
A closer view of the square.

The weights keep the walls squeezed together while the glue sets.

The inner floors will assist in bracing the full structure.

The lower floor is in place.

Another look.

From a different angle.

Coming along nicely.

The weights assist in keeping the roofing in place while the glue sets.

The roof makes use of the tab and slot design as well.

The lower roof is now in place.

To create a cap or roof ridge I begin with a wider section of stiff paper to get a good crease. Then I will use a straight edge and X-Acto knife to cut it smaller...narrowing it down.

Painting below the eaves.

The roof is materializing.

The rafter sections are long lengths with little jut outs for the rafter tails.

A side-on view.

The rafter tails can just be seen at this angle.

The building develops.

A look from the other end.

A look at the elevator assembly.

The elevator assembly is well designed.

It goes together in a jiffy!

The door is a laser cut individual piece tucked in behind the wall section.

The platform and railing go together well.

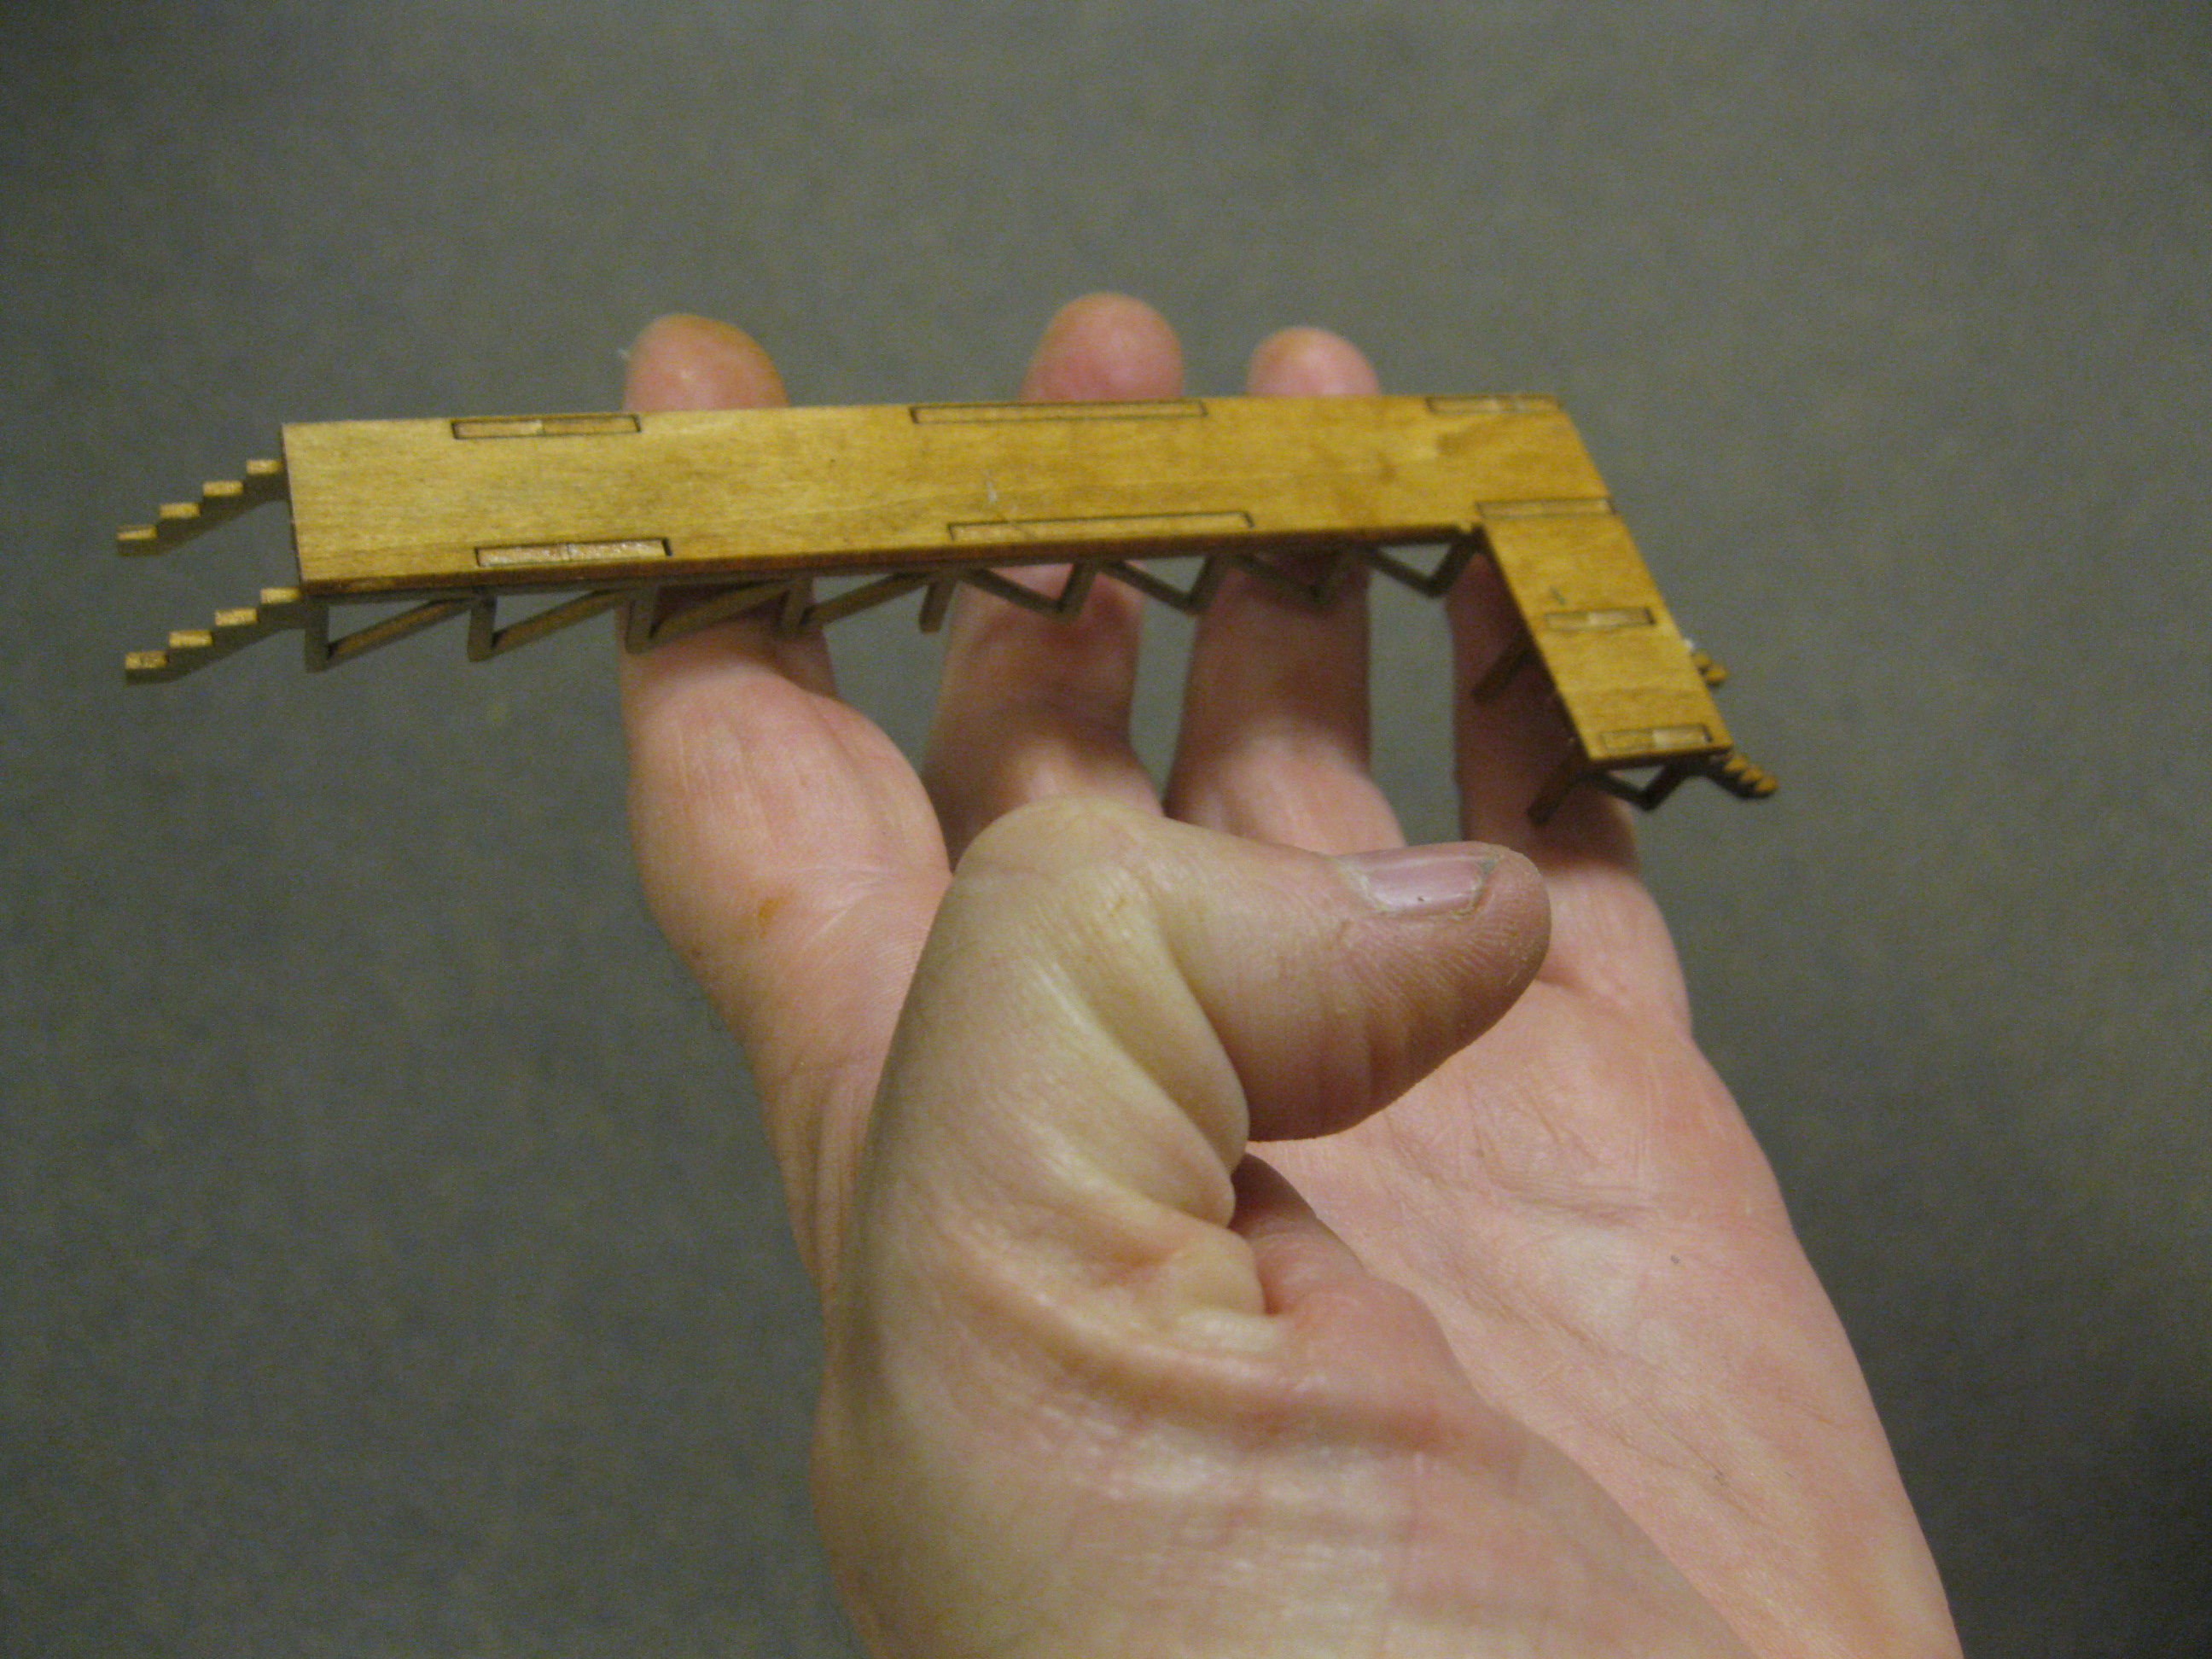
The ladder does not come in one piece...you have to assemble it as well.

No problem at all.

Some simple lining up of material...

...and the ladder takes shape!

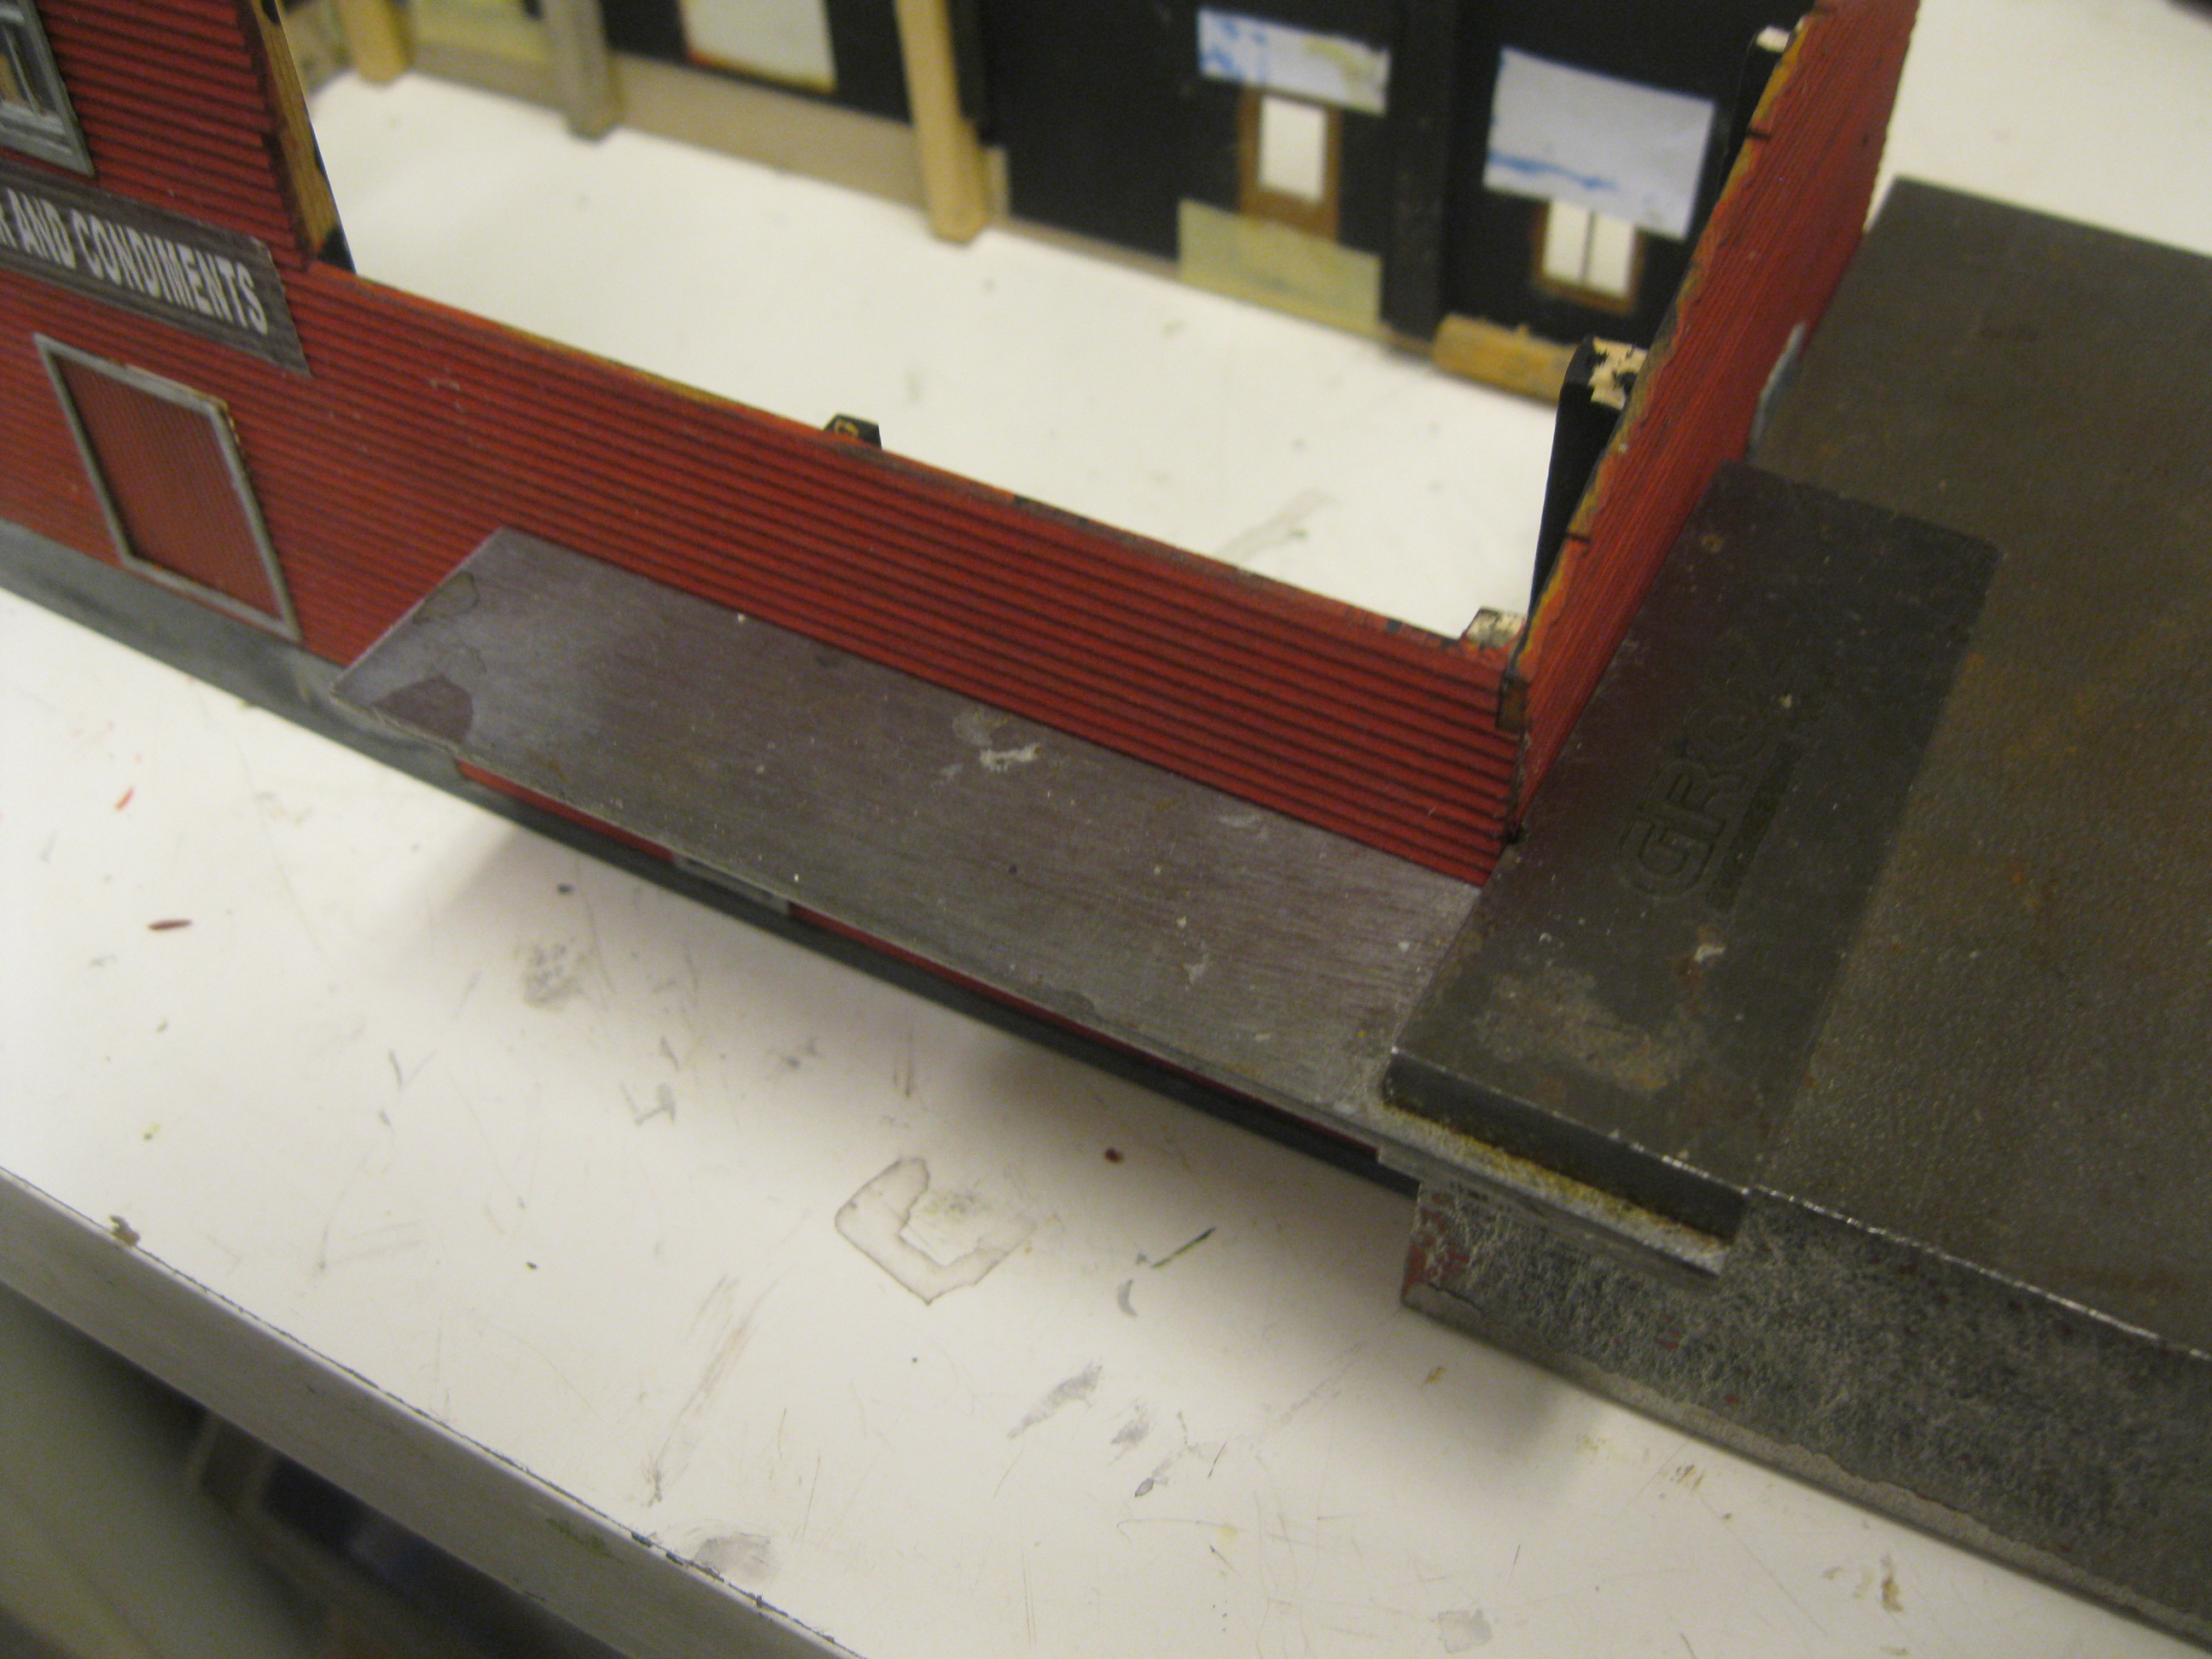
The assembly for the ramp is easy as well.

It went together in no time at all.

The individual boards were stained first then washed with black acrylic paint.

The floorboards for the loading docks were addressed with furniture stains.

The lower bracing.
Tab and slot design again.

The look below.

A side view.

I wanted a lighter colour for the brine vats so parchment works fine!

Once the paint is in place, I scribed the divisions with my X-Acto blade.

The finished structure.

A lower angle view.

Side view with the elevator adding to the structure.

A view from the back.

The other side.

The ramp is in place as are the loading dock areas.

The loose sections required for the internal structure of the vats.

The assembly comes together.

The interior of a vat.

All four taking shape.

Looking cool!

The sides of the vat have been painted and now sprayed in order to wrap around the internal framing.

Elastic bands come in handy here.

The one vat with the open top exposing the pickle brine.

The platform which holds four vats.

It is an elevated platform.

A couple of ladders allows the employees to climb atop the platform.

The finished model.

Varying views.

This will look nice on David's layout.

A lower view.
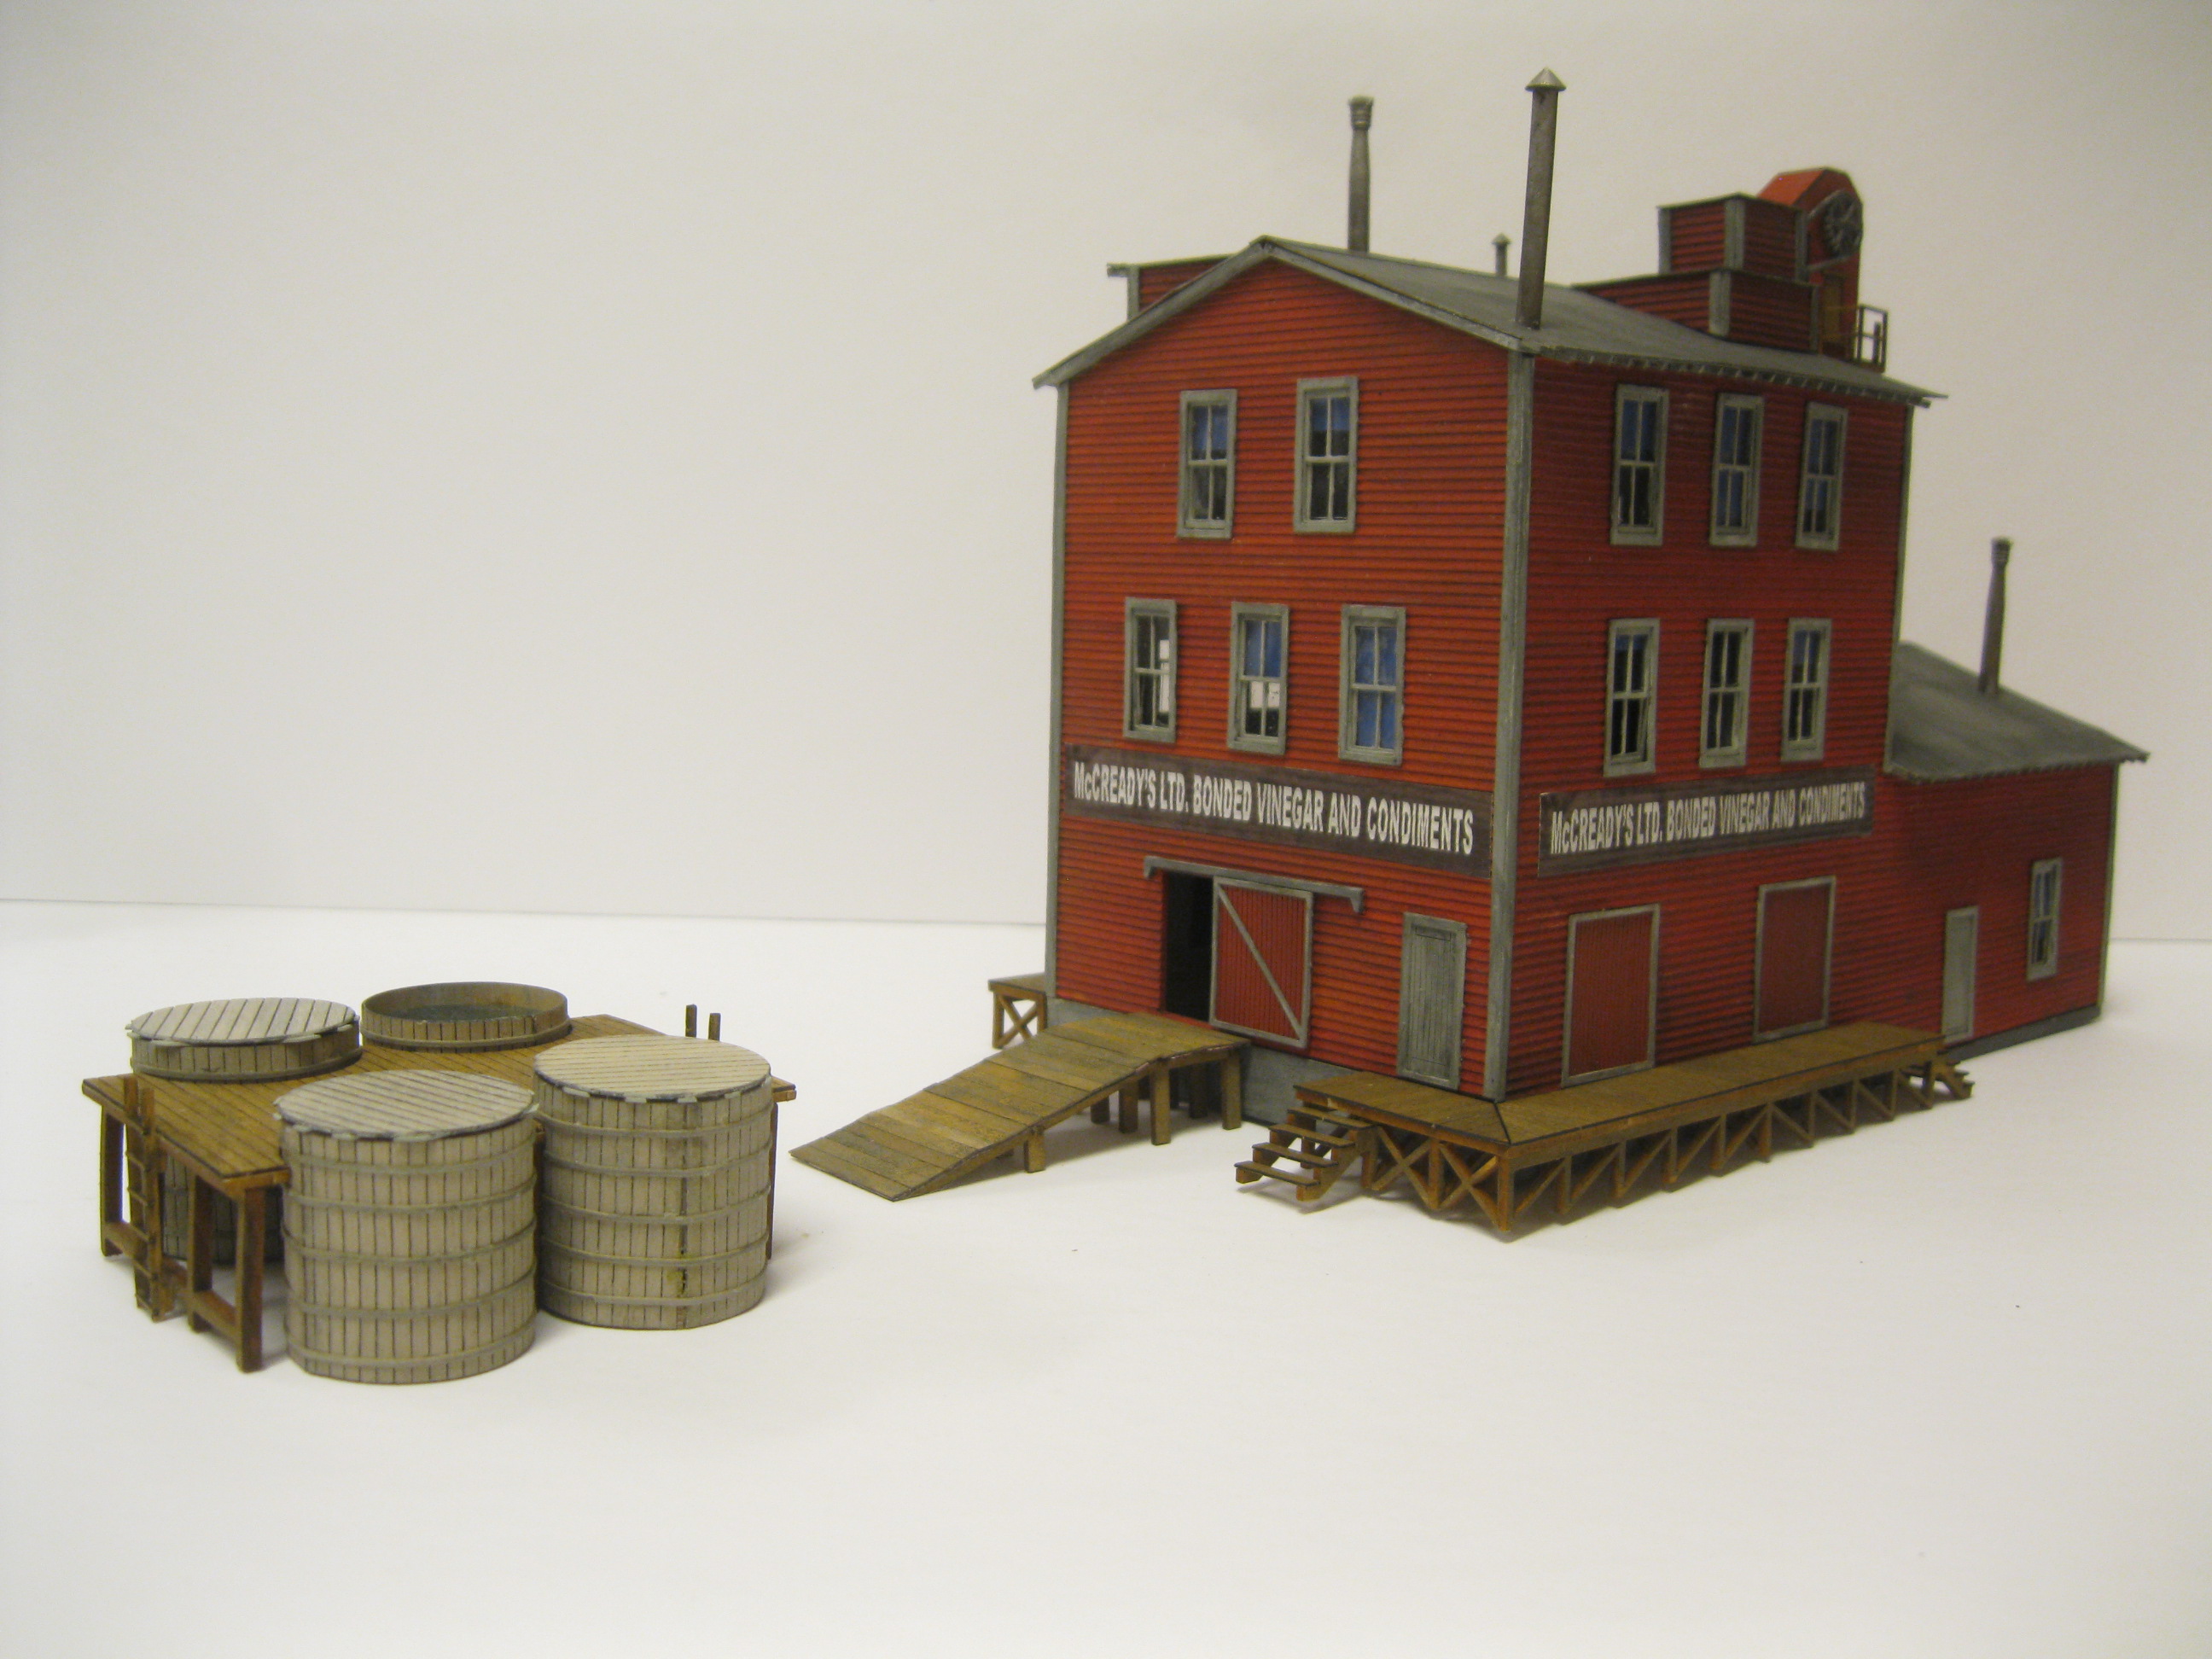
This is an impressive structure.

The brine vats up close.

At some point David's scene will appear something like this!

The next phase will be to build the pickle car.

Here is a black and white image of one.

I like the colours in this particular model!

My friend, Carl Lindon, snapped these next three images of the pickle factory at the location where it will reside on David's developing layout.

Carl constructed the beautiful viaduct from scratch.

The pickle factory appears very comfortable in the scene!

I have shrunk to HO Scale all of a sudden! This image was taken in Brockville, Ontario while attending a ribfest!
Thanks for checking in on the build of this lovely American Model Builders structure.
All the best, Mike Hamer, Ottawa, Ontario, Canada
No comments:
Post a Comment