Monday, June 28, 2010

Berrigan's Boat Works Background Structure Evolves from Foscale Kit Winger Paper Bag Co.


Foscale's backdrop buildings are excellent offerings for my current needs as I am planning a shelf layout to be built along the walls of my crew lounge. The shelf will be 16 inches deep. Berrigan's Boat Works began with the Foscale Kit #17 Winger Paper Bag Company. A friend scanned the sign and I reworked it to name the structure after my friend, Gerry Berrigan.


I like the look of this stucture with its slight changes to the elevation seeing how the section to the lower left juts out a bit. The loading dock and its concrete supports are interesting as well and the triangular peak on the roof certainly adds visual interst.


A front view showcases the windows, doors and overhang. While this building really appeals to me, I want Berrigan's Boat Works to be a larger facility so I decided that a scratchbuilt extension would be in order.


Let's step back in time and review the making of the kit.
Here is the original set of instructions that came with the Foscale kit known as the Winger Paper Bag Co.


First step, brace the sides and paint the interior to help prevent warping.


Rather than paint the exterior walls, I gave a wash of white acrylic.
By giving washes, you can always add more until you achieve the desired results.
If you paint directly on, it is more difficult to remove the paint if you feel you used too much.


Paint the windows and doors.


Here's a great little tool for snipping the details off the sprues.


Very little residue is left as this tool allows you to get in really tight.


A trusty burnishing tool to press down on the lettering.


I like the desired effect.


A closer look at the burnishing tool.


Why not place the building with other background structures I've already finished?


Rearrange things a bit.


Yup, I really like the appearance of the Winger Paper Bag Co. now referred to as Berrigan's Boat Works.


I want a railroad spur to work Berrigan's and I thought that the short loading platform offered in the kit was more for vehicular traffic, so this interesting extension was born!

To create this add-on, I took parts from a variety of kits I had hanging around on the shelves. The wall section was easy...it is one clapboard wall from the Bar Mills' "I-Kit". I wanted unique doors and larger windows, so I robbed them from a Full Steam Ahead kit I will be building. The kit is the R.G, Shinnie Boatworks and I am not too concerned with one wall of that kit missing its windows and doors as that wall section will be the back wall of the structure and will never be seen by viewers in the room. The roofing came from leftovers in another Bar Mills kit and the beautiful loading dock is a Ed Fulasz plaster offering.


Some of the loading dock detail can be seen here. I haven't glued any of the detail parts to the model just yet...only placed it for the photograph. I will eventually create some steps to join the upper ramp with the lower one.


A 45 degree angle view of the completed structure. I really like the look of the extension as is fits in nicely with the original building.


I am really excited about how this amalgamation of kits and kit parts turned out and I know the Berrigan Boat Works will make a wonderful contribution to my new shelf layout! Have a great day!  Mike Hamer

To view a more in-depth account of this build at the Railroad Line Forum, paste the link below into your address bay above.

http://www.railroad-line.com/forum/topic.asp?TOPIC_ID=27442

Thursday, July 30, 2009

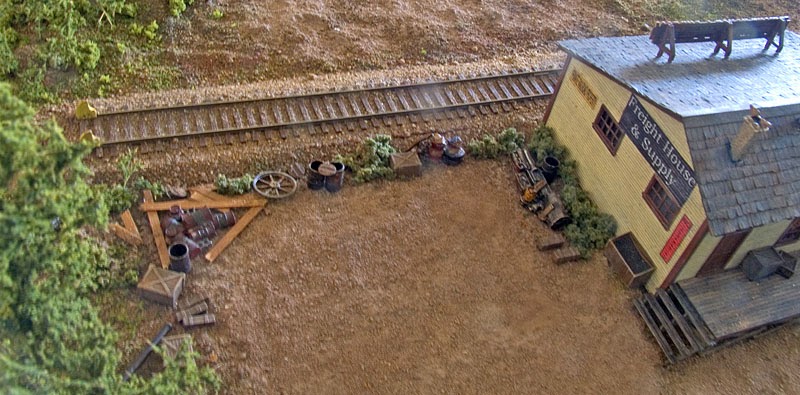
Full Steam Ahead - Freight House & Supply


A friend, Ron Newby, is building a series of modules for a portable railroad he showcases at train shows and he needed some building completed before a specific show deadline. I offered to do one for him and I selected a structure from a manufacturer whose kits I had not worked with before. Full Steam Ahead is a company based in Ontario which produces laser cut structure kits and ships them in these beautiful cigar style boxes with a lovely imprint of a steam locomotive on the cover. I was exited to try out a new kit from a new manufacturer.


The kit is a freight house and supply structure that would be a perfect fit on any model railroad. Opening the front and back covers of the instruction manual provides you with a fine example of how the finished product appears.


Ron gave me the liberty to select any colour scheme of my liking, so I chose to paint the structure in Boston and Maine colours, of course! Depot Buff and Maroon. The image above shows a faded and aged railroad shed where the maroon has turned to a more brownish colour - a nice combination in my books!


I painted the wall sections using an acrylic colour called 'sand' and a trim colour called 'coffee bean' over top a maroon base. Note the grooves along the top of the wall sections. These are cleverly designed to allow for the roof rafters.


A great feature of this kit are the many loading docks that surround the structure. I chose to add supports front and back creating an 'x' formation. Staining with an alcohol and ink combination provides a weathered look to the wood.


Another nice feature to this kit is the inclusion of rafter supports. Above you can see the rafter tails after having been applied with the kit in an upside down formation. Note the wraparound nature of the decking.


Here is a three-quarters view of the completed structure with many of the detail parts on the loading docks.


The structure as seen from another view. I particularly like the stairs leading from the dock to the ground.

Finally, a side view showcasing the nice sign that comes with the kit. Now that it's done, off it goes to Ron for his modules. It was a joy putting together this kit and I must congratulate Joe Rutter from Full Steam Ahead who has made such a lovely kit!
To see a more detailed account of this project with many more images, check out the link below to the Railroad-Line Forum thread I created.
To visit Full Steam Ahead's website...


Here are some pictures that my friend, Chris Lyon, snapped of the finished model on Ron's module.


I like how Ron has detailed the scene.


Lots of little "doodad" items bring the property to life.


Nice view from the side.


A front view.

A close-up from the vantage point in front of the module...this shot taken before the detailing of the area.


Nice side-on view.


From above.


Like the vehicle and the little people.


Looks like business is brisk.


Ron is talented when it comes to module construction and finish.


I'm proud to have been able to build this structure for my good friend Ron.


An aerial view.

From the back of the module.


Thanks for checking in on this fun project.  Have a fantastic day!

To view an in-depth account of this project at the Railroad Line Forum, paste the link below into your address bar above.

http://www.railroad-line.com/forum/topic.asp?TOPIC_ID=26388

Wednesday, March 18, 2009

Craftsman Structure Build Listing on Forum Group

A complete listing of craftsman structure builds can be found at the Railroad-Line Forum, an on-line discussion group to which I belong. The link below takes you to the thread containing the listing.

http://www.railroad-line.com/forum/topic.asp?TOPIC_ID=25239

Wednesday, February 11, 2009

Kitbashing - The "Art" of Curren

Many of us have marvelled at the numerous unique structures Art Curren (and others) have managed to create through the simple act of combining and changing parts from typical offerings of manufacturers over the years. Yes, they have managed to turn the ordinary into the extraordinary!

This posting showcases a couple of rudimentary kitbashes that I built when I first got into this great hobby fifteen years ago. Yes, they were my first efforts...and, no...they weren't spectacular, but they are sentimental to me, so they all hold a location on my B&M railroad that I constructed ten years ago.

I found in the September 1984 MR issue (page 70) an interesting kitbashing project proposed by Art Curren. Art recommended combining two simple AHM snap-together kits (later IHC) to create a highly effective model of a railroad freighthouse or storage shed. In that article he provided two examples; one combining the basic farmhouse and schoolhouse and the other combining the schoolhouse and barn.

Here we see the basic AHM barn in the foreground combined with the basic AHM schoolhouse in back to form one structure. I was impressed with Art Curran's ingenuity by utilizing the shared "inner walls" that would be useless material to make the interior wall partitions at the recessed loading ramp door. This structure resides along my abandoned section of Maine Central trackage.


This building was constructed using the basic AHM schoolhouse in the front with the basic AHM farmhouse (two story structure) in back. Art Curran's creative talents once again came to the fore here. He recommended creating the small annex you see in the foreground using the extra schoolhouse wall from the interior of the building.


This structure resides along Boundary Road on the outskirts of North Dover. With a little added details, the scene really comes to life.


Here is the picture from the DPM package.


...and here is the large industrial facility made from eight or ten of the Laube Linen Mills. With the addition of vines, downspouts and signage painted on the walls, some of the lines were eliminated. It is the overall effect I wanted at the time and the building has served its purpose doing yeoman's service during operating sessions over the course of the past ten years!


While not really craftsman structures, it is interesting to see how some creative kitbashing with plastic models can result in fascinating and realistic looking industries for your model railroad!

Saturday, February 7, 2009

Whistlestop Junction - Bar Mills


With modern packaging, it is truly amazing how a kit of a train station can come in such a tiny parcel. Bar Mills offers many of their individual kits this way.  This little depot is a great kit for modellers who choose to model any area in North America as it resembles your typical "Whistlestop" station. 

First task after opening the box is to lay all the contents out. The laser cut items go together so well that it is almost as easy as doing a jigsaw puzzle!

I chose to paint my station in the standard Boston and Maine colours...Depot Buff and Maroon. I applied the paint as a wash so as not to plug in any of the fine details with too thick of a paint.  Before painting, I braced the interior side of each wall section to help avoid warping.

With the walls all painted, it is a simple matter of lining everything up, making sure all is square and glueing the wall pieces togethers. My heavy weights come in handy with this job...although there are a number of different methods out there to brace and ensure the degree of squareness.

The roof section is added and the depot is installed around the platform. Starting to look like a station to me!

This side view demonstrates some of the dry brush weathering on the side of the station depot. Some figures and other details have been added.


This angle shot shows the almost finished product. I just have to place some posters and signs around and it should be done. Then, place it on the shelf and await the layout extension job!
To see a more detailed account of this build, visit http://www.railroad-line.com/forum/topic.asp?TOPIC_ID=19611
To see more offerings by Bar Mills, visit http://www.barmillsmodels.com/
Thanks, Mike Hamer - Ottawa, Ontario, Canada


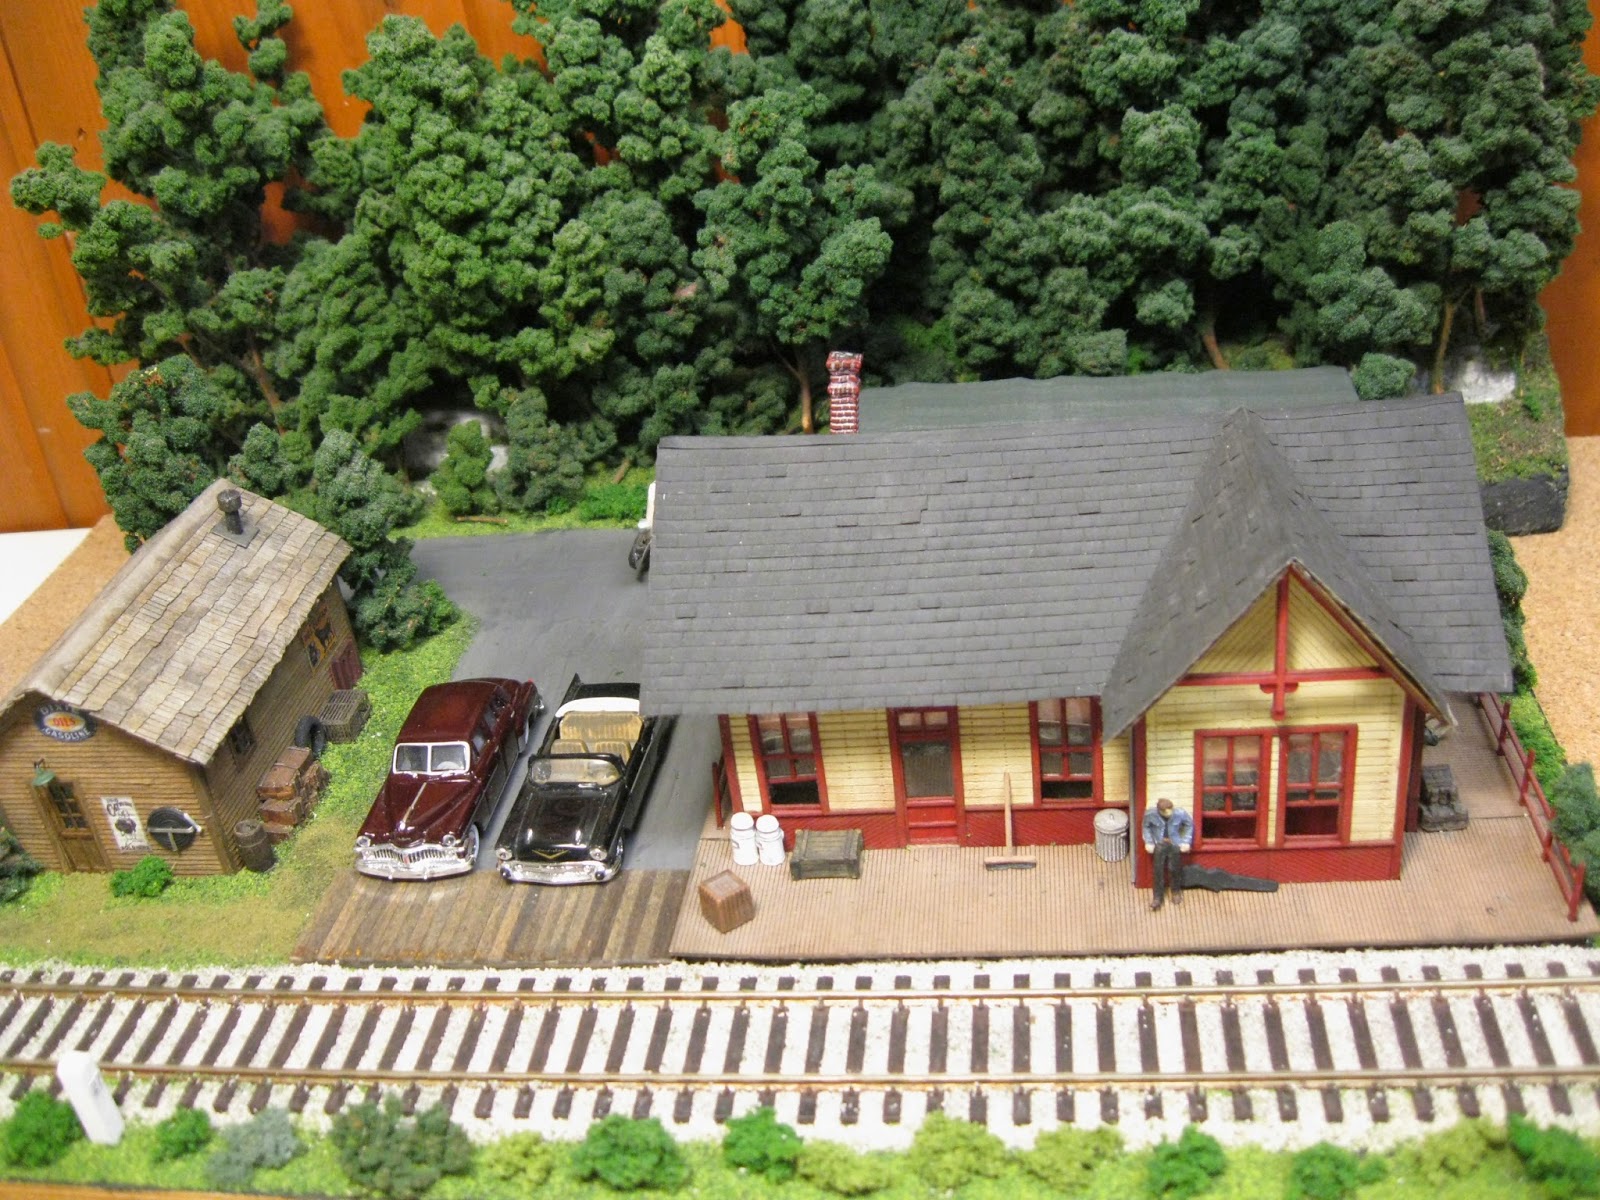
After awhile, I decided to place this handsome little depot on a mini-diorama.


I purchased a simple wooden picture frame from Michael's to use as a base.


The stand of trees in the background are not part of the diorama.  They are on their own stand and simply are used for a background for photography purposes.


I call the diorama "Beyond Milepost 27.


I call it this because many of my favourite musicians passed away at the tender age of 27.  It is my hope that the gentleman standing on the lplatform will board the train here at Milepost 27 and he'll travel beyond Milepost 28, 29 and so on to live a long and fulfilling life.


Jimi Hendrix, Janis Joplin, Robert Johnson, Brian Jones and Amy Winehouse are but a few members of Club 27, those famous musicians who never made it to their 28th birthday.


The additional structure on the diorama is a shack that came in a Full Steam Ahead kit offering called Black Cove Harbor.  In total, six shack kits were offered in that kit.


A few more views of the diorama.


An aerial one.

The Bar Mills depot is a really nice looking structure.


My guitar friend waiting for the train.


Thanks for checking in on my build!  Have a nice day!  Mike Hamer

Again, to view a more in-depth account of the build at the Railroad Line Forum, paste the link below into your address bar above 
http://www.railroad-line.com/forum/topic.asp?TOPIC_ID=19611

To view an exchange of views about the diorama itself, paste this link into your address bar.
http://www.railroad-line.com/discussion/topic.asp?TOPIC_ID=41263