Northway Tractor Repair
An HO Scale offering from Mt. Albert Scale Models
This is a wonderful looking kit with its cupola up top and the office off to the side.
I chose to build it on a diorama which you will see as you read through this blog entry.
Gerry at Mt. Albert Scale Models is well known for his O scale kits. He is in the process of bringing some of them out in HO scale.
To see the images in larger format, simply click on any picture.
To return to the default page, simply click outside the picture.
I really enjoyed the opportunity to build this great looking kit and place it on a diorama. I even decided to use Mt. Albert Scale Lumber to scratchbuild a small shed to add to the overall look of the scene! Building this kit brought me many hours of pleasure!
The Northway Tractor Repair is Gerry's first foray into HO production as far as models go.
Here are most of the main contents in the kit.
I test fit the wall sections.
Yup, the template drawings are superb.
The office structure has board and batten walls, so I must remove some of the batten material to accommodate the windows.
Aha! A great fit!
These are the stains and paint colours I will use for may wall washes.
As well as the Hunterline stain "Light Grey".
A small hole has been drilled into the office wall to allow the stovepipe to fit.
Great little clamps hold the back section of the false front wall together as the glue sets.
I painted all doors and windows a parchment colour.
The walls are a maroon stain and wash.
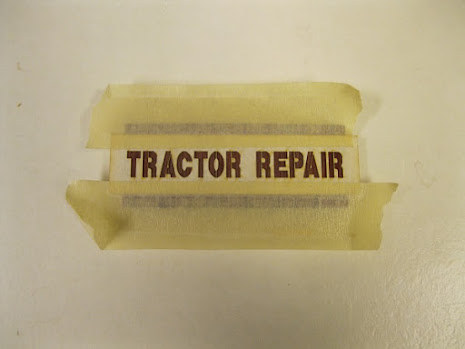
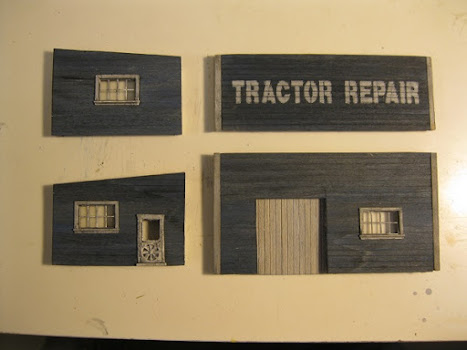
A stencil was used for the sign.
Taped onto the wall section.
Here's the result!
The Irwin Quick Grip allows wall sections to stay in place to allow the glue to set.
The four main wall sections.
Two pairs of adjacent walls are glued together first.
Then all four wall sections come together.
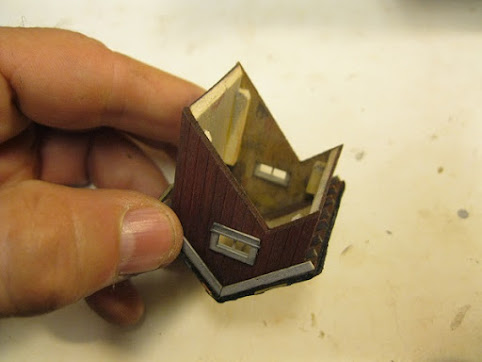
With the office walls in place.
I've chosen to recess the main doors.
You can see the overhanging annex section supports and the entranceway framing.
They were made overtop these templates.
The sign has three-dimensional depth.
Painting and staining the corrugated roofing.
Sanding the cupola walls to fit tight to the roof.
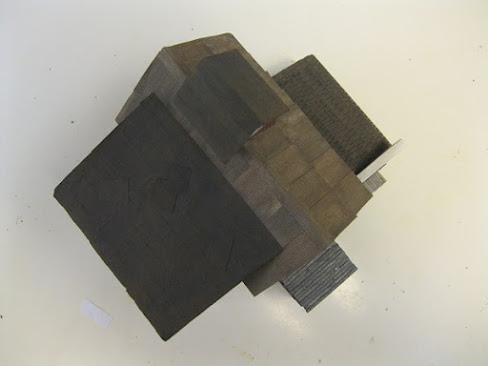
The main building is formed with the various roofing materials.
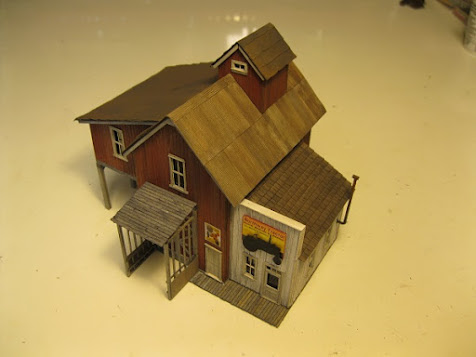
You've got to admit that this is one cool-looking building!
I used the front elevation drawings to determine my spacing for the overhang roof supports.
Then I drew them on the structure itself.
A little "test fit" first to see how things will look!
Et voila! The roof supports are in.
Don, who made the first kit for Gerry recommended staggering the placement of the boards.
This is a great idea as it adds greater visual interest.
The building is almost complete.
An aerial shot from directly above.
Some posters adorn the walls.
A rear view. The smokestack is required for the office wall.
The smokestack is in!
All that is left are detail parts for outside and around the building.
That means...creating a diorama!
So, I went out to the garage to see what spare lumber and masonite I had.
I've chosen to have my diorama fall off to a ravine toward the back of the facility.
This decision is based on photos a gentleman sent me from where the original building is located in Mt. Morris, NY.
This shot taken from Google Earth street view shows the original structure up the road.
This kit is loosely based on that structure. The land slopes down behind the building.
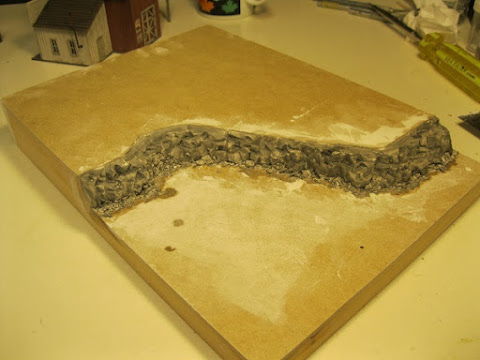
Adding the rockface with Plaster of Paris and washes of black acrylic paint.
As mentioned earlier, sections of the structure will hang out over the ravine.
I want to scratch build a small shed out back to help "balance" the scene.
Mt. Albert Scale Lumber will come in handy here!
I've cut out my walls and drawn out the door and window openings.
These little clamps come in handy for small jobs such as gluing the back of the false front on the wall.
I've given the walls a "wash" of acrylic denim blue colour.
Washes are great as you can always add more washes to get the desired results.
I've chosen to advertise the business on the back of this little shed using the same stencil that came with the kit.
I'm happy with the results.
I've scratch built the cribbing for below the shed taking into account the flow of the ravine's edge.
A quick look to see how the various elements will play out.
Low angle shot showing the cribbing beneath both structures.
I always paint my base black before adding the ground material. This way, any ground areas that get bumped or chafed will have a natural shadowed effect showing through.
The ground foam goes in.
A fun picture of the tractor repair shop and the cribbing which is attached below the white office section.
Note how I've added the railings to protect the walkway.
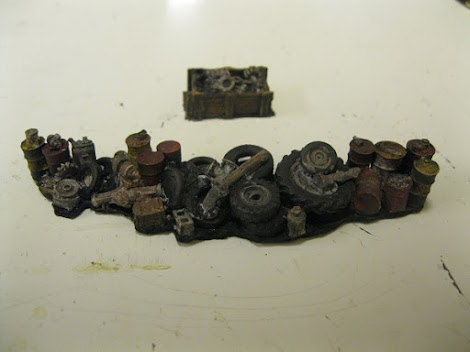
Detail parts have been painted and I've cut around the base.
I will bring scenic elements such as grass and small scrubby bushes to the edge to hide the elevated nature of the large detail section.
A dusting of grey powders over the asphalt area takes the solid black look away.
I did this using a soft make-up brush and some AIM powders.
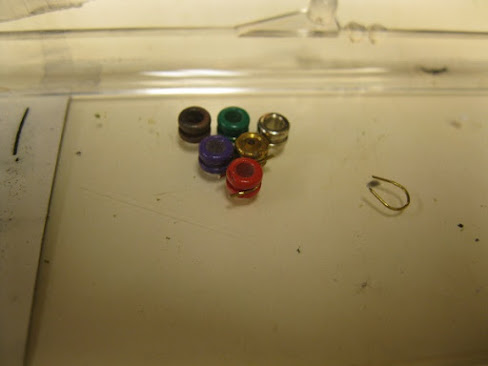
Aha! Those little nubs that come on the end of my guitar strings! They can be recycled as a small detail item.
I painted this one black and weathered it with rust powders.
You can make it out beneath the short board on the angle by the front entranceway to the right of the red pickup truck..
I've been hiding the edge of the large detail part...almost done...just a little bit more effort required to conceal the left section of the base.
I painted a black plastic railing - black. Yes, the paint acts as a "grab" for the weathering powders to take hold.
AIM Products Light Rust will be used here.
The finished railing.
Some twigs from my hedge on the edge of my property will act as small deadfalls in the scene.
I use this bigger pin vice to help drill holes for some of the trees I will plant.
You can see the rusted railing in this shot.
This is sedum, an autumn perennial plant. I've already added the green ground foam and will pull these sections apart to act as low growth shrubs.
Like the ones you see beneath the shed.
The Tichy Jib Crane is a little bit tricky to build. I painted and weathered it one evening.
Then I assembled it in an hour and a half the next day using ACC.
To help make my little people stand while the glue sets, I use a wide variety of zany methods like the one you see above.
The trees and shrubs are in the lower ravine area...even a pile of automotive junk.
The crane looks great in the scene. In real life the earth looks the more natural brown colour and not as yellow as you see in the image.
The diorama is done! Time to take a trip around it. Here is a front view.
A helicopter shot.
Angled view from the front. I like how there is the spartan parking lot with the heavily detailed ravine out back.
Low angle view of the right side of the diorama.
My helicopter pilot flies me around to that side.
Rear angle view where you can see many of the natural elements in the ravine.
Aerial view once again.
View from the backside. I'm really glad I advertised on the back of the scratch built shed although only the squirrels and the resident rodents will be able to see this side! (Big grin).
Overhead view from the back side perspective.
The other corner view from the rear showcases the overhanging section on the tractor repair shop.
From above.
The left side view showcasing a lot of the details that would go along with a tractor repair facility including the B.E.S.T. gasoline pump.
Low angle elevated shot of the left side.
Aerial shot of the let side.
In a more yellow lighting, we see out front.
The red pickup track adds a splash of colour.
Slightly elevated shot from this perspective.
Full overhead shot.
It has been great fun building the Northway Tractor Repair facility from Mt. Albert Scale Models. This amazing looking facility will look great on any layout.
To see a more in-depth step-by-step thread on this build visit the Railroad Line Forum at the link below.
Scroll across the link address and right click to get there.
http://www.railroad-line.com/forum/topic.asp?TOPIC_ID=45520
Have a great day in model railroading!
Mike Hamer, Ottawa, Ontario, Canada
Scroll across the link address and right click to get there.
http://www.railroad-line.com/forum/topic.asp?TOPIC_ID=45520
Have a great day in model railroading!
Mike Hamer, Ottawa, Ontario, Canada


