
Hello everyone. This post will take you through the process I used to create my "Berrigan's Boat Works" diorama. I hope to create a shelf layout after I retire from teaching so I decided to create the diorama to see if I can fit the type of modelling I like within the constraints of 16 inches of depth for the shelf. This includes track work and scenery.

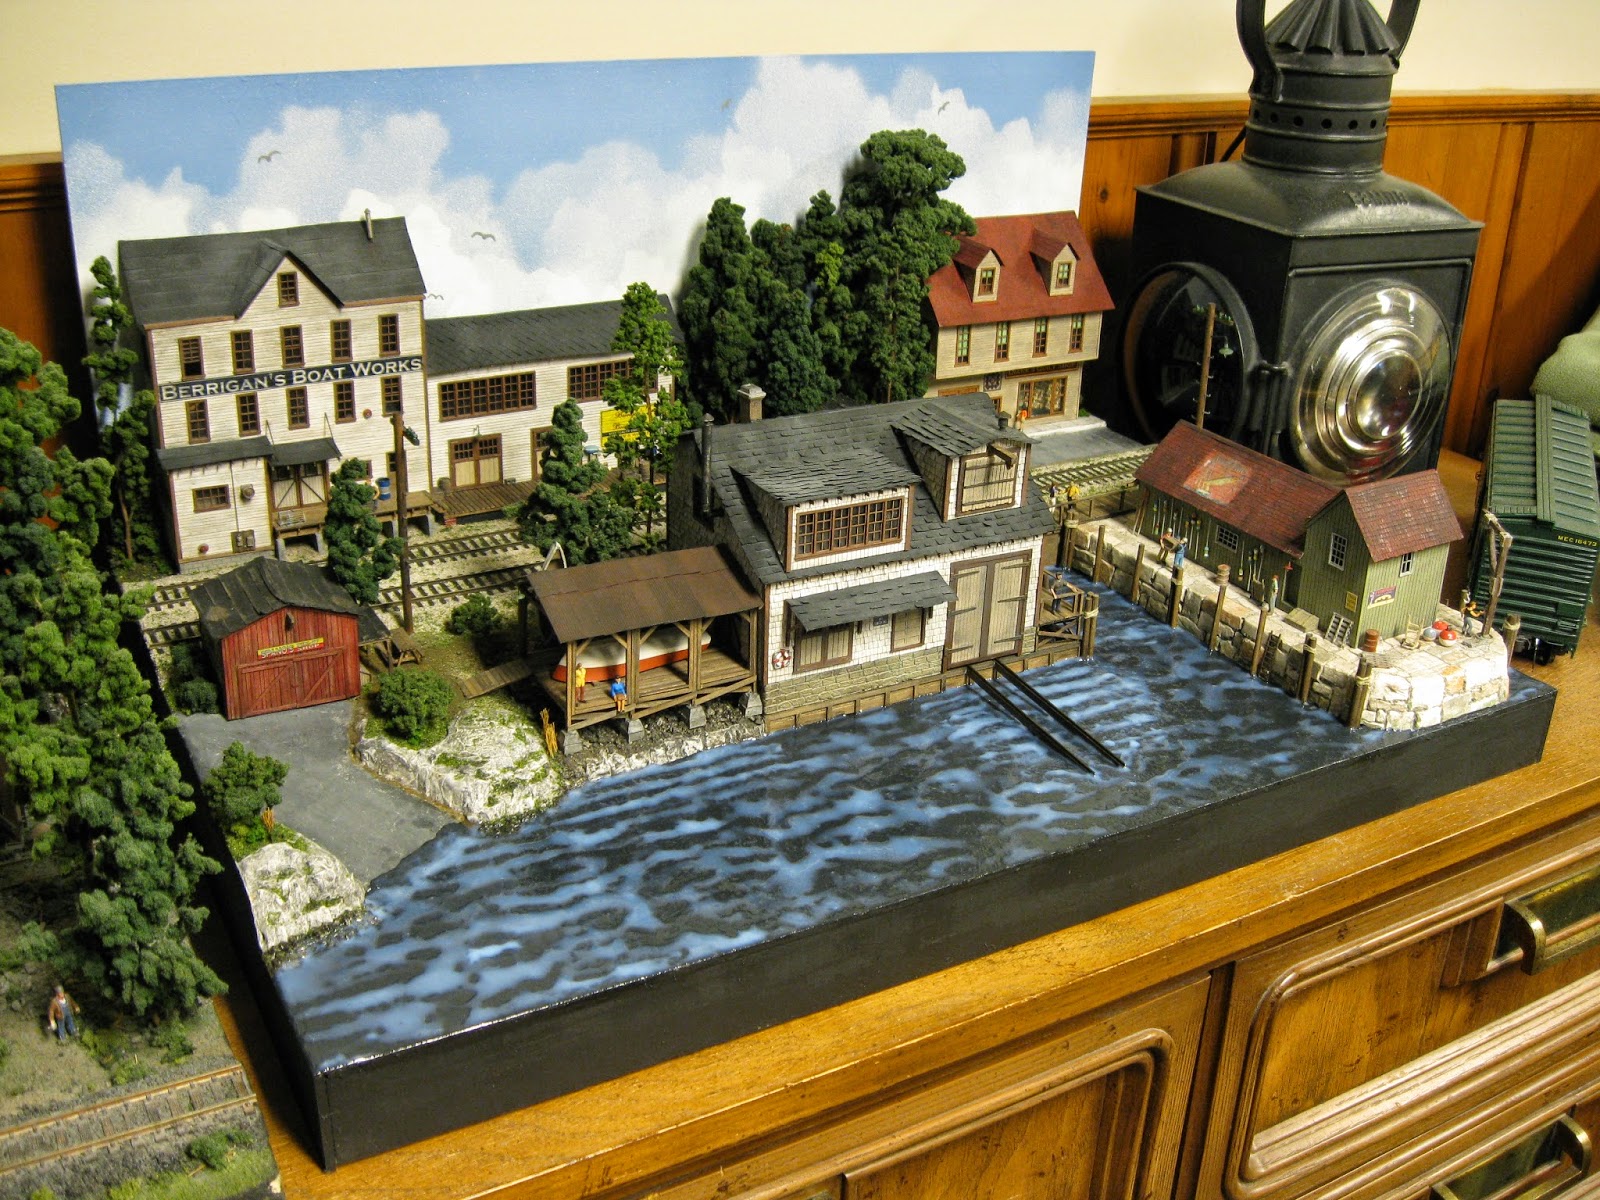
Here are a few pics of the completed diorama which showcases a waterfront New England scene.

I will take you through the stages of the diorama build in regard to scenery.

I have already detailed the construction of many of the buildings in other posts located on the blog.

Structures I have chosen to make up the scene include the background structure from Foscale which was originally the Winger Paper Bag Co. I turned it into my Berrigan's Boat Works and added a section to the right in order to lengthen the loading area making it suitable for a railroad spur.

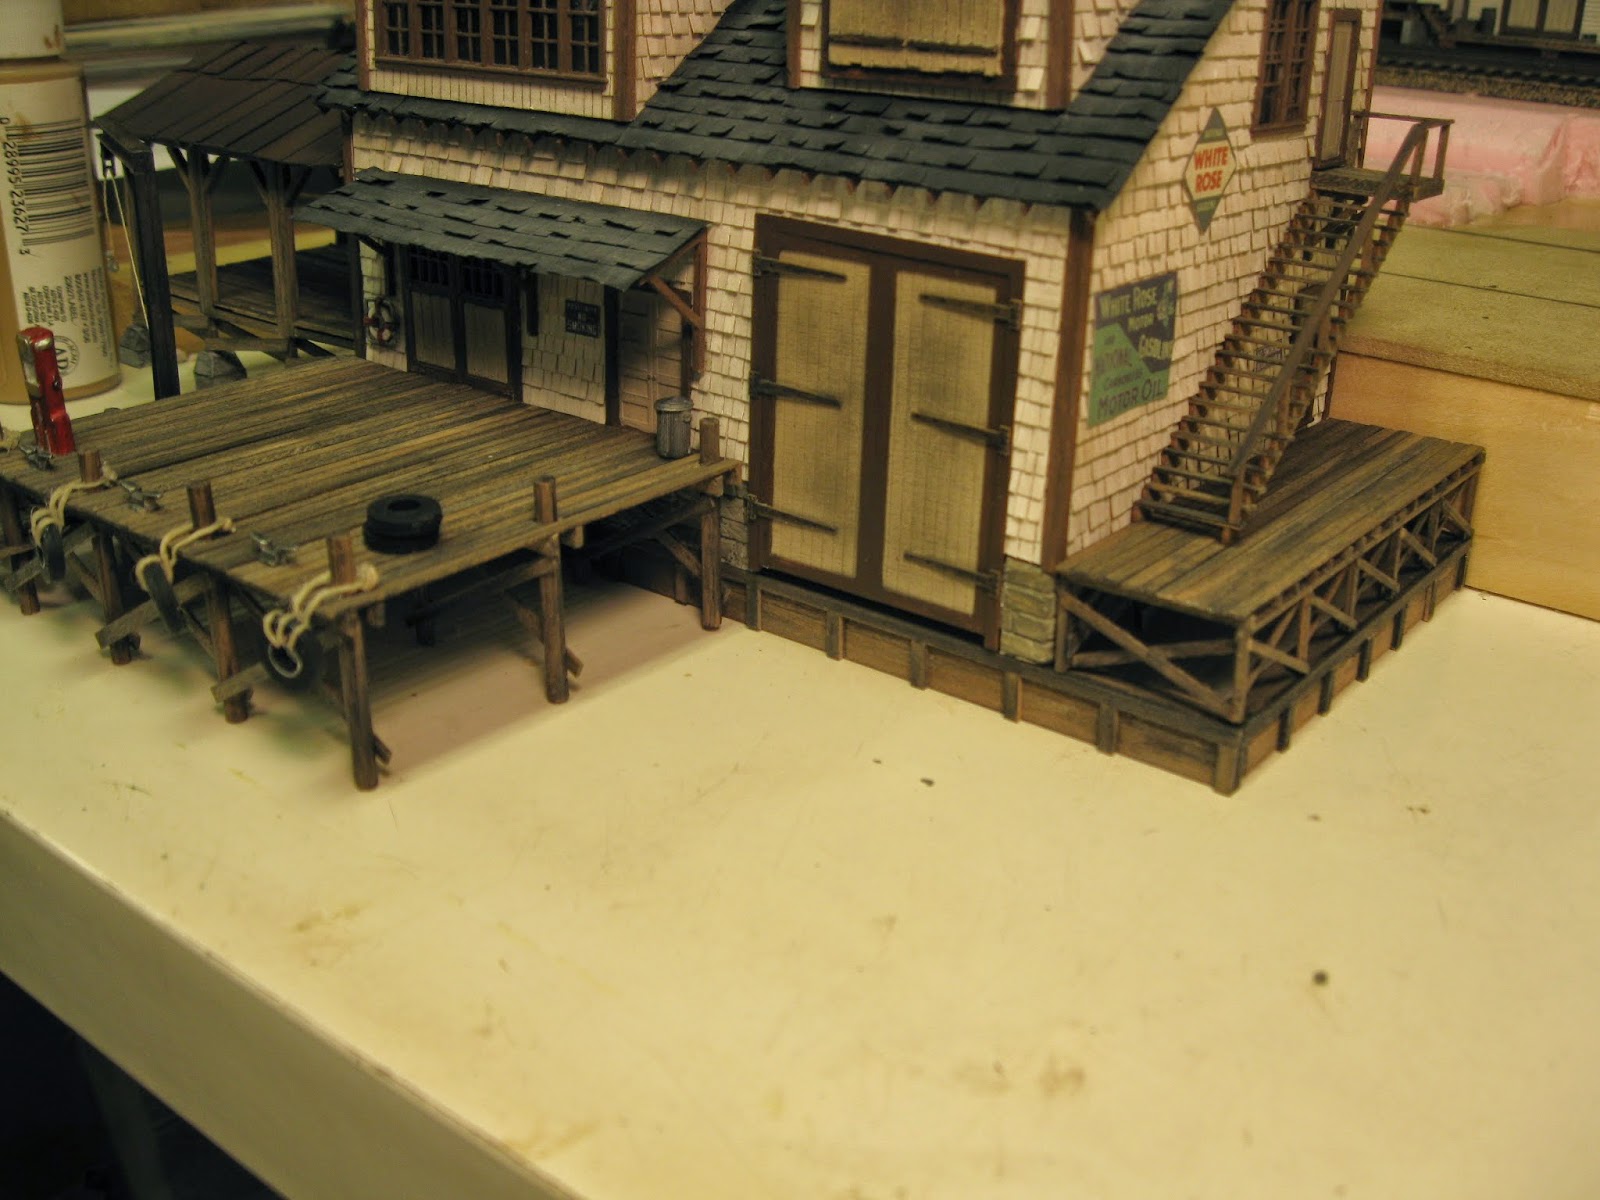
The foreground structure is a Full Steam Ahead R.G. Shinnie Boat Works.

A second look at this structure with its requisite dock work.

I think I will arrange the two structures in this juxtaposition.

This lovely Bar Mills building was given to me by a friend down in the United States and will find a wonderful home on the diorama. This is a spectacular model on its own. Thanks, Bill, for the very special gift!

Here is how the structure came to me from my friend.

Bar Mills puts out a kit called the "Shack Pack" which offers three little shacks to build.
I will include two of them on my diorama.

The shacks certainly have quite a lot of character.

Another building I want on the diorama is this scratchbuilt quilt shop I made to honour the fine quilt making of my friend's wife, Diane. It looks handsome up against the wooden wall.

This Sea Port Model Works sardine hauler should find a place to dock on the diorama.

So may this tugboat I built.

The base.

I will build the diorama atop this section.

I'll include a backdrop.

Just playing with the elements. You can see that at this point I have not built the sardine hauler and a nice looking lobster boat helps fill the maritime scene nicely.

I've simply rested structures up on ledges for the time being.

Let's see how things appear with a bit of track work in.

Yup, it's going to be nice scene, I believe.

A tight shot from water level.

Time to trace in the landforms.

And build a support for the foreground structure.

My trusty squares are a Godsend.

Yes, I like the wooden look all around.
With the dock work.

Styrofoam will be used to create the land forms.

A look from the front.

A three-quarters angle look.

Cork roadbed in...check!

Paint the styrofoam and the water area and place a few freight cars around.

Looking good!

These are the colours I mixed to get the desired effect of the water colour I want.

Front view.

A closer shot with a nice blue and black B&M car for added colour.

I'm liking the angles.

A scratch built fence will be needed for a property divider.

Time to remove all objects to paint and weight down the scenic elements.
My shelf behind the workbench is able to hold all of the parts.

The weights were used to hold the land forms in place while the glue set.

How about painting a small piece of masonite blue and use it as a test backdrop colour?

I like the look.

The B&M Bluebird GP9 compliments the backdrop sky.

A nice close-up view.

Here are the colours I mixed to achieve the sky blue I wanted.

Oh, artwork is so much fun!

Part of the backdrop will not require painting as buildings and a small forest will hide it.
I created this quick mock-up of the area and traced around it before painting.

I glued some ground foam in an area where you will look through the trees.

The background is looking really good.

A view from above.

A slightly different angle.

A view from the other corner.

Time to mix some plaster for the rock work and run a wash of black paint over top to give that natural rock complexion.

I've cut away the area where the road will go as well as the sidewalk.
Note how I carved the shape of the diorama wall out of masonite to match the contours of the scenery.

Ground foam added to form the green backdrop area so that when you look through the little forest you will see the textured green.

A view down the tracks with green ground foam in.
I will sprinkle dirt and sand coloured foam to take away the too-green look.

Time to build some more of the retaining wall area.

And scratch build the boardwalk, street and sidewalk.

Note the barricaded windows on the back of the foreground structure.
They were used when I scratch built the extension to the background structure to help make the entire complex look like one.

I've started the pedestrian crosswalks over the tracks..not finished as yet.
I'm also adding ballast to mate the boardwalk to the track area.

Some ground up leaves help form the forest floor.

The pedestrian walks are in.

The B&M 44-tonner looks right at home on this piece of track!

Most of this scenery has been built from scratch.

Looking good so far!

Time to spray paint some clouds on the backdrop.
I'll simply hold this template an inch or so away from the backdrop and spray away to create clouds.

Look, it's a cloudy day!

Light gray is used to hand paint a few seagulls in the air.

Look very much like a maritime scene to me.

Head on shot.

From the left corner.

From the right corner.

Time to make water out of Liquitex Medium Gel.

In only a few minutes the entire water area is covered.

You simply brush it on to your heart's content.

All covered.
When the liquid gel hardens the colour will clear.

Looking great! I'm liking the wave action.

A look from the front.

Overnight the water has set.

Here's the finished scene.

The lobster boat is a nice touch for now.

As are all the scratch built wharves and docks.

Diane's Quilt shop looks like a busy little business.

An overall shot.

This photo was taken from the back of the diorama looking down on the scene.

Yes, it is so much fun creating models and scenery!

Thanks for checking in on my techniques used to create the Berrigan's Boat Works diorama!
To see a more complete version of this build at the Railroad Line Forums, check out the site below.
http://www.railroad-line.com/forum/topic.asp?TOPIC_ID=30198
To see a more complete version of this build at the Railroad Line Forums, check out the site below.
http://www.railroad-line.com/forum/topic.asp?TOPIC_ID=30198
Have a great one! Mike Hamer
Looks Amazing!
ReplyDeleteFlush door Manufacturer in India, Block Board Manufacturer in India
Great to see someone enjoying the hobby of scratch-building.
ReplyDeleteSome real nice models on display.
Greetings from the evergreen gardens of Fiddle Wood,Norwich, United Kingdom. BB
Thanks to you both! Paul, I truly enjoy building models from scratch...as I imagine you do as well! All the best, Mike Hamer,
ReplyDeleteOttawa, Canada